


– 15 –
ENGLISH
3
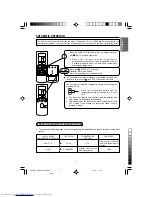
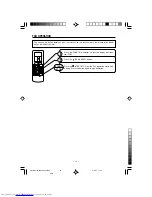
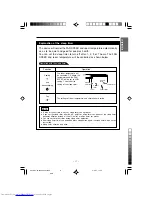
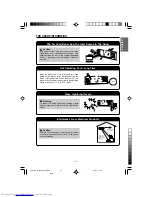
Point the signal window of the remote controller toward the indoor unit, and
press the
(RESERVE) button.
The (OFF) mark starts lighting instead of flashing and the sign (RESERVED)
lights. A beep occurs and the (TIMER) lamp lights on the indoor unit.
●
The time indication will disappear
automatically in 1 second.
●
To check the current time setting,
press the (TIME) button twice.
The setting of the current time is
now complete.
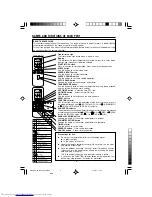
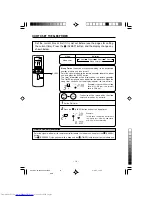
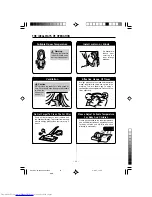
●
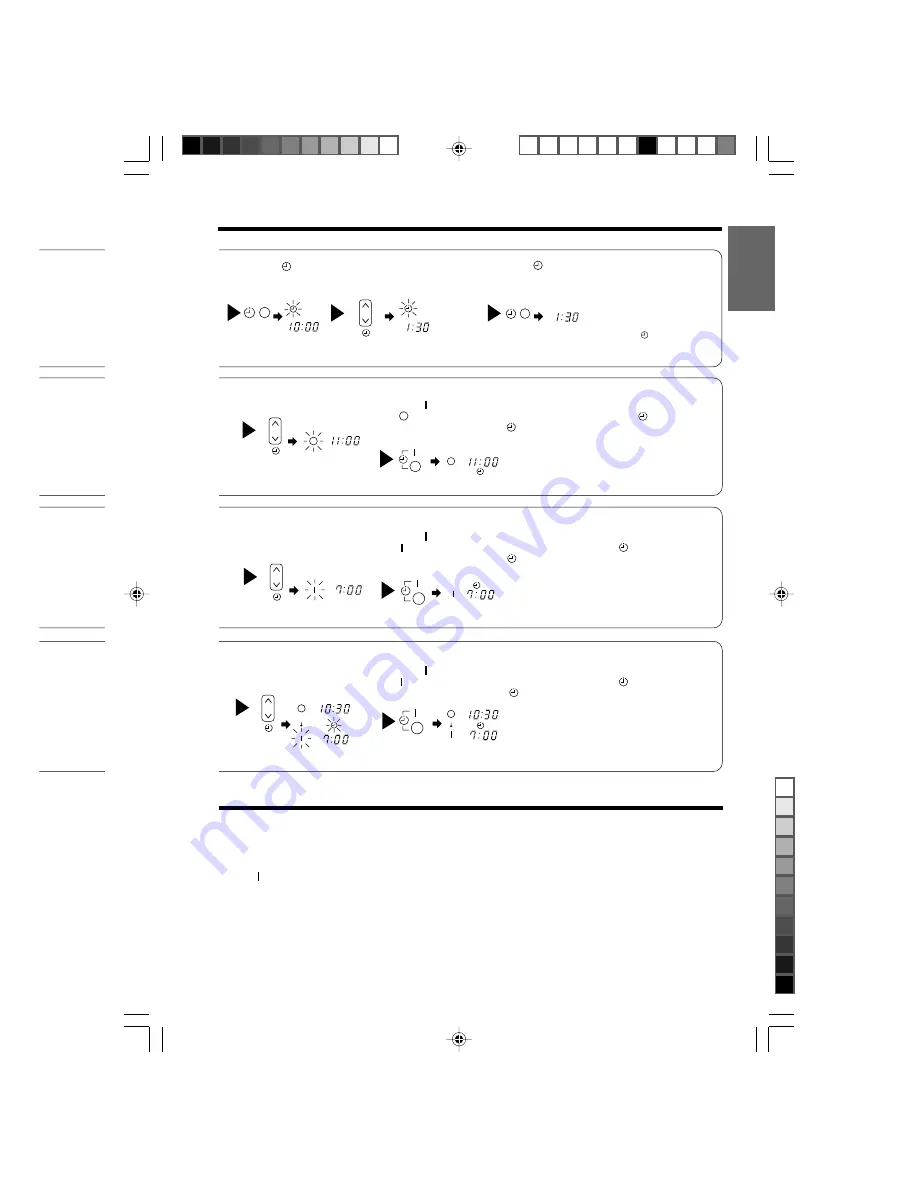
The timer may be used in three ways: off-timer, on-timer, and ON/OFF (OFF/ON)-timer. Set
the current time at first because it serves as a reference.
●
As the time settings are stored in memory in the remote controller, you only have to press
the (RESERVE) button in order to use the same settings next time.
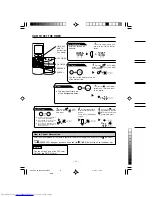
2
Set the
(TIME) button.
3
Set the current time with the
TIMER control button.
Example: The current time is 1:30 p.m.
2
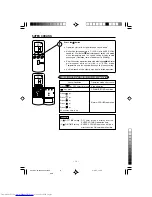
Set the turn-off time with the
TIMER control button.
The setting of turn-off time is now complete.
Example: The device will turn off at 11:00p.m.
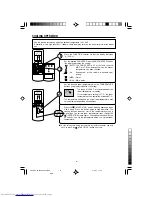
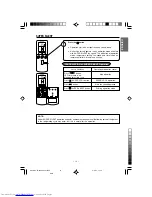
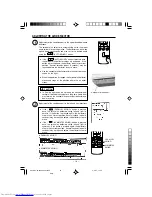
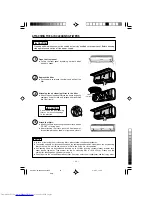
Example:
The device will turn on, early so that the preset temperature
be almost reached at 7:00 a.m.
The setting of the turn-on time is now complete.
4
Set the turn-on time with the
TIMER control button.
5
Point the signal window of the remote controller toward the indoor unit, and
press the
(RESERVE) button.
The
(ON) mark starts lighting instead of flashing and the (RESERVED) sign
lights. A beep occurs and the (TIMER) lamp lights on the indoor unit.
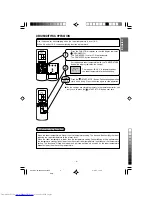
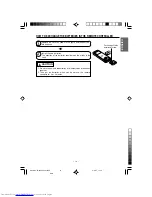
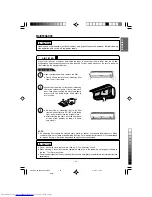
3
Point the signal window of the remote controller toward the indoor unit, and
press the
(RESERVE) button.
The
(ON) mark starts lighting instead of flashing and the (RESERVED) sign
lights. A beep occurs and the (TIMER) lamp lights on the indoor unit.
2
Set the turn-on time with the
TIMER control button.
Example:
For heating, the device will turn off at 10:30p.m., and then
turn on early so that the preset temperature be almost reached
at 7.00a.m.; for cooling and dehumidifying, it will simply turned
on at 7.00a.m. The settings of the turn on/off times are now
complete.
4
Press the (TIME) button again.
The time indication starts lighting
instead of flashing.
PM
PM
AM
PM
PM
PM
AM
AM
AM
AM
PM
PM
EN3 RAS-18/24CX9KS2/24CX9
4/11/07, 17:44
15
Black
Summary of Contents for RAC-18CX9
Page 28: ... 28 MEMO EN3 RAS 18 24CX9KS2 24CX9 4 11 07 17 44 28 Black ...
Page 33: ... 33 20 0 FILTERE STANBY MODE RAS RAC 18 24CX9KS2 30 33 12 2 07 3 32 PM 33 ...
Page 38: ... 38 RESET 0 123456 7689 012 2 1 0 12 RAS RAC 18 24CX9KS2 34 41 12 2 07 3 35 PM 38 ...
Page 39: ... 39 RESET C C 01 012 0 1 2 3 0 RAS RAC 18 24CX9KS2 34 41 12 2 07 3 35 PM 39 ...
Page 40: ... 40 C RESET C 20 20 1 2 1 20 RAS RAC 18 24CX9KS2 34 41 12 2 07 3 35 PM 40 ...
Page 41: ... 41 01 2345 67 89 67 1 01 RAS RAC 18 24CX9KS2 34 41 12 2 07 3 36 PM 41 ...
Page 46: ... 46 2 E 6 F 15 60 RESET 1 S S RAS RAC 18 24CX9KS2 45 47 12 2 07 3 30 PM 46 ...
Page 47: ... 47 1 2 01 1 2 0 RAS RAC 18 24CX9KS2 45 47 12 2 07 3 30 PM 47 ...
Page 48: ... 48 2 RAS RAC 18 24CX9KS2 48 58 12 2 07 3 23 PM 48 ...
Page 49: ... 49 8W OFF N RAS RAC 18 24CX9KS2 48 58 12 2 07 3 23 PM 49 ...
Page 52: ... 52 2 0123 40 012 RAS RAC 18 24CX9KS2 48 58 12 2 07 3 24 PM 52 ...
Page 56: ... 56 MEMO RAS RAC 18 24CX9KS2 48 58 12 2 07 3 25 PM 56 ...
Page 57: ... 57 MEMO RAS RAC 18 24CX9KS2 48 58 12 2 07 3 25 PM 57 ...
Page 58: ... 58 MEMO RAS RAC 18 24CX9KS2 48 58 12 2 07 3 25 PM 58 ...


