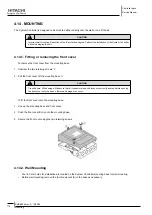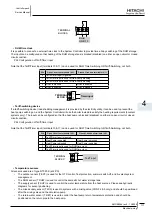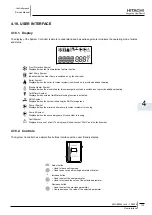
Controller pack
Service Manual
124
Installation configuration settings
SMGB0066 rev.0 - 12/2009
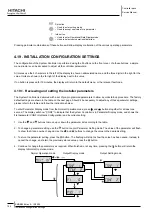
Set button
• Used to enter setting mode
• Used to accept new value for a parameter.
Info button
• Used to enter Operational Data Display mode.
• Used to select next operational data item
Pressing particular combinations of these buttons will allow display or alteration of the various operating parameters.
4.19. InSTAllATIon ConfIGUrATIon SETTInGS
The configuration of the System Controller is performed using the 5 buttons on the front cover. Via these buttons, a simple
menu structure can be accessed to adjust all the controller parameters.
All menus use the 4 characters in the left of the display to show an abbreviated name, and the three digits in the right for the
value. Units are shown in the far right of the display next to the value.
If no button is pressed for 10 minutes, the display will return to the default menu, or the relevant fault code.
4.19.1. reviewing and setting the installer parameters
The System Controller is delivered with a set of pre-programmed parameters to allow a quick start-up procedure. The factory
default settings are shown in the table on the next page. Should it be necessary to adjust any of these parameter settings,
please refer to the table and follow the instructions below.
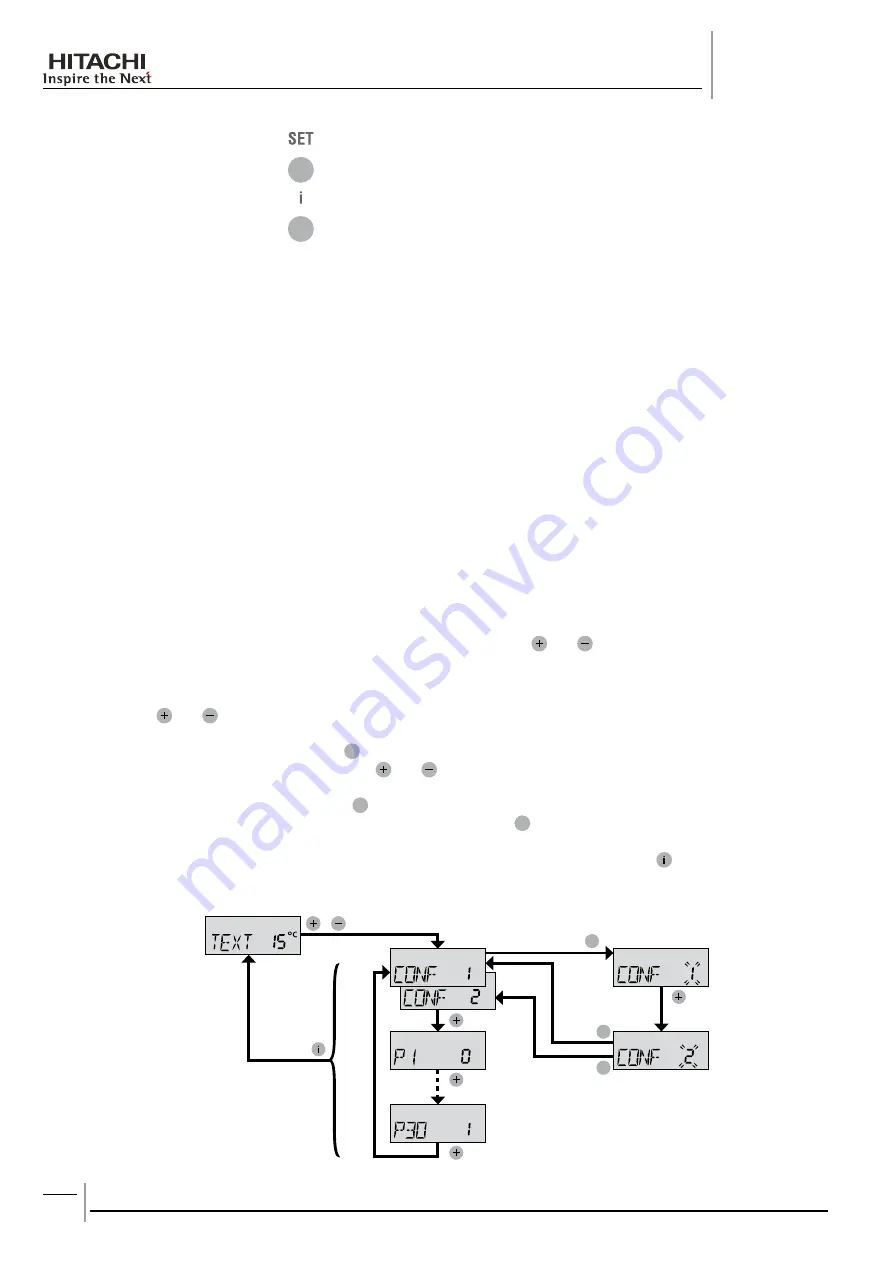
To enter Parameter Display mode from the Normal Operation mode, press
and buttons together for at least one
second. The display will show “CONF” to indicate that the System Controller is in Parameter Display mode, and shows the
first parameter CONF (Hydraulic Configuration) and its current setting.
Use the
1.
and buttons to move up or down the parameter list according to the table.
To change a parameter setting, use the
2.
SET
button to enter Parameter Setting mode. The value of the parameter will flash
to show that it can now be changed. Use the and buttons to change the value to the desired setting.
To store the parameter setting, press the
3.
SET
button. The flashing will stop to show the value has been saved. Instead, to
cancel the change, and retain the previously stored value, press the
SEL
button.
Continue to change the parameters as required. When finished, or at any time, pressing the
4.
button will return the
display to Normal Operation mode.
Normal Operation mode
Output Display mode
Output Setting mode
& > 1 sec.
SET
SET
SEL

