1 BEFORE USE
- 5 -
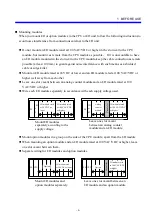
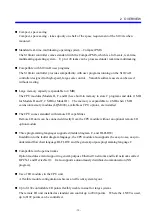
Mounting modules
When you mount I/O or option modules in the CPU or I/O unit, follow the following instructions to
avoid noise interference from connections external to the I/O unit:
Do not mount an I/O module rated at 100 VAC/VDC or higher in the slot next to the CPU
module, but mount it as remote from the CPU module as possible. If it is unavoidable to have
an I/O module mounted in the slot next to the CPU module, keep the cable connection as remote
possible (at least 100 mm) to guard against noise interference with such means as a shielded
cable or surge killer.
Mount an I/O module rated at 24 VDC or lower and an I/O module rated at 100 VAC/VDC or
higher well away from each other.
Leave one slot vacant between an analog counter module and an I/O module rated at 100
VAC/VDC or higher.
Wire each I/O module separately in accordance with each supply voltage used.
Mount option modules in a group on the side of the CPU module, apart from the I/O module.
When mounting an option module and an I/O module rated at 100 VAC/VDC or higher, leave
one slot vacant between them.
Separate wiring for I/O modules and option modules.
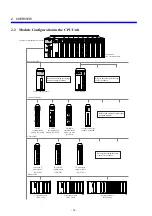
CPU
or
ST
I/O module rated
at 100 VAC/VDC
or higher
I/O module rated
at 100 VAC/VDC
or higher
Analog
counter
module
I/O module rated
at 24 VDC or
lower
Leave one slot vacant
between an analog counter
module and an I/O module.
Mount I/O modules
separately according to the
supply voltage.
PS
CPU
or
ST
PS
V
acant slot
CPU
PS
Option
Option
Leave one slot vacant between an
I/O module and an option module.
Mount I/O modules and
option modules separately.
I/O module rated
at 24 VDC or lower
CPU
PS
I/O module rated
at 100 VAC/VDC
or higher
V
acant slot
Summary of Contents for S10mini D
Page 1: ......
Page 14: ...THIS PAGE INTENTIONALLY LEFT BLANK ...
Page 19: ...1 BEFORE USE ...
Page 28: ...THIS PAGE INTENTIONALLY LEFT BLANK ...
Page 29: ...2 OVERVIEW ...
Page 34: ...THIS PAGE INTENTIONALLY LEFT BLANK ...
Page 35: ...3 NAMES AND FUNCTIONS OF PARTS ...
Page 45: ...4 INSTALLATION ...
Page 54: ...THIS PAGE INTENTIONALLY LEFT BLANK ...
Page 55: ...5 WIRING ...
Page 68: ...THIS PAGE INTENTIONALLY LEFT BLANK ...
Page 69: ...6 SETTING ...
Page 84: ...THIS PAGE INTENTIONALLY LEFT BLANK ...
Page 85: ...7 OPERATION PROCEDURES ...
Page 91: ...8 EXPLANATION OF OPERATION ...
Page 111: ...9 MAINTENANCE ...
Page 128: ...THIS PAGE INTENTIONALLY LEFT BLANK ...
Page 129: ...10 SPECIFICATIONS ...

