14. Adding and Replacing Modules
14-17
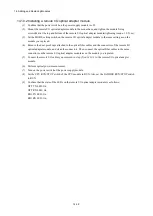
14.6.2 Installing a D.NET module
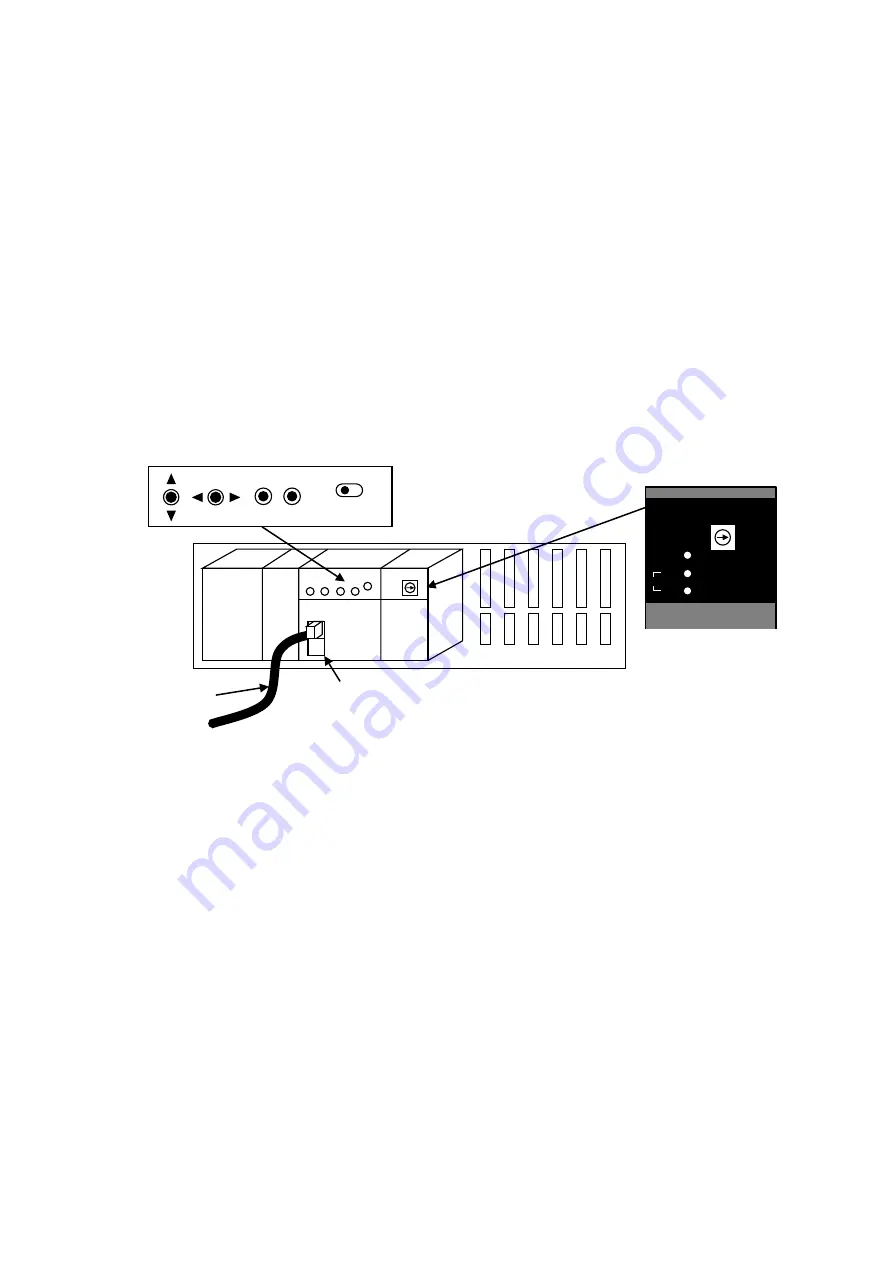
(1) Confirm that the power switch on the power supply module is off.
(2) Mount the D.NET module to the mount base, and tighten the module fixing screws(M4) at the top and
bottom of the D.NET module(tightening torque: 1.0 N
·
m).
(3) Set the MODU No. setting switch on the D.NET module to the same setting as on the module you
replaced.
(4) Reconnect the cables you disconnected in step (8) in
14.6.1
to the same connectors.
(5) Turn on the power switch of the power supply module.
(6) Set the CPU RUN/STOP switch of the CPU module to RUN. Also set the LADDER RUN/STOP switch
to RUN.
(7) Confirm that the state of the LEDs on the D.NET module is as follows:
MS LED: Lit green
NS LED: Lit green
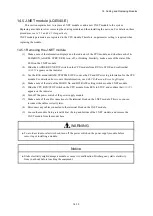
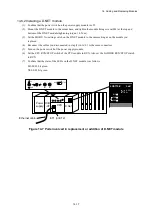
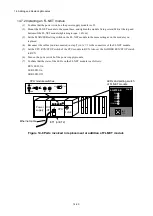
Figure 14-7 Parts involved in replacement or addition of D.NET module
ET1 (or ET2)
Ethernet cable
MODU
No.
LQE770-E
D.NET
MS
CH0
CH1
NS
UP
DWN
L
R
SET
ESC
RUN
STOP
LADDER
D.NET
Power
supply
CPU
RI/O
-I/F
Summary of Contents for S10VE
Page 1: ...User s Manual General Description SEE 1 001 A ...
Page 2: ...User s Manual General Description ...
Page 53: ...This page is intentionally left blank ...
Page 59: ...This page is intentionally left blank ...
Page 67: ...This page is intentionally left blank ...
Page 75: ...This page is intentionally left blank ...
Page 77: ...This page is intentionally left blank ...
Page 103: ...This page is intentionally left blank ...
Page 129: ...This page is intentionally left blank ...
Page 295: ...This page is intentionally left blank ...
Page 309: ...This page is intentionally left blank ...
Page 341: ...This page is intentionally left blank ...
Page 345: ...This page is intentionally left blank ...
Page 475: ...This page is intentionally left blank ...
Page 489: ...This page is intentionally left blank ...
Page 505: ......


