


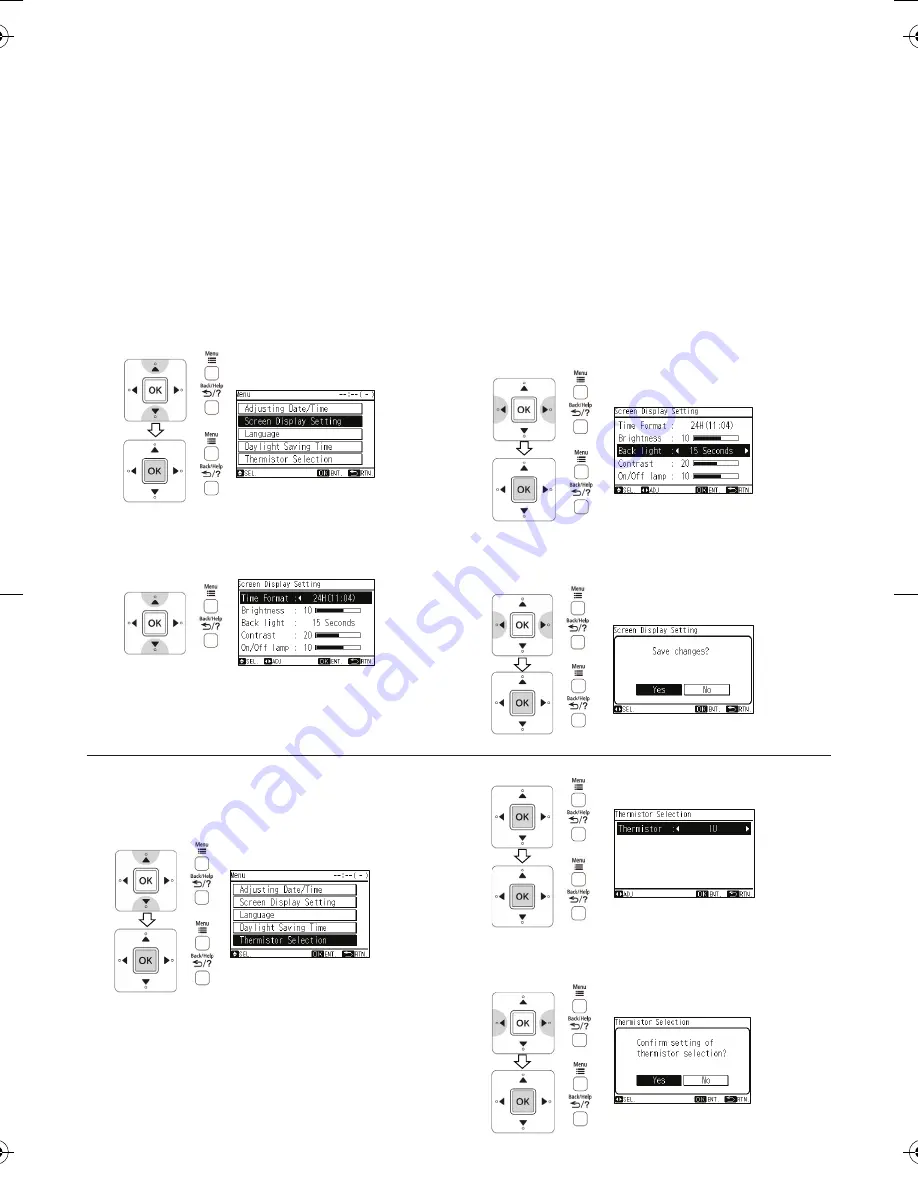
3 Select "Yes" by pressing "
△
"or "
▽
" and press "OK". The setting
will be confirmed and the screen will return to the normal mode.
2 By repeatedly pressing "
" or "
", the indication is changed in
order of IU <---> Remote control <---> Average.
Select the controlling thermistor and press "OK".
The confirmation screen will be displayed.
1 Select "Thermistor Selection" from the menu and press "OK".
This function is used to select the controlling thermistor.
7. THERMISTOR SELECTION
4 Select "Yes" by pressing "
" or "
" and press "OK". The setting
will be confirmed and the screen will return to the normal mode.
•
Brightness :
Press "
" or "
" and the brightness of backlight is changed.
•
Back light :
The display backlight is OFF after the specified time interval of
inactivity (no input from touch screen).
The backlight off time interval can be selected as follows;
5 Seconds <--> 15 Seconds <--> 30 Seconds
•
Contrast :
Press "
" or "
" and the degree of difference between light
and dark parts of LCD is changed.
•
On/Off lamp :
Press "
" or "
" and the brightness of operation indicator
lamp is changed.
After the setting is completed, press "OK".
The confirmation screen will be displayed.
•
Time Format :
The time form is changed as follows;
12 Hour <---> 24 Hour.
3 Press "
" or "
" and set the display.
2 Select the setting item by pressing "
" or "
". The indication is
changed in order of "Time Format", "Brightness", "Back light",
"Contrast" and "On/Off lamp".
1 Select "Screen Display Setting" from the menu and press "OK".
This function is used to change the display adjustment.
◆
Function
•
Time Format :
To change the time form to 12 hour 24 hour.
•
Brightness :
To adjust the brightness of backlight.
•
Back light :
To change the time (5, 15 or 30 seconds) between ON and OFF
of backlight.
•
Contrast :
To adjust the degree of difference between light and dark parts
of LCD.
•
On/Off lamp (Operation indicator lamp Brightness) :
To adjust the brightness of operation indicator.
6. SCREEN DISPLAY SETTING
- 6 -
Summary of Contents for SPX-WKT2
Page 8: ......


