background image


1-3


StarBoard 

T-19WX


Introduction

English 

1.3 Part Names and Functions 

1.3.1 Front Screen 


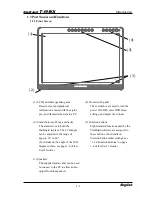
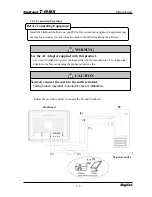
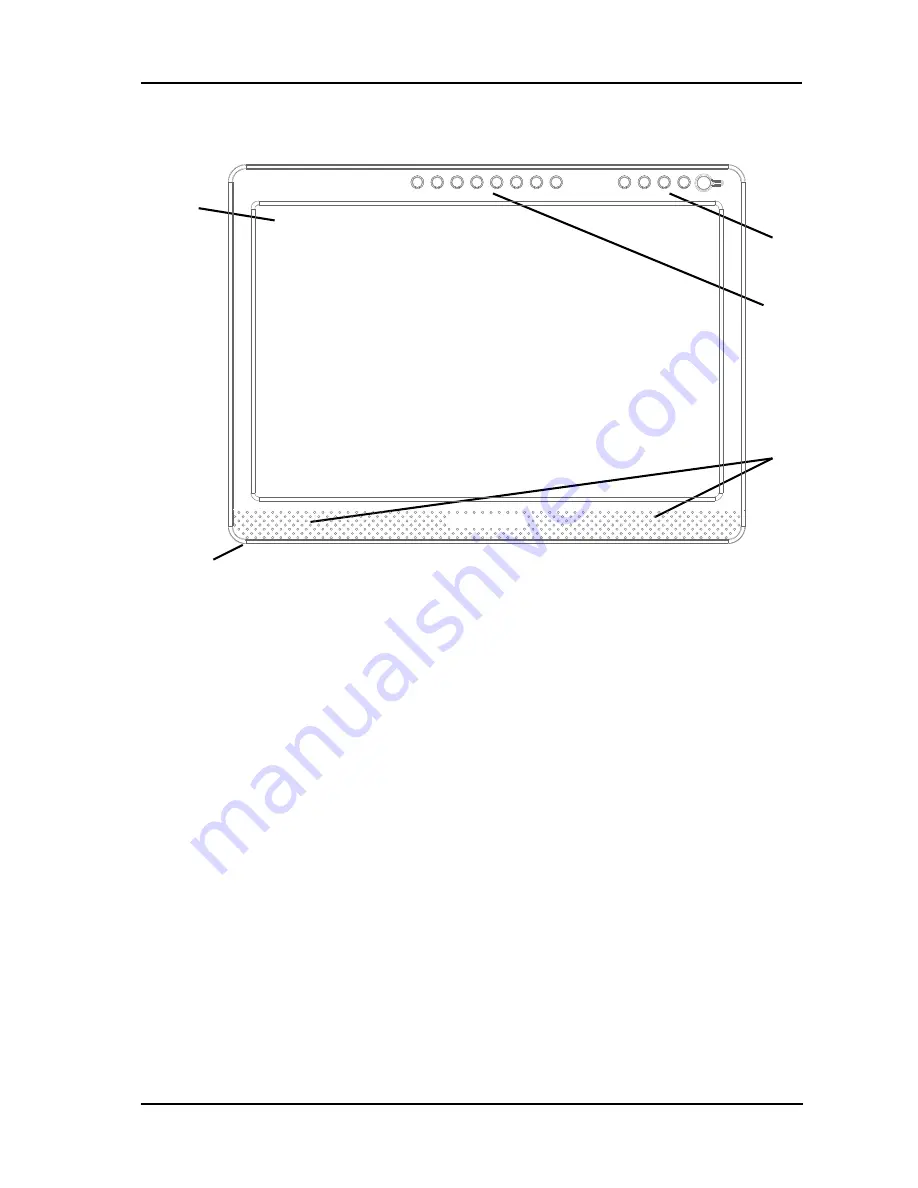
(1) LCD and tablet operating area 

Receives text and graphical 
information entered with the stylus 
pen, and transmits the data to a PC. 

 
(2) Stand (bottom of body and back) 

The stand serves to hold the 
StarBoard in place. The LCD angle 
can be adjusted in the range of 
approx. 14° to 66°. 
(For details on the angle of the LCD 
display surface, see page 1-8 of this 
User's Guide.) 

 
(3) Speakers 

The supplied audio cable can be used 
to connect to the PC to allow audio 
output from the speakers. 


(4) Front switch panel 

These switches are used to turn the 
power ON/OFF, enter OSD menu 
settings, and adjust the volume. 

 
(5) Function buttons 
        Eight standard functions used by the 

StarBoard software are assigned to 
these buttons. (For details on 
function button initial settings, see 
“1.3.4 Function Buttons” on page 
1-6 of this User’s Guide.) 


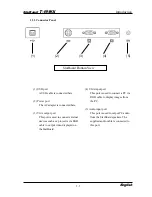
(1)

(3)

(4)


(5)


(2)


Summary of Contents for StarBoard T-19WX

Page 1: ...L110801 Hitachi Solutions Ltd Italiano Read this user s guide and carefully retain it for future reference Before using this product carefully read and fully understand the safety instructions Store this User s Guide nearby for ease of reference English English ...

Page 2: ...es no liability and makes no warranty either express or implicit regarding the contents of this user s guide Also the company makes no warranty as to the product s suitability merchantability or fitness for a particular intended use All products of Hitachi Solutions Ltd described in this user s guide are presently for sale or are site licensed Users who purchased the aforesaid product s will bear ...

Page 3: ...ed in this manual denotes the model No of the product The StarBoard T 19WX incorporates WALTOP s 19 inch LCD monitor integrated digitizer technology Windows is registered trademarks of Microsoft Corporation U S and in other countries Mac and Mac OS are trademarks of Apple Inc registered in the U S and other countries Other trademarks and product names are trademarks and or registered trademarks of...

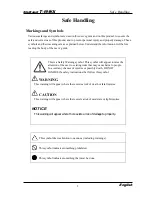
Page 4: ...is symbol will appear to raise the attention of the user to existing risks that may cause harm to people To avoid any chances of injuries or possibly death DO NOT IGNORE the safety instructions that follow this symbol WARNING This warning will appear where there exists a risk of death or fatal injuries CAUTION This warning will appear where there exists a risk of moderate or light injuries NOTICE ...

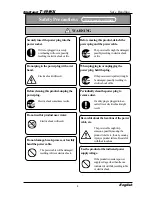
Page 5: ...plug If thepower cord ispulled it might bedamaged possiblyresulting in electricshockorfire Periodically clean the powerplug to remove dust If a dirtyplug isplugged into an outlet fireor electric shock might result Be careful about the locations of the power cable etc Thepower cable might trip someone possibly causing the productto fall etc therebycausing injuryorproductfailure Be careful with thei...

Page 6: ... either should enter unplug thepowerplug fromthe outletandcontact your dealer Do not open oralterthe cabinet of this product Thecabinetcontainshigh voltage areas so electricshockorother injurywillresult Do not leave this product orany of its accessories on the floor Someone mightstepon itand break it or mightbeinjuredby trippingon it Do not place a heavy object on the power cable heat orpull it Th...

Page 7: ...s damaged b After liquid is spilled onto the main unit c After the main unit is exposed to rain or water d After this product malfunctions even when operated according to the instruction manual Adjust this product within the ranges specified in the instruction manual Do not make other adjustments A qualified service representative is required to correct improper adjustments e After this product fa...

Page 8: ... may result in an electric shock or malfunction 1 9 Be sure to install batteries correctly Do not install batteries with positive and negative terminals reversed or use batteries other than the type specified It will cause pen malfunctions and excess heat or burns to the hand 2 5 Be sure to provide insulation during disposal Be sure to insulate the positive and negative terminals of the battery us...

Page 9: ... Procedures 2 1 2 1 Start Method 2 1 2 1 1 Start Method Windows version 2 1 2 1 2 Start Method Mac OS version 2 2 2 2 Using the Stylus Pen 2 3 2 2 1 How to Use the Stylus Pen 2 3 2 2 2 Basic Stylus Pen Operations 2 3 2 2 3 Stylus Pen Settings 2 4 2 2 4 Changing the Battery in the Stylus Pen 2 5 2 2 5 Replacing the Stylus Pen Tip 2 6 2 3 Using the OSD Menu 2 7 2 3 1 OSD Buttons and Their Functions ...

Page 10: ...n the screen displayed on the LCD monitor The StarBoard Software allows text and images to be written to the PC and allows the text and images to be input to the PC as digital data in real time That data can then be saved printed or otherwise manipulated Compatible with presentations in PowerPoint Text and images can be written into presentation materials prepared in Microsoft PowerPoint That allo...

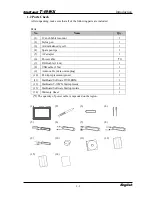
Page 11: ...AAA alkaline dry cell 1 4 Spare pen tips 2 5 AC adapter 1 6 Power cable 1 7 RGB cable 1 8m 1 8 USB cable 1 5m 1 9 Audio cable stereo mini plug 1 10 Pen tip replacement pin set 1 11 StarBoard Software DVD ROM 1 12 StarBoard T 19WX Startup Guide 1 13 StarBoard Software Startup Guide 1 14 Warranty Sheet 1 1 The quantity of power cable is depended on the region 1 2 3 4 5 6 7 8 9 10 11 12 13 14 ...

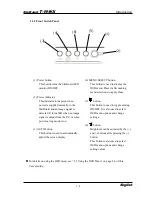
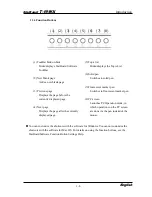
Page 12: ...approx 14 to 66 For details on the angle of the LCD display surface see page 1 8 of this User s Guide 3 Speakers The supplied audio cable can be used to connect to the PC to allow audio output from the speakers 4 Front switch panel These switches are used to turn the power ON OFF enter OSD menu settings and adjust the volume 5 Function buttons Eight standard functions used by the StarBoard softwar...

Page 13: ... This button is used to automatically adjust the screen display 4 MENU SELECT button This button is used to display the OSD menu Press it after making menu selections to apply those 5 button This button is used to toggle muting ON OFF It is also used to select OSD menu options and change settings 6 button Brightness can be adjusted by the and buttons after pressing the button This button is also u...

Page 14: ... is used to connect external devices such as a projector via RGB cable to output video displayed on the StarBoard 4 VGA input port This port is used to connect a PC via RGB cable to display images from the PC 5 Audio input port This port is used to output PC audio from the StarBoard speakers The supplied audio cable is connected to this port 5 4 StarBoard Bottom View 1 2 3 4 5 ...

Page 15: ... page 5 Topic list Hides displays the Topic List 6 Solid pen Switches to solid pen 7 Fluorescent marker pen Switches to fluorescent marker pen 8 PC screen Launches PC Operation mode in which operations on the PC screen are done via the pen instead of the mouse You can customize the shortcuts with the software for Windows You cannot customize the shortcuts with the software for Mac OS For details o...

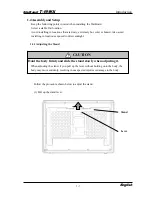
Page 16: ... or humid Also avoid installing in locations exposed to direct sunlight 1 4 1 Adjusting the Stand Follow the procedure shown below to adjust the stand 1 Pull up the stand lever Lever Stand Hold the body firmly and slide the stand slowly when adjusting it When adjusting the stand if you pull up the lever without holding onto the body the body may move suddenly resulting in unexpected injuries or da...

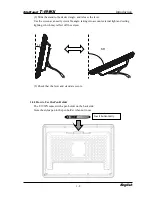
Page 17: ...an easily viewable angle taking into account external light and ceiling lighting which may reflect off the screen 66 3 Check that the lever and stand are secure 1 4 2 How to Use the Pen Holder The T 19WX comes with a pen holder on the back side Store the stylus pen in the pen holder when not in use Insert horizontally 14 ...

Page 18: ...ower cables specified by the manufacturer Use of improper adaptors or cables can damage the product or cause a fire WARNING Securely connect the earth to the earth terminal Failing to do so may result in an electric shock or malfunction CAUTION Install the StarBoard Software on your PC before connecting equipment Equipment may not function normally if connections are made without first installing ...

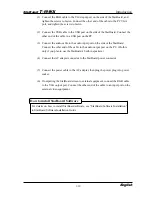
Page 19: ...ard Connect the other end of the cable to the audio output port on the PC Do this only if you plan to use the StarBoard s built in speakers 4 Connect the AC adapter connector to the StarBoard power connector 5 Connect the power cable to the AC adapter then plug the power plug into power socket 6 If outputting the StarBoard screen to external equipment connect the RGB cable to the VGA output port C...

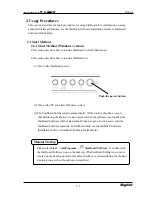
Page 20: ...s to start 3 The StarBoard Software starts automatically If the Startup checkbox was not checked during the shortcut creation process when the software was installed the StarBoard Software will not start when Windows opens In such cases start the StarBoard Software manually For further details see the StarBoard Software Installation Guide or StarBoard Software Online Help Push the power button Eit...

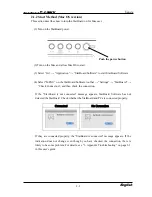
Page 21: ...ttings StarBoard Check Connection and then check the connection If the StarBoard is not connected message appears StarBoard Software has not detected the StarBoard Check whether the StarBoard and PC are connected properly Connected No Connection If they are connected properly the StarBoard is connected message appears If the indication does not change even though you have checked the connection th...

Page 22: ... mouse actions The following xxxx xxxx description is for functions and operations in a Windows environment or Mac OS environment Clicking Primary mouse button clicking Press the pen tip against the display with a suitable amount of force and then release it quickly Double clicking Primary mouse button double clicking Press the pen tip against the display with a suitable amount of force and then r...

Page 23: ...g the button settings see the StarBoard Software Online Help Button User action Corresponding mouse action Windows Corresponding mouse action Mac OS Pen tip Press the pen tip against the display Mouse left click Primary mouse button click Side Button No 0 Press the button with the pen tip slightly removed from the screen 5 mm or less Mouse left double click Secondary button click Side Button No 1 ...

Page 24: ... a new cell with the positive side facing the pen tip Positive side Negative side CAUTION Be sure to install batteries correctly Do not install batteries with positive and negative terminals reversed or use batteries other than the type specified It will cause pen malfunctions and excess heat or burns to the hand Be sure to provide insulation during disposal Be sure to insulate the positive and ne...

Page 25: ...n and becomes too short replace it as described below 1 Using the special pin set remove the stylus pen tip 2 Insert a new pen tip into the stylus pen When changing the battery be careful not to close the pen s rear part too forcefully If too much force is applied when closing the rear part of the stylus pen the pen may be damaged CAUTION ...

Page 26: ...LECT to select that value 5 To close the OSD menu leave buttons un pressed for a set amount of time adjustable or select EXIT from the menu screen If closing by not pressing buttons setting changes made up to then will be applied when the OSD closes OSD Menu AUTO button This button is used to automatically adjust the screen display button Brightness can be adjusted by the and buttons after pressin...

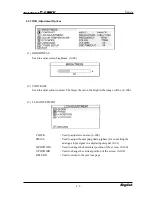
Page 27: ...ighter the image will be 0 100 3 LCD ADJUSTMENT CLOCK Used to adjust screen size 0 100 PHASE Used to adjust the sampling timing phase for converting the analogue input signal to a digital input signal 0 63 H POSITION Used to change the horizontal position of the screen 0 100 V POSITION Used to change the vertical position of the screen 0 100 RETURN Used to return to the previous page ...

Page 28: ...een 0 100 RETURN Used to return to the previous page 5 ECO MODE Used to turn the ECO mode ON and limit brightness setting from 0 to 20 to reduce power consumption RETURN Used to return to the previous page 6 LANGUAGE Used to select the display language The following languages are available Japanese English French German Spanish Italian and Chinese RETURN Used to return to the previous page ...

Page 29: ...djust vertical position of OSD window 0 100 OSD TRANSPARENCY Used to turn OSD window background transparency ON OFF OSD TIMEOUT Used to set the amount of time before the OSD menu closes automatically 0 60 VOLUME Used to adjust the speaker volume 0 100 MODE MESSAGE Used to turn the screen resolution display ON OFF RESET Used to reset OSD menu settings to their default values RETURN Used to return t...

Page 30: ...ructions see the PC manual and other documentation Was LCD and monitor switching done right may be assigned to a function key Set so LCD and monitor are both selected or that just the monitor is selected For details on selection see the PC manual and other documentation Other Contact technical support StarBoard Software related problems In this case Check this And do this StarBoard is not recogniz...

Page 31: ...Check if the pen tip is worn down or is too short For details on how to replace the stylus pen tip see 2 2 5 Replacing the Stylus Pen Tip on page 2 6 of this User s Guide Are there any electronic devices located nearby the StarBoard such as microwave ovens or radio transmitters that emit electromagnetic noise This product is susceptible to electromagnetic noise so use the StarBoard away from devic...

Page 32: ...w to use the StarBoard Software see the StarBoard Software Installation Guide StarBoard Software may be damaged or may not be installed correctly Uninstall StarBoard Software and then reinstall For details on how to install StarBoard software see StarBoard Software Installation in StarBoard Software Installation Guide Are there any electronic devices located nearby the StarBoard such as microwave ...

Page 33: ...imately 130 points per second Interface USB interface USB1 1 compliant Environmental conditions Temperature During use 50 F to 95 F 10 C to 35 C in storage 4 F to 140 F 20 C to 60 C Humidity During use 30 to 80 no condensation in storage 10 to 80 no condensation Input output DC in VGA in Dsub 15 pin VGA out Dsub 15 pin Stereo mini jack stereo audio USB Power consumption 50 W or less 2W or less in ...

Page 34: ... Hz Horizontal Scan KHz Dos Mode 720 400 70 31 5 VGA 640 480 60 31 5 640 480 72 37 9 640 480 75 37 5 SVGA 800 600 60 37 9 800 600 72 48 1 800 600 75 46 9 XGA 1024 768 60 48 4 1024 768 70 56 5 1024 768 70 56 5 SXGA 1280 1024 60 64 0 1280 1024 75 80 0 WXGA 1440 x 900 60 55 9 1440 x 900 75 70 6 ...

Page 35: ...cts That or bumping the StarBoard can damage it Never use gasoline thinner or other solvents That can cause the cabinet to degenerate and printed areas to peal off 3 4 Consumables 1 Pen tips for Stylus pen 2 AAA alkaline dry cell Enquire at the place of purchase or with technical support for information on how go get replacements 3 5 LCD Panel 1 Please note that even though the LCD panel is produc...

Page 36: ...he following cases 1 If the registration card accompanying the warranty is not returned to our company 2 If the warranty is not presented 3 If specified fields on the registration card accompanying the warranty are not completed or if the wording has been changed without authorization 4 The warranty applies only to the original purchasers It does not apply to a third party to whom the customer res...

Page 37: ...If the customer sends the product to our company without RMA Return Merchandise Authorization number it might not be covered by warranty 6 As a rule the customer is responsible for shipping charges required to send all or part of the product for repair etc Our company will assume responsibility for the return shipping to the customer 7 This warranty does not cover labour fees for repair associated...

Reviews:

Related manuals for StarBoard T-19WX