background image

Table of Contents 


pg. 13 

- 16 - 


16

Connecting to a Television with a VCR Attached.....27 
Connecting to a Television with Audio In and Video In Jacks.....28 
Connecting to a Television without Audio In and Video In Jacks.....29 
Simple Playback.....30 
Using Still.....30 
Using Forward and Reverse Search.....30 
Using the Power Zoom.....32 
Using the Digital Zoom.....32 
Using the INST.ZOOM (Instant Zoom) Button.....32 
Using Auto Focus.....33 
Using Manual Focus.....34 
Using the Electronic Image Stabilizer.....34 
Using Fade.....35 
Fading In.....35 
Fading Out.....35 
Using Instant Review.....36 
Using Quick Edit.....36 
Using Macro.....36 
Creating and Recording Titles.....37 
Creating a Title.....37 
Characters Available for Your Title.....37 
Correcting Errors.....38 
Recording Titles on a Tape in the Camera/Recorder.....38 
Recording a Title while Transferring a Tape.....38 
Using the Wireless Remote Control.....39 
Dubbing from the Camera/Recorder to a VCR.....39 
Using Synchro Edit.....40 
Controlling Your TV with the Camera/Recorder's Remote Control.....41 
Programming the Remote Control.....41 
Controlling the TV.....42 
Using Audio/Video Dubbing.....43 
Recording Television Programs.....44 
Cleaning the Camera/Recorder Heads.....46 
Cleaning the Lens and Picture Tube of the Electronic Viewfinder.....46 
Periodic Maintenance.....47 
Troubleshooting.....47 
Specifications.....49 
General Specifications.....49 
Video Recorder Specifications.....49 
Camera Specifications.....49 
Accessories Add Excitement.....51 

Summary of Contents for VM-E58A

Page 1: ... Norcross GA 30093 Quebec H9R1B1 CANADA Tel 404 279 5600 Tel 514 697 9150 HITACHI SALES CORPORATION OF HAWAII INC 3219 Koapaka Street Honolulu Hawaii 96819 Tel 808 836 3621 Thank you for buying a Hitachi product You ve chosen the best 8 mm video camera recorder for you and we want to help you make the most of your purchase Please take time to become familiar with the manual and how it is set up Ke...

Page 2: ...rces 22 Using the AC Adapter Charger 22 Using Alkaline Dry Cell Batteries 23 Using a Car Battery 23 Inserting and Removing Cassettes 24 Inserting a Cassette 24 Removing a Cassette 24 Protecting Recorded Material 25 Attaching the Optional DC Camera Light 25 Removing the DC Camera Light 25 Replacing the DC Camera Light Bulb 26 Using Memory 27 Setting the Date and Time 27 Correcting the Date and Time...

Page 3: ...corder 46 Recording a Title while Transferring a Tape 46 Using the Wireless Remote Control 47 Dubbing from the Camera Recorder to a VCR 47 Using Synchro Edit 48 Controlling Your TV with the Camera Recorder s Remote Control 49 Programming the Remote Control 49 Controlling the TV 50 Using Audio Video Dubbing 50 Recording Television Programs 51 General Maintenance pg 51 53 Cleaning the Camera Recorde...

Page 4: ...it has been included Therefore it should be read carefully to avoid any problems CAUTION TO REDUCE THE RISK OF ELECTRIC SHOCK DO NOT OPEN NO USER SERVICEABLE PARTS INSIDE REFER SERVICING TO QUALIFIED SERVICE PERSONNEL WARNING TO PREVENT FIRE OR ELECTRIC SHOCK MATCH WIDE BLADE OF PLUG TO WIDE SLOT AND FULLY INSERT PLUG WARNING Many television programs and films are copyrighted In certain circumstan...

Page 5: ...s cause harmful interference to radio or television reception which can be determined by turning the equipment off and on the user is encouraged to try to correct by one or more of the following measures Reorient or relocate the receiving antenna Increase the separation between the equipment and receiver Connect the equipment into an outlet on a circuit different from that to which the receiver is...

Page 6: ...lug will fit into the power outlet only one way This is a safety feature If you are unable to insert the plug fully into the outlet try reversing the plug If the plug should still fail to fit contact your electrician to replace your obsolete outlet To prevent electric shock do not use this polarized plug with an extension cord receptacle or other outlet unless the blades can be fully inserted with...

Page 7: ...ay cause hazards Caution Maintain electrical safety Power line operated equipment or accessories connected to this unit should bear the UL listing mark or CSA certification mark on the accessory itself and should not have been modified so as to defeat the safety features This will help avoid any potential hazard from electric shock or fire If in doubt contact qualified service personnel 10 Water a...

Page 8: ...into such power lines or circuits When installing an outside antenna system extreme care should be taken to keep from touching or approaching such power lines or circuits as contact with them might be fatal Installing an outdoor antenna can be hazardous and should be left to a professional antenna installer USE 14 Cleaning Unplug this video product from the wall outlet before cleaning Do not use l...

Page 9: ...sult in damage and will often require extensive work by a qualified technician to restore the video product to its normal operation e If the video product has been dropped or the cabinet has been damaged f When the video product exhibits a distinct change in performance this indicates a need for service 19 Replacement Parts When replacement parts are required have the service technician verify tha...

Page 10: ... sure cord is located so that it will not be stepped on tripped over or otherwise subjected to damage or stress 9 Do not operate charger with damaged cord or plug replace them immediately 10 An extension cord should not be used unless absolutely necessary Use of improper extension cord could result in a risk of fire and electric shock If extension cord must be used make sure A The pins on plug of ...

Page 11: ... to allow you to use your video camera recorder quickly and confidently before advancing to the more sophisticated features of the Hitachi VM E56A E58A l l l l Advanced Techniques to help you with some of the exciting sophisticated features of the Hitachi VM E56A E58A We hope you will take the time to learn about these functions since they have been designed for you You can use the video camera re...

Page 12: ...perature exceeds 120 49 C or the pickup device may be damaged Dangerous includes l l l l Inside a car with the windows closed and in direct sunshine l l l l Near heating appliances n n n n Do not leave the viewfinder lens facing sunlight for a prolonged period or the phosphorescent surface of the cathode ray tube or the liquid crystal display LCD panel may be damaged Features l l l l Easy to use l...

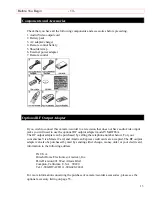
Page 13: ...the optional RF outptut adapter model VM RF86A The RF output adapter can be purchased by calling the telephone number below For your convenience Visa Master Card and American Express credit cards are accepted The RF outptut adapter can also be purchased by mail by sending either cheque money order or your credit card information to the following address IN U S A Hitachi Home Electronics America In...

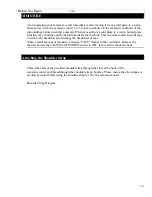
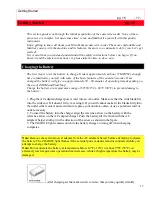
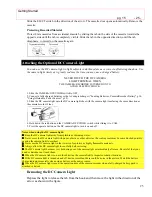
Page 14: ... This moisture could cause the tape to stick to the headwheel and damage the headwheel or tape When a small amount of moisture is sensed TAPE flashes in the viewfinder Remove the cassette and set the CAMERA OFF VIDEO switch to OFF then wait for about one hour Attaching the Shoulder Strap Thread the ends of the provided shoulder strap through the slots at the back of the camera recorder and thread ...

Page 15: ...emote Control Battery 14 Camera Recorder Battery 14 Removing the Battery 15 Checking the Battery s Charge 15 Using Alternative Power Sources 15 Using the AC Adapter Charger 15 Using Alkaline Dry Cell Batteries 16 Using a Car Battery 17 Inserting and Removing Cassettes 17 Inserting a Cassette 17 Removing a Cassette 18 Protecting Recorded Material 18 Attaching the Optional DC Camera Light 18 Removin...

Page 16: ...d Recording Titles 37 Creating a Title 37 Characters Available for Your Title 37 Correcting Errors 38 Recording Titles on a Tape in the Camera Recorder 38 Recording a Title while Transferring a Tape 38 Using the Wireless Remote Control 39 Dubbing from the Camera Recorder to a VCR 39 Using Synchro Edit 40 Controlling Your TV with the Camera Recorder s Remote Control 41 Programming the Remote Contro...

Page 17: ...86 F 30 C to prevent damage to the battery 1 Plug the AC adapter charger power cord into an AC outlet Make sure that the wide blade fits into the wide slot If it doesn t fit try reversing it If you still cannot make fit the blades fully into the outlet either contact an electrician to replace your obsolete outlet or use a polarized cord or outlet accessory 2 To insert the battery into the charger ...

Page 18: ...proximately 4 hours VM BP82 adding considerable time to battery charging With repeated normal charging and use the battery will gradually lose operating time When operation time becomes too short to be useful replace the battery If the POWER light begins to flash during charging remove the battery and then reattach it to the AC charger adapter If the POWER light continues to flash after several at...

Page 19: ...r details in your area for recycling options or proper disposal Adjusting the Electronic Viewfinder The electronic viewfinder adjusts simply by pivoting it to a position where it is comfortable and easy to see through Place the viewfinder back in its original position before storing the camera recorder in its case or carrying the camera recorder around to avoid damaging the viewfinder or camera re...

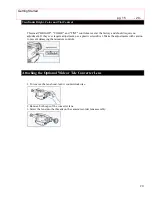
Page 20: ...djustment If they ever require adjustment use a plastic screwdriver Make the adjustments with caution to prevent damaging the miniature controls Attaching the Optional Wide or Tele Converter Lens 1 To remove the lens hood turn it counterclockwise 2 Remove both caps of the converter lens 3 Screw the lens into the threads on the camera recorder lens assembly ...

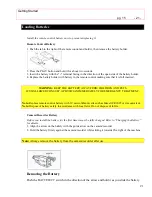
Page 21: ...ED CONSULT A PHYSICIAN IMMEDIATELY FOR EMERGENCY TREATMENT Note Replace remote control battery with 3V micro lithium cells such as Maxell CR2025 or its equivalent Note Dispose of battery safely in accordance with local laws Do not dispose of in fire Camera Recorder Battery Before you install the battery for the first time it must be fully charged Refer to Charging the Battery for details 1 Align t...

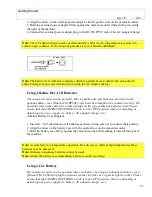
Page 22: ...ource or charge the battery before continuing to use the camera recorder Using Alternative Power Sources Using the AC Adapter Charger Please ensure that the CAMERA OFF VIDEO switch is in the OFF position whenever attaching or detaching any power supply ie battery AC adapter charger etc AC Adapter Charger Hookup 1 Plug the AC adapter charger power cord into an AC outlet Make sure that the wide blad...

Page 23: ...ecorder depends on the type of alkaline batteries used Please ensure that the CAMERA OFF VIDEO switch is in the OFF position whenever attaching or detaching any power supply ie battery AC adapter charger etc Alkaline Battery Case Diagram 1 Insert six AA alkaline dry cell batteries as shown being sure not to confuse their polarity 2 Align the arrow on the battery case with the guide arrow on the ca...

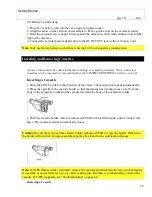
Page 24: ... or off Inserting a Cassette 1 Slide the EJECT switch in the direction of the arrow The cassette door opens automatically 2 Place the cassette in the cassette holder so that the transparent window faces away from the body of the camera recorder and the sprockets toward the body of the camera recorder 3 Push the cassette holder which is embossed PUSH on the left hand side until it clicks into place...

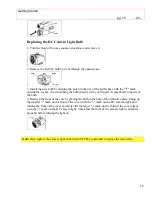
Page 25: ...on the CAMERA OFF VIDEO switch while sliding it to CAM 5 Press the operate button on the DC camera light to turn it on and off Notes when using the DC camera light l l l l Keep the DC camera light away from splashing or dripping water l l l l Never cover the DC camera light with paper plastic or other object as the cooling vents may become blocked possibly causing the camera light to overheat l l ...

Page 26: ...fingers It may shorten the life of the bulb 4 Reattach the front of the case by placing the bulb in the hole of the reflective plate lining up the smaller mark on the front of the cover with the mark on the DC camera light and turning the front of the cover clockwise till the larger mark on the front of the cover aligns with the mark on the DC camera light Check that the front of the camera light ...

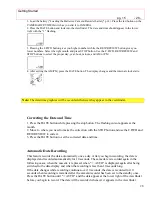
Page 27: ...r time counter clears to 0 00 00M 3 Continue recording or playback until ready to return Press the STOP when finished 4 Press the REW REVIEW button and the tape stops at approximately where you reset the linear time counter This feature works in F FWD as well Setting the Date and Time Take the time to set the date and time now The time backup battery is rechargeable Charge the backup battery every...

Page 28: ...e pressing the stop button The flashing cursor appears at the month 2 Move to where you need to make the correction with the STOP button and use the F FWD and REW REVIEW to correct 3 Press the DATE button to set the corrected date and time Automatic Date Recording This feature records the date automatically once a day After you begin recording the date is displayed and recorded automatically for 1...

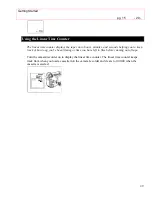
Page 29: ...seconds helping you to keep track of how long you ve been filming or time you have left to film before running out of tape Turn the camera recorder on to display the linear time counter The linear time counter keeps track from when you load a cassette into the camera recorder and clears to 0 00 00 when the cassette is ejected ...

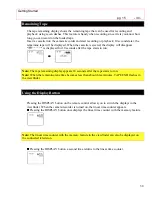
Page 30: ...s to run Note The tape remaining display appears 10 seconds after the tape starts to run Note When the remaining tape time becomes less than about three minutes TAPE END flashes in the viewfinder Using the Display Button Pressing the DISPLAY button on the remote control allows you to switch the displays in the viewfinder When the camera recorder is turned on the linear time counter appears l l l l...

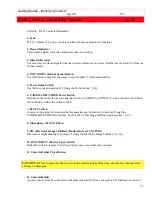
Page 31: ... red button as you slide the switch to CAMERA or VIDEO You do not need to hold down the red button to slide the switch to OFF 7 EJECT Switch A power source must be connected before cassettes can be inserted or removed though the CAMERA OFF VIDEO switch may be set to OFF Inserting and Removing Cassettes p 17 8 Microphone For VM E58A 9 EIS Electronic Image Stabilizer Button Only for VM E58A EIS corr...

Page 32: ...your optimum focus adjustment 19 F FWD Button Use this button to fast forward tapes or for visual search During visual search the camera recorder fast forwards at approximately 9 times normal playback speed Also use this button to set date and time 20 Camera Light Shoe Attach the DC camera light here 21 Viewfinder BRIGHT COLOR and TINT Controls Use this controls to adjustment this camera recorder ...

Page 33: ...ME Increase or decrease the volume l l l l CHANNEL Top button switches to the next higher channel bottom button switches to the next lower channel For these to operate you must have preset your channels Controlling your TV with the Camcorder s Remote Control p 41 30 Recorder s Remote Control The shaded buttons on the remote control have the same functions as the corresponding buttons on the camera...

Page 34: ... to shutter speed 1 Connect the camera recorder to a power source Loading Batteries Camera Recorder Battery p 15 Using Alternative Power Sources p 15 2 Insert an 8mm cassette Inserting and Removing Cassettes p 17 3 Press the red button on the CAMERA OFF VIDEO switch as you slide it to CAMERA appears and the camera recorder is now ready to record 4 Use the diopter control to match the viewfinder s ...

Page 35: ...t mode consult your VCR manual for details Operate the television as you normally do to see the signal coming from the VCR 5 Hold down the red button on the CAMERA OFF VIDEO switch while sliding the switch to VIDEO 6 Press the PLAY button to begin playback 7 Press the STOP button when finished Connecting to a Television with Audio In and Video In Jacks 1 Connect the provided AV stereo output cord ...

Page 36: ...minals at the back of your television 4 Connect the RF output adapter cable to the AV IN OUT jack of your camera recorder 5 Turn your television on and select channel 3 channel 4 if channel 3 is a channel used in your area 6 Select the CH3 or CH4 on the RF output adapter matching the channel selected on your television 7 Insert the previously recorded cassette into the camera recorder 8 Hold down ...

Page 37: ...g playback to play the tape forward at approximately 9 times normal speed Press PLAY button to return to normal playback l l l l Press REW REVIEW button during playback to play the tape backwards at approximately 7 times normal speed Press PLAY button to return to normal playback Note When you engage F FWD button or REW REVIEW button the picture will have some interference or noise This is normal ...

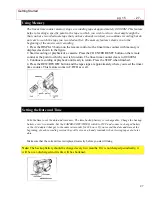
Page 38: ...ations that they might fit in and add a special touch Using the Power Zoom The power zoom W control widens the picture moving the subject farther away while the power zoom T control brings the subject closer narrowing the picture If ZOOM appears at the left of the viewfinder the digital zoom function shown below has been engaged When the power zoom switch is operated the zoom position is displayed...

Page 39: ...Advanced Techniques pg 37 39 39 ...

Page 40: ...rol the zoom with the power zoom T and W controls When ZOOM is not displayed in the viewfinder normal zoom functions resume Using the INST ZOOM Instant Zoom Button The instant zoom feature activates the digital zoom to magnify the subject 1 5 times regardless of zooming engaged by the power zoom T and W controls Press the INST ZOOM button I ZOOM appears at the left of the viewfinder and the pictur...

Page 41: ...O MAN buttons simultaneously to return to auto focus The auto focus will not work under the following conditions and you must focus manually Objects outside the center of the viewfinder Objects at different distances in the center of the viewfinder Brightly lit objects such as a neon light objects lit by spotlight etc Objects behind water dappled or dusty glass Objects with little difference in li...

Page 42: ... to your subject If you don t use the T control to zoom to the picture you want the picture may fall out of focus when actual recording starts 3 Press the Focus control AUTO MAN or button until the subject is in focus 4 Use the power zoom W control to zoom back to the picture you desire Note To return to auto focus press FOCUS control AUTO MAN buttons and the FOCUS disappears from the viewfinder U...

Page 43: ...pod in which case the picture would be blurred Using Fade Use the fade feature to add a professional touch to your recordings Use the FADE button to select one of the three fade options l l l l White fade Fades in from a white screen or fades out to a white screen appears in the upper left corner of the viewfinder l l l l Wipe fade The picture opens gradually from the center of a black screen or c...

Page 44: ...of tape play back in reverse and then in normal playback mode 2 The camera plays back to the spot where you paused and returns to record pause mode standby Press the Start Stop button to resume recording Using Quick Edit Use quick edit to search for the end of previously recorded material find a particular spot on your tape begin editing or record new material While the camera is in record pause m...

Page 45: ...yed and recorded at any time A title contains two lines of up to 16 characters per line The camera recorder contains 47 different characters for creating a title Titler Buttons Creating a Title 1 Connect the camera recorder to a power source 2 Hold down the red button on the CAMERA OFF VIDEO switch and slide it to either CAMERA or VIDEO 3 Press the TITLE ON OFF button on the remote control and a f...

Page 46: ...ct the title you wish to record 5 Press the Start Stop button to start recording the title 6 Press the TITLE ON OFF button on the remote control to stop recording the title The title graphics disappear from the viewfinder and the camera recorder can record normally Note Create and store your title before an event you plan to record Just press the TITLE ON OFF button on the remote control to superi...

Page 47: ...light such as direct sunlight or very bright artificial lighting Note Clear a direct path from the wireless remote control to the infrared ray receiver The wireless remote control won t work if an obstacle blocks the infrared rays Note The remote control code of this camera recorder is Hitachi code VCR2 If you have a VCR with the same code you Hitachi VCR may malfunction when you use the camera re...

Page 48: ...e synchro edit cord Stop the VCR change the position of the switch and press the RECORD button on the VCR 6 Press the S EDIT button on the remote control and the last few seconds of the recorded tape reviews in the viewfinder and then the camera recorder is placed in playback The recording VCR starts recording automatically 7 Press the F FWD REW REVIEW STOP and Start Stop buttons to pause the VCR ...

Page 49: ...l recognize and respond to Here s what to do Programming the Remote Control l l l l Turn the television on any channel is okay l l l l Aim the camera recorder s remote control at your TV set Hold down the CH button while you press the button corresponding to your brand of television as shown in the chart page 42 For example if you have an RCA television press CH and DISPLAY at the same time If thi...

Page 50: ...rogrammed Note It may not be possible to control all TVs listed in this Table Note The AVX Button can t be used with Gold Star 2 and Sharp TVs Using Audio Video Dubbing Use audio video dubbing to record audio and video from the camera recorder s built in microphone and camera onto a previously recorded tape in the camera recorder Audio Video Dubbing Diagram 1 Connect your Camera Recorder to the te...

Page 51: ...the tape that you selected Note If the camera recorder is in AV DUB pause or STILL mode for more than 5 minutes the camera recorder stops automatically to protect the tape Note Automatic date recording is disabled during audio video dubbing Note When the audio video dubbed portion is played back noise may appear at the end of the dubbed portion Recording Television Programs If your television or V...

Page 52: ... the camera recorder noise may appear in the picture In this event press the STOP button to stop the camera recorder unplug the AV input cord and play back the tape again Note To monitor the picture being recorded connect the AV stereo output cord provided to the VIDEO IN jack of the television as shown above ...

Page 53: ...r other foreign matter adheres to it 1 Rotate and remove eye cup 2 Clean the picture tube face and lens To prevent scratching use a soft non abrasive cloth swab or lens cleaning paper 3 Align the reference mark and rotate the eye cup in the direction of arrow Periodic Maintenance A precision electromechanical device the Hitachi VM E56A E58A requires maintenance after a period of normal use We expe...

Page 54: ...ressed Check the record protect tab on the cassette Push the cassette holder embossed PUSH to close it Picture is out of focus Make sure that FOCUS does not appear in the viewfinder Auto focus does not operate If it is displayed press FOCU Control AUTO MAN buttons to erase it Auto Focus does not operate if a special effects filter is attached or the objects shown on page 33 are being recorder RECO...

Page 55: ... not turned on and no button operations are accepted Remove the power source and after about one minute push the reset switch gently using a toothpick etc until you feel a click The display will be reset Then set the information again TAPE DISPLAY SYMPTOM CHECK POINT CORRECTION TAPE appears in the viewfinder Have you moved the camera recorder from a cold place to a warm place so that its temperatu...

Page 56: ...ecorder Specifications Format 8mm Record playback Two video record playback heads Video signal EIA standard NTSC color Tape speed 14 3mm sec Video input 1 0Vp p 75 ohm Video output 1 0Vp p 75 ohm Audio input 7 8dBs 316mVrms Audio output 7 8dBs 316mVrms Fast forward rewind time Less than 8 minutes with P6 120 cassette Camera Specifications Scanning 525 lines 60 fields 30 frames Required minimum ill...

Page 57: ...o the Hitachi Authorized Service Facility nearest you Just present proof of purchase and or delivery receipts to the Hitachi Authorized Service Facility and service will be rendered in accordance with the terms of the limited warranty as stated on your warranty card or operating guide Should you have any questions regarding in warranty service operation or technical assistance please contact Hitac...

Page 58: ...ll free number or use the ordering form on page 53 More Available Accessories To Order in the United States In Canada Please use Canadian order form in French version of this manual Page 53 By Phone To place an order by phone have your VISA MASTERCARD or AMERICAN EXPRESS card ready and call Hitachi s toll free number anytime 24 hours a day 7 days a week 1 800 HITACHI By Mail Complete the order for...

Page 59: ... parts at no charge to the original owner Parts used for replacement are warranted for the remainder of the original Limited Warranty period For 90 days from the date of original purchase Hitachi will provide labor for the repair or replacement of defective parts without charge subject to the following conditions 1 Owner must provide verification of the date of purchase when requesting Limited War...

Page 60: ...IS LIMITED WARRANTY HITACHI MAKES NO EXPRESS WARRANTY REGARDING THIS HITACHI PRODUCT FURTHER ALL IMPLIED WARRANTIES RELATING TO ANY PORTION OF THIS PRODUCT INCLUDING ANY WARRANTY OF MERCHANTABILITY OR FITNESS FOR A PARTICULAR PURPOSE ARE LIMITED TO 90 DAYS FOR LABOR AND TWO YEARS FOR PARTS THE DURATION OF THE APPLICABLE EXPRESS WARRANTY CONTAINED ABOVE HITACHI SHALL NOT BE LIABLE TO THE PURCHASER ...

Page 61: ...ccredited by Hitachi The program is available only for products covered by an original validated Hitachi warranty given at the time of the purchase B Hitachi will make repairs to the product mentioned in this plan parts and labour charges included until the expiry date of this plan C THIS PROTECTION PLAN WILL BE IN FORCE ONLY AFTER EXPIRATION OF THE NORMAL PURCHASER S WARRANTY During the normal wa...

Page 62: ...which is the only valid document to be presented at the time of repair to an authorized Hitachi Service Center THIS PROTECTION PLAN IS NOT TRANSFERABLE NOR REFUNDABLE H This Protection Plan can be renewed as long as the request is made before the expiry date of the Plan Hitachi however reserves the right to refuse any renewal I Hitachi reserves the right to cancel the Protection Plan in case of ab...

Page 63: ...lightning acts of God or other events beyond the control of Hitachi 4 Batteries tape cassettes earphones antennas accessories and external parts such as cabinet and knobs 5 PRODUCTS PURCHASED OUTSIDE CANADA 6 Products used outside Canada 7 In transit damage claims improper handling by carrier or post offices 8 Products or parts thereof which have had serial numbers removed altered or defaced 9 Pro...

Page 64: ...HITACHI WARRANTY CARD Front CANADA ONLY 64 64 ...

Reviews: