background image

Advanced Techniques


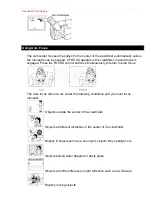
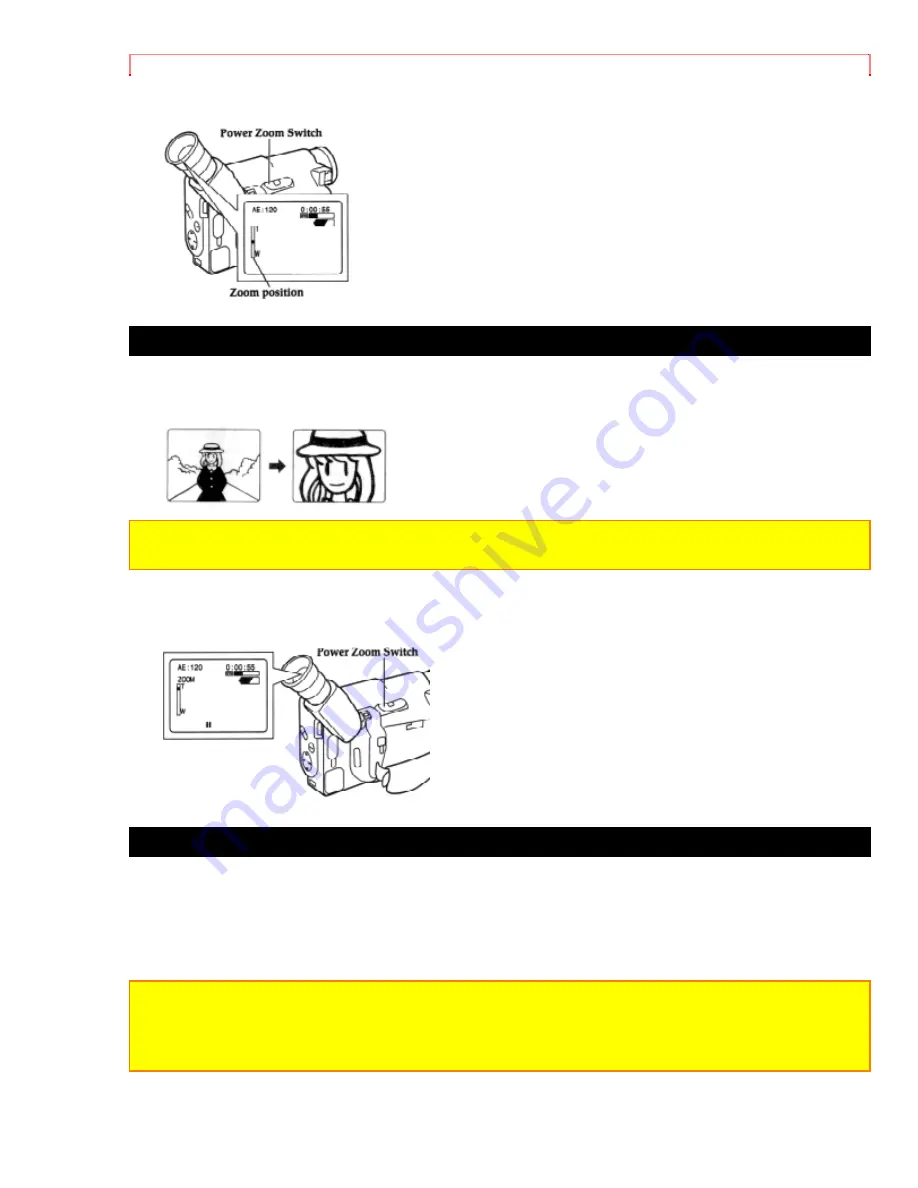
Using the Digital Zoom 

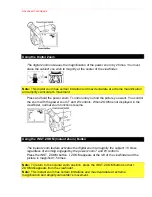
The digital zoom increases the magnification of the power zoom by 2 times. You must 
place the subject you wish to magnify at the center of the viewfinder. 


Note:

 This digital zoom has certain limitation and may degradate at extreme magnification 

and amplify camcorder's movement. 

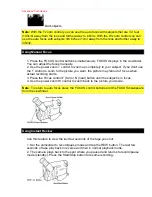
Press and hold the power zoom T control until you find the picture you want. You control 
the zoom with the power zoom T and W controls. When ZOOM is not displayed in the 
viewfinder, normal zoom functions resume. 


Using the INST. ZOOM (Instant Zoom) Button 

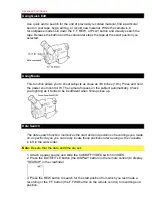
The instant zoom feature activates the digital zoom to magnify the subject 1.5 times 
regardless of zooming engaged by the power zoom T and W controls. 

Press the INST. ZOOM button. I. ZOOM appears at the left of the viewfinder and the 
picture is magnified 1.5 times. 

Note:

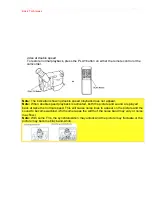
 To return to the original zoom position, press the INST. ZOOM button so that I. 

ZOOM disappears from the viewfinder. 

Note:

 This instant zoom has certain limitations and may degradate at extreme 

magnification and amplify camcorder's movement. 

Summary of Contents for VME-230A - Camcorder

Page 1: ...Norcross GA 30093 Mississauga Ontario L5N 2L8 Tel 770 279 5600 CANADA Tel 905 821 4545 HITACHI SALES CORPORATION OF HAWAII INC 3219 Koapaka Street Honolulu Hawaii 96819 Tel 808 836 3621 Thank you for buying a Hitachi product Please take time to become familiar with the manual and how it is set up Keep it handy for feature reference QR16731 Hitachi Ltd 1997 Printed in Japan KN H N ...

Page 2: ...ack 22 Removing the Battery Pack 23 Checking the Battery s Charge 24 Using Alkaline Dry Cell Batteries 24 Using Alternative Power Sources 26 Using the AC Adapter Charger 26 Using a Car Battery 26 Inserting and Removing Cassettes 27 Inserting a Cassette 27 Removing a Cassette 28 Protecting Recorded Material 28 Using the Linear Time Counter 28 Remaining Tape 28 Setting the Date and Time 29 Correctin...

Page 3: ...l is optional 50 Programming the Remote Control for the VCR 50 Operation 52 To End Programmable Simple Edit 53 Attaching the Optional Wide or Tele Converter Lens 54 Attaching the Optional DC Camera Light 54 Removing the DC Camera Light 55 Replacing the DC Camera Light Bulb 55 Viewfinder Bright Color and Tint Control 56 General Maintenance 57 Cleaning the camcorder Heads 57 Cleaning the Lens and Pi...

Page 4: ... TV set has VIR circuit Turn if off during playback 59 Date search function does not operate 59 Slide the CAM OFF VIDEO switch to VIDEO 59 Insert the clock battery set the date and time then start recording 59 Do not remove the clock battery after recording 59 Do not eject the recorded cassette Leave it in the camcorder 59 The playback picture moves rapidly and noise appears Also sound speeded up ...

Page 5: ...nts Video Recorder Specifications 60 Camera Specifications 60 Accessories Add Excitement 62 Available Accessories 62 To Order in the United States 62 By Phone 62 By Mail 62 FOR AUTHORIZED HITACHE SERVICE IN CANADA 62 ...

Page 6: ...Table of Contents ...

Page 7: ...LIFIED SERVICE PERSONNEL WARNING TO PREVENT FIRE OR ELECTRIC SHOCK MATCH WIDE BLADE OF PLUG TO WIDE SLOT AND FULLY INSERT PLUG WARNING Many television programs and films are copyrighted In certain circumstances copyright law may apply to private in home videotaping of copyrighted materials This Class B digital apparatus meets all requirements of the Canadian Interference Causing Equipment Regulati...

Page 8: ...manufacture could void the user s authority to operate the equipment Note to CATV system installer This reminder is provided to call the CATV system installer s attention to Article 820 40 of the NEC that provides guidelines for proper grounding and in particular specifies that the cable ground shall be connected to the grounding system of the building as close to the point of cable entry as pract...

Page 9: ...it into the power outlet only one way This is a safety feature If you are unable to insert the plug fully into the outlet try reversing the plug If the plug should still fail to fit contact your electrician to replace your obsolete outlet To prevent electric shock do not use this polarized plug with an extension cord receptacle or other outlet unless the blades can be fully inserted without blade ...

Page 10: ...fication mark on the accessory itself and should not have been modified so as to defeat the safety features This will help avoid any potential hazard from electric shock or fire If in doubt contact qualified service personnel 10 Water and Moisture Do not use this video product near water for example near a bath tub wash bowl kitchen sink or laundry tub in a wet basement or near a swimming pool and...

Page 11: ...r short out parts that could result in a fire or electric shock Never spill liquid of any kind on the video product 16 Lightning For added protection for this video product during a lightning storm or when it its left unattended and unused for long periods of time unplug it from the wall outlet and disconnect the antenna or cable system This will prevent damage to the video product due to lightnin...

Page 12: ...haracteristics as the original parts Use of replacements specified by the video product manufacturer can prevent fire electric shock or other hazards 20 Safety Check Upon completion of any service or repairs to this video product ask the service technician to perform safety checks recommended by the manufacturer to determine that the video product is in safe operating condition 21 Heat The product...

Page 13: ...rd is located so that it will not be stepped on tripped over or otherwise subjected to damage or stress 9 Do not operate charger with damaged cord or plug replace them immediately 10 An extension cord should not be used unless absolutely necessary Use of improper extension cord could result in a risk of fire and electric shock If extension cord must be used make sure A The pins on plug of extensio...

Page 14: ...histicated features of the Hitachi VM E230A We hope you will take the time to learn about these functions since they have been designed for you You can use the video camcorder without reading this section A General Maintenance section to help keep your purchase in good repair We want this manual to be as helpful as possible so it includes two easy ways to find the information you need A quick inde...

Page 15: ...t object directly Be sure not to leave the camcorder in a place where the temperature exceeds 140 F 60 C or the pickup device may be damaged Dangerous includes Inside a car with the windows closed and in direct sunshine Near heating appliances Do not leave the viewfinder lens facing sunlight for a prolonged period or the liquid crystal display LCD panel may be damaged Features Easy to use Instant ...

Page 16: ...The RF adapter can also be purchased by mail by sending either money order or your credit card information to the following address HiTRON Inc 675 Old Peachtree RD Suwanee GA 30174 Tel 1 800 995 4500 For more information concerning the purchase of camcorder accessories please see the optional accessory listing on page 59 Lens Cap Using the lens cap string Pass the string through the lens cap and g...

Page 17: ...Before You Begin During shooting attach the lens cap as shown in the figure to prevent it from being lost ...

Page 18: ...o the battery 1 Plug the AC adapter charger power cord into an AC outlet Make sure that the wide blade fits into the wide slot If it doesn t fit try reversing it If you still cannot make fit the blades fully into the outlet either contact an electrician to replace your obsolete outlet or use a polarized cord or outlet accessory 2 To insert the battery into the charger align the reference arrow on ...

Page 19: ...f the POWER light continues to flash after several attempts to attach it the battery is unable to take a charge and must be replaced Do not attach a hot battery to the AC adapter charger Allow it to cool Attaching a hot battery to the AC adapter charger causes the POWER light to flash THERE ARE NO USER SERVICEABLE PARTS INSIDE THE BATTERY OR AC ADAPTER CHARGER THROWING THE BATTERY INTO FIRE OR EXP...

Page 20: ...TION Do not hold the unit by the electronic viewfinder when carrying as this could cause a malfunction Eyepiece Adjustment To use the electronic viewfinder turn this control for your optimum focus adjustment Adjustment the Hand Strap Adjust the hand strap to best fit your hand After adjustment hook the hand strap s pad securely Loading Batteries ...

Page 21: ...TMENT Note Replace the battery with 3V micro lithium cells such as Maxell CR2025 or its equivalent Note Dispose of battery safely in accordance with local laws Do not dispose of in fire Note Do not short circuit the battery Note Do not take apart the battery Note Do not hold the battery with the metallic tweezers Note Do not re charge the battery Note Keep the battery in a dark cool dry place Remo...

Page 22: ...r dispose of batteries by throwing them into a fire When liquid leaks wipe it off completely and then insert new batteries Camcorder Batteries Using Battery Pack Before you install the battery for the first time it must be fully charged Refer to Charging the Battery on page 12 for details 1 Lift the OPEN lever and pull it up The power supply attachment cover will open 2 With the battery compartmen...

Page 23: ...the cover will not close Note Always remove the battery from the camcorder after use Note We cannot guarantee against malfunctions of the camcorder which occur when you use battery packs other than those specified Note Always attach a battery by the procedure described here Attaching a battery forcibly could damage it Removing the Battery Pack 1 Lift the OPEN lever and pull it up The power supply ...

Page 24: ...ource or charge the battery before continuing to use the camcorder Using Alkaline Dry Cell Batteries The camcorder can be powered by six alkaline dry cell batteries inserted into the power supply attachment holder The continuous operation time of the camcorder depends on the type of alkaline batteries used Please ensure that CAM OFF VIDEO switch is in the OFF position whenever attaching or detachi...

Page 25: ... Do not use batteries made by different manufacturers at the same time Do not use old and new batteries at the same time Note If the liquid leaks remove the batteries immediately and ask your nearest dealer to inspect the camcorder this will be at your own expense Note Do not let the batteries or the terminals of the camcorder get dirty If they are dirty use a dry cloth to wipe off the dirt comple...

Page 26: ...r Charger Please ensure that the CAM OFF VIDEO switch is in the OFF position whenever attaching or detaching any power supply ie battery AC adapter charger etc 1 Plug the AC adapter charger power cord into an AC outlet Make sure that the wide blade fits into the wide slot If it doesn t fit try reversing it If you still cannot make fit the blades fully into the outlet either contact an electrician ...

Page 27: ...hether the CAM OFF VIDEO switch is on or off Inserting a Cassette 1 Slide the EJECT switch in the direction of the arrow The cassette door opens automatically 2 Place the cassette in the cassette holder so that the transparent window faces away from the body of the camcorder and the sprockets toward the body of the camcorder 3 Push the cassette holder which is embossed PUSH LOCK on the left hand s...

Page 28: ...ep track of how long you ve been filming or time you have left to film before running out of tape Turn the camcorder on to display the linear time counter The linear time counter keeps track from when you load a cassette into the camcorder and clears to 0 00 00 when the cassette is ejected Remaining Tape The tape remaining display shows the remaining tape that can be used for recording and playbac...

Page 29: ...e battery providing power to the camcorder is removed Make sure that the current time is displayed correctly before you start filming 1 Load the battery Loading the Batteries Camcorder batteries p 15 Press the red button on the CAM OFF VIDEO switch as you slide it to CAM 2 Press the DATE TITLE button and look into the viewfinder The date and time should appear in the lower right with the 1 flashin...

Page 30: ... and the camcorder enters the automatic date recording mode See Date Recording on page 32 Correcting the Date and Time 1 Press the DATE TITLE button while pressing the STOP button The flashing cursor appears at the month 2 Move to where you need to make the correction with the STOP button and use the F F and REW to correct 3 Press the DATE TITLE button to set the corrected date and time ...

Page 31: ...h may be set to OFF Inserting and Removing Cassettes p 18 9 DATE TITLE DISP Button Use this button to record the date time and title on your tape Any time that the date time and title displays appear in the viewfinder they are recorded on your tape This button can be used instead of DISPLAY button on the remote control in the VIDEO mode Note Be sure to insert the clock battery before setting the d...

Page 32: ...Attach the DC camera light here 17 OPEN Lever Use this to open or close the cover of the power supply attachment holder Camcorder Batteries p15 18 Power Supply Attachment Section Behind the cover Attach a battery or alkaline batteries here Camcorder Batteries P 15 16 19 Hand Strap Refer to page 13 20 DC IN Jack Behind the jack cover When using the AC adapter charger connect one end of the DC cord ...

Page 33: ...amcorder to a tripod 27 Recorder s Remote Control The shaded buttons on the remote control have the same functions as the corresponding buttons on the camcorder 28 COUNTER RESET Button only on the remote control Use this button to reset the linear time counter to 0 00 00 29 TITLE ON OFF Button only on the remote control Use this button to create and record a title for your tapes Creating and Recor...

Page 34: ...hi VM E230A uses PROGRAM AE auto exposure that automatically selects the optimum shutter speed either 1 60 1 120 1 180 1 250 1 350 1 500 1 750 1 1000 1 1500 1 2000 or 1 4000 of a second The iris adjusts automatically in response to shutter speed 1 Connect the camcorder to a power source Loading Batteries Camcorder Batteries p 15 Using Alternative Power Sources p 17 2 Insert an 8mm cassette Inserti...

Page 35: ...o the AUDIO IN and VIDEO IN jacks of your VCR Note If your VCR has two stereo AUDIO IN jacks connect the audio plug to the left channel AUDIO IN jack 2 Connect the other ends of the cable to the AUDIO OUT and VIDEO OUT jacks of the camcorder 3 Insert a previously recorded cassette into the camcorder 4 Turn on your VCR and place it in the camcorder input mode consult your VCR manual for details Ope...

Page 36: ...tput adapter to the VHF antenna terminals on the back of the television If the television is set up to connect to a flat antenna lead you need to purchase antenna adapter 75 ohm to 300 ohm transformer Connect the adapter to the 75 ohm coaxial cable of the RF output adapter and connect the free ends of the adapter to the VHF antenna terminals at the back of your television 4 Connect the RF output a...

Page 37: ...yback to play the tape forward at approximately 9 times normal speed Press PLAY button to return to normal playback Press REW button during playback to play the tape backwards at approximately 7 times normal speed Press PLAY button to return to normal playback Note When you engage F F button or REW button the picture will have some interference or noise This is normal during search mode To Play Ba...

Page 38: ...pear Note When double speed playback is activated both the picture and sound are played back at twice the normal speed This will cause noise lines to appear on the picture and the sound to become warbled With some tapes the width of the noise band may vary or noise may flow Note With some TVs the synchronization may unlock and the picture may fluctuate or the picture may become black and white ...

Page 39: ...nd Date Automatic Date Recording This option records the date automatically once a day at the beginning of recording for ten seconds Note The camcorder records the same date when the cassette is replaced you select AUTO and date display again the recording is less than 10 seconds long Note If the date changes while recording continues over 10 seconds the new date is recorded for about 10 seconds t...

Page 40: ...ears about 10 seconds after recording is started Note When TITLE and date display is selected the title and date disappear about 10 seconds after recording is started Using the Power Zoom The power zoom W control widens the picture moving the subject farther away while the power zoom T control brings the subject closer narrowing the picture If ZOOM appears at the left of the viewfinder the digital...

Page 41: ...m T and W controls When ZOOM is not displayed in the viewfinder normal zoom functions resume Using the INST ZOOM Instant Zoom Button The instant zoom feature activates the digital zoom to magnify the subject 1 5 times regardless of zooming engaged by the power zoom T and W controls Press the INST ZOOM button I ZOOM appears at the left of the viewfinder and the picture is magnified 1 5 times Note T...

Page 42: ...simultaneously to return to auto focus The auto focus will not work under the following conditions and you must focus manually Objects outside the center of the viewfinder Objects at different distances in the center of the viewfinder Brightly lit objects such as a neon light objects lit by spotlight etc Objects behind water dappled or dusty glass Objects with little difference in light reflection...

Page 43: ...ontrol to zoom to the picture you want the picture may fall out of focus when actual recording starts 3 Press the Focus control F far or N near button until the subject is in focus 4 Use the power zoom W control to zoom back to the picture you desire Note To return to auto focus press the FOCUS control buttons and the FOCUS disappears from the viewfinder Using Instant Review Use this feature to vi...

Page 44: ...ses on the subject automatically Check your lighting as it tends to be insufficient when filming close up Date Search The date search function memorizes the start and end positions of recordings you made on a specific day so you can easily locate those positions later as long as the cassette is left in the camcorder Note Be sure that the date and time are set 1 Attach a power source and slide the ...

Page 45: ...o a VCR to copy your or a friend s home 8mm recordings to VHS Camcorder to VCR Connection Illustration 1 Connect your camcorder to the VCR following Playing Back Your Recording on page 26 2 Turn on your VCR and place it in the camcorder input mode consult your VCR manual for details Operate the television as you normally do to see the signal coming from the VCR 3 Hold down the red button of the CA...

Page 46: ... 0 00 00M This feature helps in locating a specific point in the tape to which you wish to return An example might be that you have recorded some tape that you have already watched you continue recording but do not care to watch the tape you recorded earlier The memory feature returns you to the beginning of the most recent recording 1 Press the DISPLAY button on the remote control so the linear t...

Page 47: ... Create titles easily and personalize your recordings while keeping a permanent visual record of what is contained on a tape The camcorder can store a title in its memory A title stored in memory can be displayed and recorded at any time A title contains two lines of up to 16 characters per line The camcorder contains 47 different characters for creating a title When creating and recording a title...

Page 48: ... control to store the title in memory and remove the title graphics from the viewfinder Note As long as the correct current time can be displayed the title is held in memory Correcting Errors 1 Press the TITLE ON OFF button on the remote control 2 Use the STOP button to select the character to be corrected 3 Use the F FWD or the F F on the camcorder and REW buttons to correct the character 4 Press...

Page 49: ...aterial which will happen when you record a title on a previously recorded tape Recording a Created Title while Transferring a Tape 1 Connect the camcorder to the VCR p 26 2 Turn on the VCR and set it to record Hold down the red button on the CAM OFF VIDEO switch while sliding the switch to VIDEO Press PLAY on the camcorder 3 Press the TITLE ON OFF button on the remote control at the point on the ...

Page 50: ...e PLAY button This places the camcorder in A V DUB pause mode 9 Press the PAUSE START STOP button The audio video dubbing starts When the linear time counter reaches 0 00 00M the camcorder stops automatically recording only the portion of the tape that you selected Note If the camcorder is in AV DUB pause or STILL mode for more than 5 minutes the camcorder stops automatically to protect the tape N...

Page 51: ... VCR and press the VCR SET button and hold it If the remote control code has been set the VCR channel is counted up automatically Note Your VCR should have an infrared remote control Note If the channel on the VCR does not change with the above operation you need to switch the remote control code of your VCR Refer to the VCR s instruction manual If the channel still does not change after you have ...

Page 52: ...copied at one time Note If sunlight or strong artificial light strikes the camcorder s infrared receiver the editing operation may not be possible Programmable Edit Hookup 1 Use the audio video output cable to connect the camcorder and VCR as illustrated and then connect the edit remote control to the camcorder Note If your VCR has two stereo AUDIO IN jacks connect the audio plug to the left chann...

Page 53: ...ginning of the next segment and resumes playback The recording VCR is automatically released from the record pause mode and resumes recording It continues recording and pausing until all the programmed segments are edited 12 When simple programmable edit is finished the camcorder will enter the stop mode and the VCR will enter the record pause mode Note If you make a mistake during programming sta...

Page 54: ...D ELECTRIC SHOCK 1 Slide the CAM OFF VIDEO switch to OFF 2 Connect a fully charged batteries or the AC adapter charger Loading Batteries Camcorder Batteries p 15 Using Alternative Power Sources p 17 3 Slide the DC camera light onto the DC camera light shoe with the camera light lens facing the same direction as the camcorder s lens 4 Hold down the red button on the CAM OFF VIDEO switch while slidi...

Page 55: ...alved Removing the DC Camera Light Depress the light to release the tab from the hook and then move the light in the direction of the arrow as shown in the figure Replacing the DC Camera Light Bulb 1 Turn the front of the case counter clockwise and remove it 2 Remove the bulb by pulling it out through the opened case 3 Install the new bulb by aligning the notch in the rim of the bulb s base with t...

Page 56: ...e the risk of fire Viewfinder Bright Color and Tint Control This small BRIGHT COLOR and TINT controls are set at the factory and should require no adjustment If they ever require adjustment use a plastic screwdriver Make the adjustments with caution to prevent damaging the miniature controls ...

Page 57: ...eaned if dust dirt or other foreign matter adheres to it 1 Rotate and remove eye cup 2 Clean the picture tube face and lens To prevent scratching use a soft non abrasive cloth swab or lens cleaning paper 3 Align the reference marks and rotate the eye cup in the direction of the arrow Periodic Maintenance A precision electromechanical device the Hitachi VM E230A requires maintenance after a period ...

Page 58: ...n the cassette Push the cassette holder embossed PUSH LOCK to close it Slide the CAM OFF VIDEO switch to CAM Picture is out of focus Make sure that FOCUS does not appear in the viewfinder If it is displayed press FOCUS Control buttons to erase it Auto Focus does not operate if a special effects filter is attached The created title does not appear Insert the clock battery then create a title Do not...

Page 59: ...ng the playback button to restore the normal playback mode The sound also returns to the normal speed Noise appears in the picture during double speed playback but this does not indicate a fault BATTERY CONDITION Symptom Check Point Correction The indication in the electronic viewfinder flashes to indicate battery is discharged Try another battery or charge the battery NO OPERATION IS ACCEPTED Sym...

Page 60: ...ording Dimensions 3 11 16 W x 4 3 4 H x 8 5 16 D 94mm x 120mm x 211mm Weight 1 87 lbs approx 850g without battery pack lens hood lens cap or cassette Operating temperature 32 F 104 F 0 C 40 C Storage temperature 4 F 140 F 20 C 60 C Video Recorder Specifications Format 8mm Record playback Two video record playback heads Video signal EIA standard NTSC color Tape speed 14 3mm sec Video output 1 0Vp p...

Page 61: ... service Hotline operator will direct you to the Hitachi Authorized Service Facility nearest you Just present proof of purchase and or delivery receipts to the Hitachi Authorized Service Facility and service will be rendered in accordance with the terms of the limited warranty as stated on your warranty card or operating guide Should you have any questions regarding in warranty service operation o...

Page 62: ...l the toll free number 8 00AM 6 00PM East Coast Time workdays 1 800 995 4500 By Mail Complete the order form on page 59 Detach it and send it to the following address with your credit card information money order or check in U S currency and payable to HiTRON Inc HiTRON is a subsidiary of Hitachi Home Electronics America Inc HiTRON Inc 675 Old Peachtree RD Suwanee GA 30174 Please allow two to thre...

Reviews: