SETUP
PLA
YB
A
C
K
FUNCTION
– 4 –
EN
Set the clock accurately for proper automatic timer
recording.
• Once the clock is set by Auto Clock Setting, the VCR will
get automatically the current time from your local PBS
channel, using a new service called Extended Data
Service (EDS) whenever turning the VCR off, at
12:00AM and 12:00PM. If the clock’s time is incorrect for
some reason or you want to reset the clock immediately,
following “AUTO CLOCK SETTING”.
• If you want to set the clock manually, follow “MANUAL
CLOCK SETTING”.
• If you want to use DAYLIGHT-SAVINGS TIME feature,
follow “DAYLIGHT-SAVINGS TIME”.
• Confirm that the antenna connections are correct and
the CHANNEL PRESET completes first.
•
Use the remote control for this procedure.
• Be sure to check that the “PWR.” and the “VCR”
indicators are both on.
• Turn on the TV and set the TV channel 3 or 4. Now set
the CH3/CH4 switch to the VCR to match the channel
selected on the TV.
• If the VCR is connected directly to a cable converter box,
the cable converter box must turn on and select the local
PBS channel itself. Then, the VCR must be set to the
output channel of the cable converter box (usually
channel 3 or 4), to be able to set up and automatically
correct the clock.
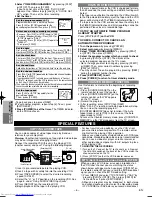
CLOCK SET UP
1 Press [MENU]
until the main menu appears.
2 Select "CHANNEL SET UP"
by pressing [PLAY] or
[STOP]. Then, press [F.FWD].
3 Select "AUTO SET UP"
by pressing [PLAY] or [STOP].
Then, press [F.FWD]. After scanning, the tuner stops on
the lowest memorized channel.
TO PRESET THE CHANNEL AGAIN
TO CHANGE THE ON-SCREEN LANGUAGE
When the VCR automatically program the tuner to scan only
the channels you receive in your area, some channels may be
skipped due to weak signal. You can manually add or delete
the channel in the VCR memory.
1 Press [MENU]
until the main menu
appears.
2 Select "CHANNEL SET UP"
by pressing
[PLAY] or [STOP]. Then, press [F.FWD].
3 Select "MANUAL SET UP"
by pressing
[PLAY] or [STOP]. Then, press [F.FWD].
4 Enter the desired channel number
by
pressing [PLAY] or [STOP].
5 Add or Delete it from memory
by pressing [F.FWD] or
[REW] so that "ADD" or "DELETE" flashes on the TV
screen accordingly.
6 Exit the Preset mode
by pressing [EXIT/RESET].
TO ADD/DELETE CHANNELS
- MENU -
TIMER PROGRAMMING
AUTO REPEAT
CHANNEL SET UP
CLOCK SET
LANGUAGE SELECT
AUDIO OUT
TV STEREO
SAP
[OFF]
[ON]
1 Press [MENU]
until the main menu appears.
2 Select "LANGUAGE SELECT"
by pressing [PLAY] or
[STOP]. Then, press [F.FWD].
3 Select "ENGLISH" or "ESPAÑOL"
by pressing [PLAY]
or [STOP]. Then, press [EXIT/RESET].
TO SELECT A DESIRED CHANNEL
You can select the desired channel by using [CH
]
or directly pressing [Number] on the remote
control.
Note for using the Number buttons:
• When selecting cable channels which are higher than
99, press [+100] first, then press the last two digits.
• You must precede single-digit channel numbers with a
zero (For example: 02, 03, 04 and so on).
( )
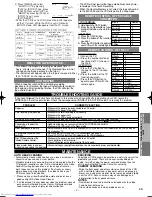
AUTO CLOCK SETTING
1 Select main menu
by pressing [MENU].
(If the clock is not set, the CLOCK SET menu appears
first. In this case, follow step [3].)
2 Select "CLOCK SET"
by pressing [PLAY] or [STOP].
Then, press [F.FWD].
3 Select “AUTO CLOCK”.
If [ON] appears beside “AUTO
CLOCK”, press [F.FWD].
(If it is not, press [PLAY] or [STOP] to
point to “AUTO CLOCK”. Then, press
[F.FWD] twice.)
4 Select the PBS channel
by pressing
[PLAY] or [STOP] . Then, press
[F.FWD]. Next, press the number
buttons or [PLAY] or [STOP] to select
the PBS channel.
(If you leave it set to
“AUTO” when the clock is not set yet, the VCR read your
local PBS channel once time every 10 minutes until the
VCR get the current time.)
NOTE:
• When your local PBS channel is incorrect or is not received,
the clock cannot be set automatically. In this case, follow
“MANUAL CLOCK SETTING”.
MANUAL CLOCK SETTING
1 Select main menu
by pressing [MENU].
(If the clock is not set, the CLOCK SET menu appears
first. In this case, follow step [3].)
2 Select "CLOCK SET"
by pressing [PLAY] or [STOP].
Then, press [F.FWD].
3 Set the clock.
Press [PLAY] or [STOP]repeatedly.
Then, press [F.FWD].
Press [PLAY] or [STOP] repeatedly.
Then, press [F.FWD].
The day of the week will appear automatically.
Press [PLAY] or [STOP] repeatedly.
Then, press [F.FWD].
Press [PLAY] or [STOP] repeatedly.
Then, press [F.FWD].
Press [PLAY] or [STOP]
repeatedly.
Press [PLAY] or [STOP] repeatedly.
Then, press [F.FWD].
Set the month
Set the day
Set the year
Set the hour
Set the minute
Set the AM
or PM
CLOCK SET
MONTH DAY YEAR
03 / 18 MON 2002
HOUR MINUTE AM/PM
05 : 40 PM AM
PM
• To go back one step, press [REW].
4 Start the clock
by pressing [EXIT/RESET] or
[F.FWD].
DAYLIGHT-SAVINGS TIME
When Daylight-Savings Time is ON, the clock’s time will
change automatically as follows:
First Sunday of April : from 2:00 AM to 3:00 AM
Last Sunday of October : from 2:00 AM to 1:00 AM
1 Select main menu
by pressing [MENU].
(If the clock is not set, the CLOCK SET menu appears
first. In this case, follow step [3].)
2 Select "CLOCK SET"
by pressing [PLAY] or [STOP].
Then, press [F.FWD].
3 Set “D.S.T.” to [ON]
by pressing
[PLAY] or [STOP]. Then, press
[F.FWD].
TO CANCEL THE DAYLIGHT-SAVINGS
TIME
Repeat steps [1] to [3]. Then, press
[F.FWD] sp that [OFF] appears on the
menu. Press [RESET/EXIT] to return to TV mode.
CLOCK SET
AUTO CLOCK
MANUAL
D.S.T.
[ON]
[ON]
AUTO CLOCK
AUTO
MANUAL
[ON]
CH - -
HB4P0.QX3 02.5.14 10:22 PM Page 4


