background image

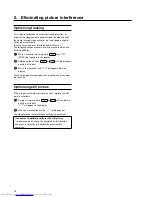
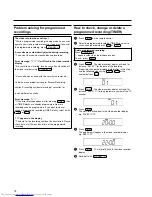
Optimising tracking

This video recorder has an automatic tracking function. In
order for the video heads to optimally read the video track of
the newly inserted video cassette, the tape speed is slightly
corrected automatically.
In some cases however, interference will still occur.
The following section will explain how to manually adjust the
tracking settings.

1

While a cassette is playing, hold

;

P+

until '

TRAC

'

(TRACking) appears in the display.

2

Hold down the buttons

;

P+

or

P-

=

until the playback

quality is at its best.

3

Wait a few seconds, until '

TRAC

' disappears from the

display.

These selected picture settings will not change until you eject
the cassette.

Optimising still picture

If the still picture vibrates vertically, you can improve the still
picture as follows:

1

During still picture, hold

;

P+

or

P-

=

until the picture

quality is at its best.
'

JITT

' will appear in the display.

2

When you release the button, '

JITT

' will disappear.

The video recorder will store these settings automatically.

I cannot reach optimal quality for the still picture

* Interference which cannot be alleviated by this function
can occur in cassettes of poor quality or camcorder
cassettes .

5.

Eliminating picture interference

14

Summary of Contents for VTMX100EUK

Page 1: ...Videorecorder VTMX100EUK Operating instructions ...

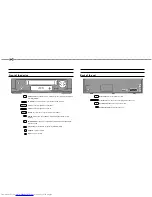
Page 2: ...cture To stop the tape and show a still picture INDEX E Index search In combination with H I to search for previous or next recording on the cassette G Playback To play a cassette H Rewind During STOP and STANDBY rewind during PLAYBACK reverse scanning I Forward wind During STOP and STANDBY forward wind during PLAYBACK forward scanning h Pause Stop To stop the tape except during TIMER recording P ...

Page 3: ...elected at this moment H Rewind During STOP and STANDBY rewind during PLAYBACK reverse scanning I Forward wind During STOP and STANDBY forward wind during PLAYBACK forward scanning h Pause Stop To stop the tape except during TIMER recording G Playback To play a cassette J Eject To eject a cassette Back of the set 4 Mains socket To connect the mains cable EXT 1 AV 1 Scart socket 1 To connect the TV...

Page 4: ...propriate collection points C Please make use of the facilities available in your country for disposing of the packaging of the video recorder in a way that helps to protect the environment C This electronic device contains many materials that can be recycled Please enquire about the possibilities for recycling your old device B Make sure that air can circulate freely through the ventilation slots...

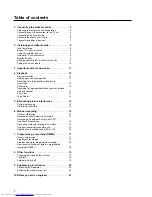
Page 5: ...on without picture forward wind and rewind 13 Easy View 13 Tape Finder 13 5 Eliminating picture interference 14 Optimising tracking 14 Optimising still picture 14 6 Manual recording 15 General information 15 Recording without automatic switch off 15 Recording with automatic switch off OTR One Touch Recording 15 Preventing accidental erasing of cassettes 15 Lining up recordings assemble cut 16 Sele...
Page 6: ...uld be a 3A fuse If your new plug does not contain a built in fuse please do not use any fuses in your fusebox with a rating of more than 5A Please destroy the old cut off plug so that it cannot be used elsewhere 1 Connect the blue cable neutral N to the terminal in the plug which is marked with the letter N or coloured black 2 Connect the brown cable live L to the terminal in the plug which is ma...

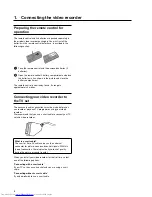
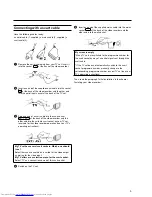
Page 7: ...corder to the TV set The necessary cable connections must be made before you can record or playback TV programmes using your video recorder We recommend that you use a scart cable to connect your TV set and video recorder What is a scart cable The scart or Euro AV cable serves as the universal connector for picture sound and control signals With this type of connection there is practically no loss...

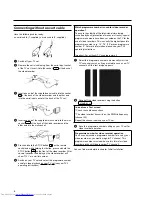
Page 8: ...ns My TV set has several scart sockets Which one should I use Select that scart socket which is suited for the video output as well as for the video input My TV offers me a selection menu for the scart socket Select TV as a connection source of this scart socket 4 Switch on the TV set 5 Insert one end of the supplied mains cable into the mains socket 4 at the back of the video recorder and the oth...

Page 9: ...er is used for video recorder operation To ensure the stability of the television picture during cassette playback prevention of waves or streaks special programme numbers have been set aside on the TV for the use of video recorders This is usually the highest possible programme number e g 12 16 99 or even programme number 0 For more information please see your TV s operating instructions Importan...

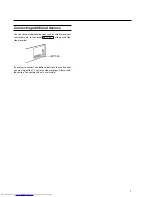
Page 10: ...h as satellite receivers camcorders etc to the socket EXT 1 AV 1 at the back of the video recorder If you want to connect an additional device to the scart socket you must adjust the TV set to the video recorder Please read the section Connecting without a scart cable 7 ...

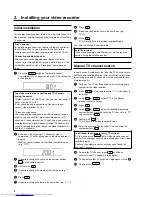
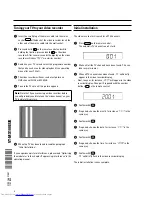
Page 11: ...he year with the number buttons 0 9 on the remote control 4 Confirm with OK 5 If required change the month in the same way e g M 01 6 Press OK 7 If required change the date in the same way e g D 01 8 Press OK 9 If required change the time in the same way e g 20 00 0 Press OK OK will briefly flash in the video recorder display The initial installation is now complete Satellite receiver If you are c...

Page 12: ...etween the TV picture and video recorder picture with VTR TV But this only works when you use a scart cable to connect the video recorder to your TV set and your TV set responds to this switch over You can also use VCR TV on the video recorder Sorting and clearing TV channels manually After you have performed the automatic channel search you may not agree with the sequence in which the individual ...

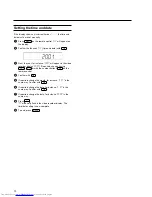
Page 13: ...e video recorder display 2001 If required change it using P P or with the number buttons 0 9 on the remote control 4 Confirm with OK 5 If required change the month for instance M 01 in the same way Confirm with OK 6 If required change the date for instance D 01 in the same way Confirm with OK 7 If required change the date for instance 20 00 in the same way 8 Press OK OK will briefly flash in the v...

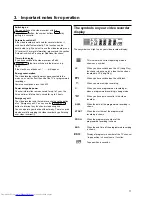
Page 14: ...remote control have the option of an Emergency exit You can use the STANDBY m button to interrupt any function or step during use You can operate your device without worry There is no risk whatsoever of damaging the video recorder by performing user steps incorrectly The symbols on your video recorder display These symbols can light up on your video recorder display This is where the current opera...

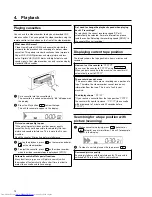
Page 15: ...Many functions e g pause still picture search switch themselves off automatically after a short time in order to protect the cassette and to save energy Do I need to change the playback speed when playing back LP recordings For playback the correct recording speed SP will automatically be selected For more information please read the section Selecting the recording speed SP LP in the chapter Manua...

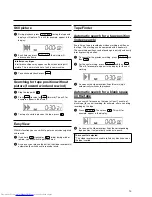
Page 16: ...y switch back to rewind or wind Tape Finder Automatic search for a tape position index search Every time a tape is recorded an index marking is written on the tape This marking can be compared with a bookmark These marked positions can be found again quickly and easily later by pressing a button 1 To search for the previous marking press INDEX E and then H 2 For the next marking press INDEX E and ...

Page 17: ...ity is at its best 3 Wait a few seconds until TRAC disappears from the display These selected picture settings will not change until you eject the cassette Optimising still picture If the still picture vibrates vertically you can improve the still picture as follows 1 During still picture hold P or P until the picture quality is at its best JITT will appear in the display 2 When you release the bu...

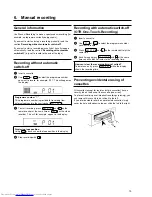
Page 18: ...order This will for example appear in the display P 01 Displaying tape position Using OK you can show the tape position in the display 4 Stop recording with h Recording with automatic switch off OTR One Touch Recording 1 Insert a cassette 2 Use P or P to select the programme number you want to record 3 Press REC OTR n and A on the remote control at the same time 4 Each time you press REC OTR n and...

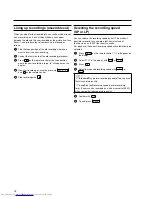
Page 19: ...essing REC OTR n and A on the remote control 5 Stop recording with h Selecting the recording speed SP or LP You can reduce the recording speed by half This makes it possible to record for example eight hours instead of four hours on an E240 four hour cassette For playback the correct recording speed will automatically be selected 1 Press MENU on the remote control CLK will appear on the display 2 ...

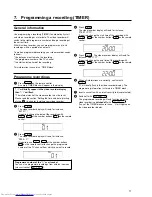
Page 20: ...uttons 0 9 on the remote control 01 3 Press TIMER The video recorder display will read for instance PROG 01 If required use P P or the number buttons 0 9 on the remote control to change the programme number of the TV channel from which you want to record 01 Programme number of the E1 scart socket You can also programme recordings from external sources via scart socket EXT 1 AV 1 4 Press TIMER The ...

Page 21: ...MER block select it with P or P ERR appears in the display The data for the recording could not be transferred Please check date start time and end time of the programmed recording How to check change or delete a programmed recording TIMER 1 Press TIMER on the remote control 2 Select the programmed recording TIMER you want to check change or delete with P or P Delete programmed recording Press CLE...

Page 22: ... will switch itself back to AUTO automatic switch over Child lock You can prevent unauthorised use of your video recorder with this function When the child lock is active the buttons on the front of the device are blocked will not function You can make programmed recordings while the child lock is on 1 Hold down the STANDBY m button on the video recorder In addition hold down the SELECT button on ...

Page 23: ... M583 or a similar number The video recorder will now transmit a test image on UHF channel 35 Frequency 583MHz 4 Change the modulator frequency with the 0 9 number buttons on the remote control 5 Tune in the TV set to the new modulator frequency channel 21 69 shown in the video recorder display 6 Keep pressing OK until OK appears in the display Optimising the modulator is now complete Switching th...

Page 24: ...ing on the cassette change the cassette You have selected the wrong programme number on the TV for playing cassette on the TV select the correct programme number for the video recorder The cable connecting the TV set and the video recorder has come loose check the cable Poor picture quality when you play a cassette Your TV set is not properly adjusted The cassette is badly worn or of poor quality ...

Page 25: ...t serial number is not removed or altered This guarantee does not apply to products acquired second hand or for commercial or communal use This guarantee does not extend to user control adjustments battery replacement and aerial adjustment Any parts replaced under guarantee shall become the property of HITACHI HOME ELECTRONICS EUROPE LTD Please note that evidence of the date of purchase will be re...

Page 26: ... ITALY Tel 39 02 487861 Tel 39 02 38073415 Servizio Clienti Fax 39 02 48786381 2 Email customerservice italy hitachi eu com HITACHI Europe AB Box 77 S 164 94 Kista SWEDEN Tel 46 0 8 562 711 00 Fax 46 0 8 562 711 13 Email csgswe hitachi eu com HITACHI EUROPE S A S Lyon Office B P 45 69671 BRON CEDEX FRANCE Tel 04 72 14 29 70 Fax 04 72 14 29 99 Email france consommateur hitachi eu com HITACHI EUROPE...

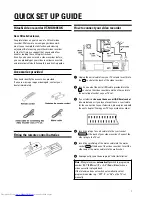
Page 27: ...o recorder 2 Insert one end of the aerial RF cable provided into the 3 socket on the video recorder and the other end into the aerial input socket on your TV set 3 If your television does not have a scart AV Euro socket shown below or if you do not want to use a scart cable for the connection to your television please proceed with the next chapter Tuning your TV to your video recorder 4 Insert the...

Page 28: ...lation If you experience picture interference please read Optimising the modulator in the chapter Suppressing interference in the operating manual Initial installation The video recorder will search for all TV channels 1 Press MENU on the remote control The automatic TV channel search starts 2 Wait until all the TV channels have been found This can take several minutes 3 When all TV channels have ...

Page 29: ...47 Milano Italia ITALY Tel 39 02 487861 Tel 39 02 38073415 Servizio Clienti Fax 39 02 48786381 2 Email customerservice italy hitachi eu com HITACHI Europe AB Box 77 S 164 94 Kista SWEDEN Tel 46 0 8 562 711 00 Fax 46 0 8 562 711 13 Email csgswe hitachi eu com HITACHI EUROPE S A S Lyon Office B P 45 69671 BRON CEDEX FRANCE Tel 04 72 14 29 70 Fax 04 72 14 29 99 Email france consommateur hitachi eu co...

Reviews: