14
EN
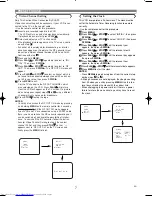
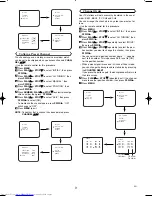
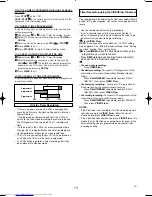
Confirm the channel number, then, press
F.FWD/
B
.
• If your local channel information is programmed in VCR’s memo-
ry, your local channel number appears automatically.
• If your local channel information is not programmed in VCR’s
memory, “– –” or an incorrect channel number may appear. In this
case, press
PLAY/
o
o
or
STOP/
L
L
repeatedly until your desired
channel number appears. Then, press
F.FWD/
B
.
• When you select the channel number using
PLAY/
o
o
or
STOP/
L
L
, it memorises in VCR’s memory.
Press
PLAY/
o
o
or
STOP/
L
L
repeatedly until the desired
tape speed appears.
Press
MENU
to exit.
Press
STANDBY
to activate the timer.
The
w
indicator on the display comes on.
7
6
5
4
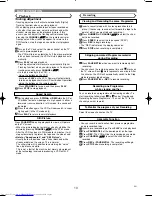
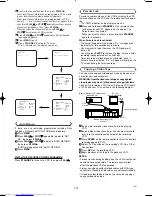
Auto Return
If there are any remaining programmes including Daily,
Everyday, & Weekly, AUTO RETURN will not operate.
Press
MENU.
Press
PLAY/
o
o
or
STOP/
L
L
repeatedly to point to “SET
UP”, then press
F.FWD/
B
.
Press
PLAY/
o
o
or
STOP/
L
L
to point to “AUTO RETURN”,
then press
F.FWD/
B
.
[AUTO] will appear next to “AUTO RETURN”.
Press
MENU.
WATCH THE RECORDED TIMER PROGRAMME
Press
STANDBY
to turn on the VCR, then press
PLAY/
o
o
.
4
3
2
1
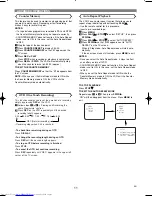
Parents Lock
Parents Lock prevents use of the VCR by making the VCR
feature buttons on the VCR and the remote control inopera-
tive.
• The “PWR” indicator on the display comes on.
Press and hold down
STANDBY
on the remote control
for 5 seconds until “PL” appears on the display. The
Parents Lock is activated.
When you want to cancel it, press and hold
STANDBY
again for 5 seconds.
When Parents Lock is activated:
• The time will appear on the display. “P.L.” will appear on
the display for two seconds every minute.
• You may insert a tape. However, the VCR power will
remain off.
• You may press
EJECT
to remove the tape (unless a timer
recording is programmed or has finished.)
• Timer recording will take place as scheduled, even if
Parents Lock is activated. “P.L.” will appear steadily on the
TV screen during the timer recording.
1
PlusCode
N o . : - - - - - - - - -
PlusCode
N o . : 1 2 3 4 5 6 7 8 9
TIMER NUMBER 1
START
END
DATE
CHANNEL
SPEED
06/05 SA
19:30
20:30
16
SP
TIMER NUMBER 1
START
END
DATE
CHANNEL
SPEED
06/05 SA
19:30
20:30
16
SP
TIMER NUMBER 1
START
END
DATE
CHANNEL
SPEED
06/05 SA
19:30
20:30
16
SP
You can make copies of videotapes made by friends or rel-
atives for your own enjoyment.
WARNING: Unauthorized recordings of copyrighted
video tapes may be an infringement of copyright laws.
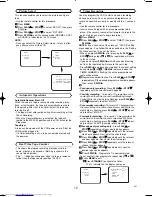
Connect the recording VCR (this unit), playing VCR (anoth-
er VCR) and your TV as outline in the following diagram.
RF OUT
AV2 (DECODER)
AV1 (TV)
AERIAL
to RF OUT
to aerial
socket
[Source (Playing) VCR <Monaural>]
(another VCR)
to 21-Pin
Scart Jack
[TV set]
(Use for monitoring)
[Editing (Recording) VCR]
(this unit)
Coaxial cable (supplied)
Copying a Video Tape
Insert a pre-recorded video cassette into the playing
VCR.
Insert a blank video cassette, or one you want to record
over, into the cassette compartment of the recording
VCR.
Press
SPEED
on the remote control to select the desired
recording speed (SP/LP).
Select “AV2” position on the recording VCR. See “Other
Connections”.
Press
REC
on the recording VCR.
Begin playback of the tape in the playback VCR.
6
5
4
3
2
1
NOTES:
• For best results during dubbing, use the VCR’s front panel
controls whenever possible. The remote control might
affect the playback VCR's operation.
• Always use video-quality shielded cables with RCA-type
connectors. Standard audio cables are not recommended.
• If video or colour fades in and out, you may be copying a
copy guarded video tape.
Summary of Contents for VTMX210EUK
Page 1: ...USERS GUIDE VTMX210EUK ...


