--- 27 ---
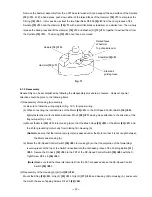
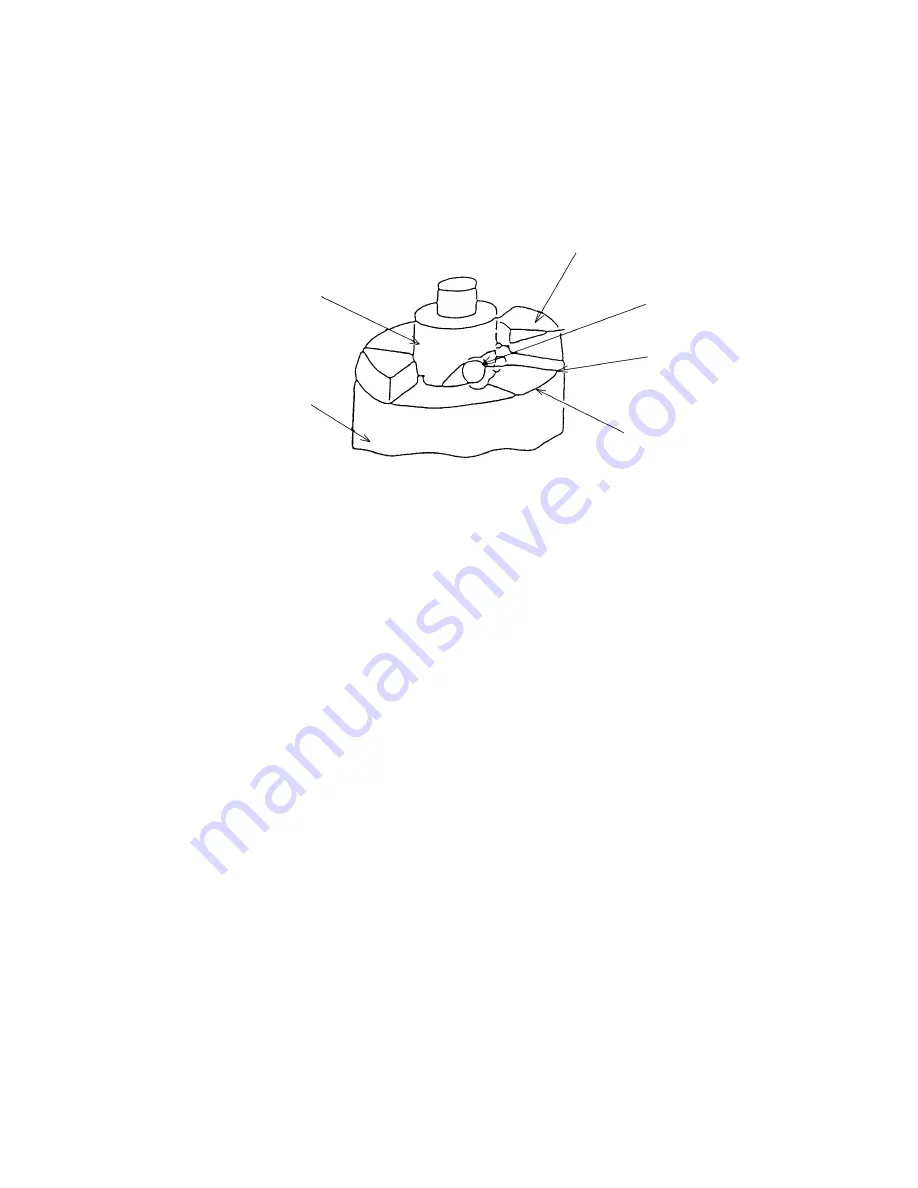
Remove the hammer assembly from the J-297 base for washer (S) and support the end surface of the Spindle
[15] <13>. With a hand press, push down either of the raised faces of the Hammer [10] <7> to compress the
Spring [12] <10>. In this position, extract the two Steel Balls D5.556 [9] <6> from the cam grooves of the
Spindle [15] <13> and the Hammer [10] <7> with a small flat-blade screwdriver or a similar tool. Then, slowly
release the hand press and lift the Hammer [10] <7> and Washer (S) [13] <11> together to extract them from
the Spindle [15] <13>. The Spring [12] <10> can then be removed.
Steel ball
guide groove
Spindle [15] <13>
Hammer [10] <7>
Raised faces
of hammer
Top of spindle cam
Steel Ball [9] <6>
Fig. 11
9-1-2. Reassembly
Reassembly can be accomplished by following the disassembly procedures in reverse. However, special
attention should be given to the following items.
(1) Reassembly of Housing (A) assembly
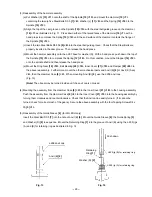
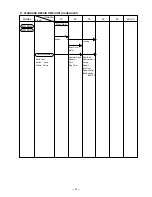
(a) Be sure to follow the wiring diagram (Fig. 12-1) for proper wiring.
(b) When connecting the internal wires of the Motor [23] <21> to the DC-Speed Control Switch [30] <28>,
tightly fasten them with the Machine Screw M3 x 5 [29] <27> paying close attention to the direction of the
flag terminal (Fig. 12-2).
(c) Mount the Motor [23] <21> into Housing (A) so that the Brush Caps [25] <23> of the Motor [23] <21> and
the rib for preventing motor body from rotating fit in Housing (A).
(Note) Make sure that the internal wire (purple) is passed under the Motor so that it is not caught between
the Motor and Housing (A).
(d) Mount the DC-Speed Control Switch [30] <28> to Housing (A) so that the projection of the forwarding/
reversing lever at the top of the Switch is inserted into the U-shaped groove of the Pushing Button [31]
<29>. Secure the Fin Ass'y [32] <30> to the FET of the DC-Speed Control Switch [30] <28> with the S-
Tight Screw D3.5 x 6 [36] <34>.
(Note) Make sure that the three internal wires from the FET are passed above the DC-Speed Control
Switch [30] <28>.
(2) Reassembly of the Housing (A).(B) Set [28] <26>
Mount the Strap [35] <33>, Grip (F) [33] <31>, Grip (R) [37] <35> and Housing (B) to Housing (A), and secure
them with the seven Tapping Screws D4 x 20 [26] <24>.
Summary of Contents for WH 8DH
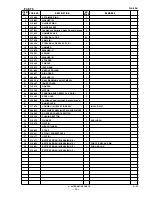
Page 35: ... 32 Assembly Diagram for WH 8DH ...


