INSTRUCTION MANUAL
ART.-NO.: 4612112 | 4612212 | 4612312 | 4612412 | 4612512 | 4612812
© Holthoff Trading GmbH
HMF
.DE | service@hmf.DE
EN
: KEY SAFE WITH ELECTRONIC LOCK
1.
Important notes about operation / exclusion of liability
Please read carefully this manual before activating the lock. We assume no liability, neither for malfunctions caused by
faulty changing, use of force or improper handling, nor in case of property or pecuniary damages due to inappropriate
locking of the safe.
Keep the emergency key in a safe place, do not put them into the safe!
2. Commissioning / emergency opening
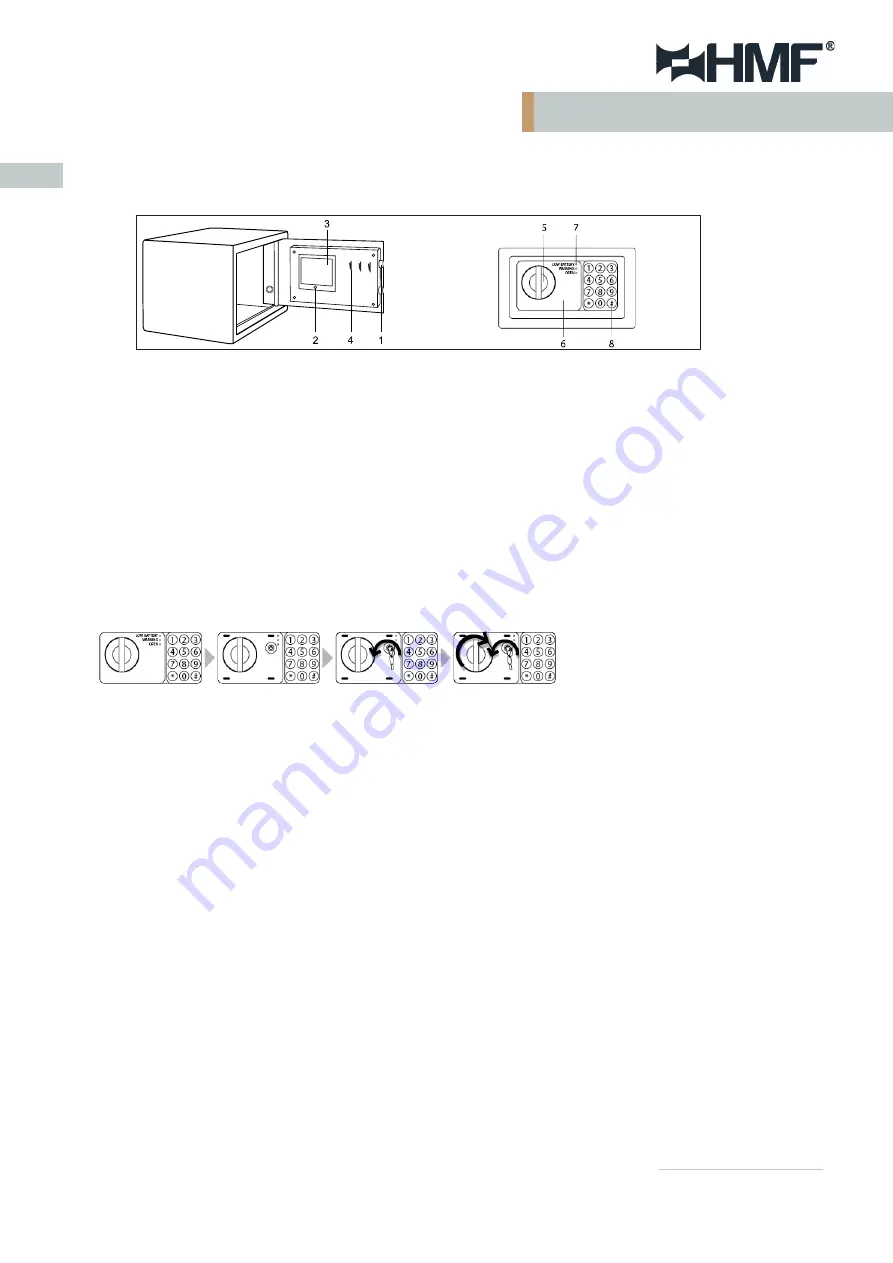
For the first opening or emergency opening, use the attached emergency key. Remove the emergency lock cover (6)
and unlock the lock counterclockwise. Rotate the knob (5) clockwise to open the door.
3. Inserting the batteries
3.1 Leave the safe door open, open the battery compartment cover (3) of the vault and insert four AA batteries into the
battery compartment (observe polarity).
Attention!
If the red and green LEDs light up simultaneously, the batteries are low and fresh batteries should be
inserted.
4. Storing the personal code
4.1 Press the reset button (2) on the inside of the door.
4.2 Now start entering your personal code (3 - 8 digits) as soon as the yellow LED lights up. Confirm the entry with “*” or
“#”.
4.3 If the yellow LED flashes and three beeps follow, the new code has not been saved successful.
Please repeat the procedure.
5. Closing the vault
Close the door and turn the knob (5) counterclockwise. Now the door is locked.
6. Open the vault with your personal code
6.1
Enter your stored code (3 - 8 digits). When you press a button, a beep sounds and the yellow LED flashes.
6.2
Confirm the entry with “*” or “#”. The green LED lights up.
6.3 Rotate the knob (5) clockwise and pull the door to you within 5 seconds.
Attention!
The preset code is “159”. You can use this if problems occur with the electronic lock. These are indicated by
three flashes of the yellow LED on the electronic lock.
1. Bolzen
2. Reset Knopf
3. Batteriefach
4. Aufbewahrungshaken
5. Drehknauf
6. Abdeckung des Notschlosses
7. LEDs
8. Bestätigungsknopf
Figure 1
Figure 2
Figure 3


