background image


14


M2218


IMPORTANT SAFETY INFORMATION 
 

This product has been designed for home use only and built for optimum safety. Please note the following safety precautions: 

1.  Before  starting  any  exercise  program  you  should  consult  your  doctor  to  determine  if  you  have  any  physical  or  health 

conditions  that  could  create  a  risk  to  your  health  and  safety,  or  prevent  you  from  using  the  equipment  properly.  Your 
doctor's  advice  is  essential  if  you  are  taking  medication  that  affects  your  heart  rate,  blood  pressure  or  cholesterol  level. 
This is especially important for persons over the age of 35, pregnant women, or those with pre-existing health problems or 
balance impairments.  

2.  Before using this equipment to exercise, always do stretching exercises to properly warm up.  
3.  Be  aware  of  your  body's  signals.  Incorrect  or  excessive  exercise  can  damage  your  health.  Stop  exercising  if  you 

experience any of the following symptoms: pain, tightness in your chest, irregular heartbeat,  extreme shortness of breath, 
feeling  light  headed,  dizzy  or  nauseous.  If  you  do  experience  any  of  these  conditions  you  should  consult  your  doctor 
before continuing with exercise program. Injuries to health may result from incorrect or excessive training.  

4.  During exercises and after keep children and pets away from the equipment. 
5.  Use the equipment on a solid, flat level surface with a protective cover for 

your floor or carpet. Move  all sharp  objects. 

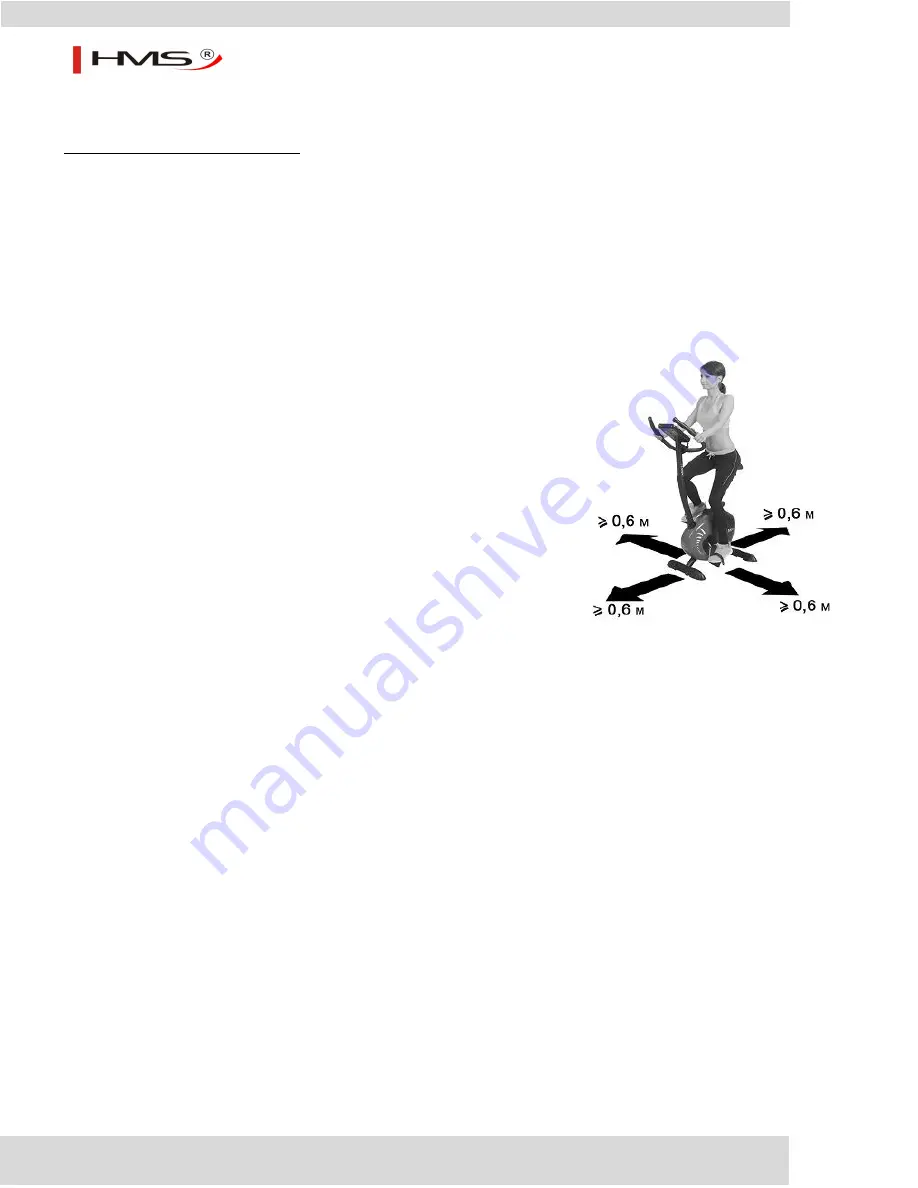
6.  Free area shall be not less than 0,6 m greater than the training area in the 

directions  from  which  the  equipment  is  accessed.  Free  area  must  also 
include  the  area  for  emergency  dismount. Where  equipment  is  positioned 
adjacent to each other the value of the free area may be shared.  

7.  Before  each  use,  visually  inspect  the  unit  including  hardware  and 

resistance bends. 

8.  Before  using  the  equipment,  check  if  the  nuts,  bolts  and  other  bends  are 

securely tightened. 

9.  Always  use  the  equipment  as  indicated.  If  you  find  any  defective 

components  whilst  assembling  or  checking  the  equipment,  or  if  you  hear 
any  unusual  noise  coming  from  the  equipment  while  using,  stop.  Do  not 
use the equipment until the problem has been rectified. 

10.  Do not insert any object into any openings. 
11.  Be aware of all regulation and constructions parts which may disturb during 

exercises. 

12.  The safety level of the equipment can only be maintained if it is regularly examined for damage and/or wear and tear.  
13.  Wear suitable clothing whilst using the equipment. Avoid wearing loose clothing which may get caught in the equipment or 

that may restrict or prevent movement. 

14.  The equipment has been tested and certified according to EN ISO 20957-1 under class H. It is not suitable for therapeutic 

use. 

15.  Care  must  be  taken  when  lifting  or  moving  the  equipment  so  as  not  to  injure  your  back.  Always  use  proper  lifting 

techniques and/or use assistance. 

16.  The equipment is designed for adult use only. Keep unsupervised children away from the equipment.  
17.  Assemble this unit as described in this manual. Use only parts from the set. Check all parts with the part list. 


WARNING:  READ ALL INSTRUCTIONS BEFORE USING ANY FITNESS EQUIPMENT. WE ASSUME NO RESPONSIBILITY 
FOR PERSONAL INJURY OR PROPERTY DAMAGE CAUSED BY OR THROUGH THE USE OF THIS PRODUCT 


SPECIFICATIONS 

Weight 

– 26 kg 

Flywheel 

– 6,2 kg 

Dimensions 

– 89 x 55 x 131 cm 

Maximum  weight of user 

– 125 kg   


MAINTENANCE  

Your unit has been carefully designed to require minimum maintenance. To ensure this, we recommend that you do the following: 
keep your unit clean by wiping sweat, dust or other residue off with a soft, clean cloth after each use. Always make sure that the 
bands are secure and show no signs of wear. Regularly check the tightness of nuts and bolts. 
 

BREAKING 

Stop to pedal when you want stop the item. Elliptical bike M2218 does not acquire breaking system or emergency break 
 

TENSION ADJUSTMENT 

To reduce tension turn control into sign ”-” direction, to increase tension turn control into sign “+” direction. 

Summary of Contents for M2218

Page 1: ...INSTRUKCJA U YTKOWANIA MANUAL INSTRUCTION N VOD K OBSLUZE ROWER MAGNETYCZNY MAGNETIC BIKE MAGNETICK ROTOPED M2218...

Page 2: ...ie jest ca kowicie sprawne 9 Urz dzenie powinno by regularnie sprawdzane pod wzgl dem zu ycia i uszkodze tylko wtedy b dzie ono spe nia o warunki bezpiecze stwa Szczeg ln uwag nale y zwr ci na uchwyty...

Page 3: ...pek siode ka 1 zestaw 19 23 57 Przedni stabilizator k ka transportowe ruby 1 zestaw 32 22 57 Tylny stabilizator za lepki ruby 1 zestaw 2 3 5 4 6 5 8 Kierownica czujniki pomiaru pulsu wtyczka piankowe...

Page 4: ...z przewodem 1 45 Ko o z o yskiem 1 15 Przew d oporu 1 46 Stalowa tuleja 15x 10x18H 1 16 ruba imbusowa M8x20L 7 47 Wspornik ko a 1 17 Podk adka 12x 8 4x1 5T 11 48 Podk adka 1 18 Podk adka 19x 8 4x1 5T...

Page 5: ...5 M2218 Diagram zbiorczy...

Page 6: ...k 18 dw ch podk adek 17 oraz dw ch za lepek 21 UWAGA Upewnij si e wszystkie ruby s dobrze dokr cone 3 Monta siode ka i s upa siode ka Usu ju zamontowane 3 podk adki 31 oraz 3 nakr tki 30 z siode ka 29...

Page 7: ...owanie z cz ciami i wyci gnij 3 podk adki 18 3 podk adki 17 oraz 3 ruby 16 Przypasuj gniazdo kierownicy 2 do trzech otwor w w g rnej cz ci s upa kierownicy 10 i dokr korzystaj c z trzech podk adek 18...

Page 8: ...do 99 59 minut SPEED PR DKO Wy wietla aktualn pr dko w przedziale od 0 do 999 9 km godz DISTANCE ODLEG O Wy wietla odleg o w przedziale od 0 do 99 99 km UWAGA Na wy wietlaczu pojawi si symbol rowerka...

Page 9: ...u ytkownikowi na dowolne ustawienie obci enie Korzystaj c z przycisk w zwi ksza obci enie oraz zmniejsza obci enie PROGRAMY AUTOMATYCZNE P1 do P6 to programy automatyczne Aktualny poziom obci enia b d...

Page 10: ...o zako czeniu odliczania 4x na wy wietlaczu zab y nie ikonka 30 00 a nast pnie je eli nie zako czysz wiczenia rozpocznie si odliczanie w g r od 30 oo a program zostanie powt rzony 2 Aby zatrzyma aktua...

Page 11: ...rzez 5 10 minut Mo na wykona kilka wicze rozci gaj cych lub peda owa przez kilka minut przy ma ym oporze Sesje treningowe D ugo treningu mo e by okre lona wed ug nast puj cej regu y Trening codzienny...

Page 12: ...bie gospodarowania zu ytymi odpadami elektrycznymi i elektronicznymi dla tego typu sprz tu nale y stosowa oddzielne sposoby utylizacji U ytkownik kt ry zamierza pozby si tego produktu zobowi zany jest...

Page 13: ...i zu ycie takich element w jak linki paski elementy gumowe peda y uchwyty z g bki k ka o yska itp 6 Gwarancja traci wa no w przypadku Up ywu terminu wa no ci samodzielnych napraw nieprzestrzegania za...

Page 14: ...ghtened 9 Always use the equipment as indicated If you find any defective components whilst assembling or checking the equipment or if you hear any unusual noise coming from the equipment while using...

Page 15: ...e sensor plate plug foam grip cap wire 1set 29 30 31 Seat w washers nylon nuts 1 set 10 11 Front post w upper section system cable 1set 7 Monitor w extention system cable four screws 1set NOTE 4 Above...

Page 16: ...Corn 1 44 Nylon nut M8x1 25Px6H 1 14 Bar Sensor w Wire 1 45 Idle Wheel w Bearing 1 15 Resistant Cable 1 46 Steel Sleeve 15x 10x18H 1 16 Allan Head Bolt M8x20L 7 47 Idle Wheel Bracket 1 17 Spring Washe...

Page 17: ...17 M2218 Explode View...

Page 18: ...ve bracket of main frame 24 using two carriage bolts 20 two curve washers 18 two spring washers 17 and two cap nuts 21 NOTE Make sure you fasten the bolts securely to avoid shaking and discomfort when...

Page 19: ...h handlebar Please open hardware blister card and take three curve washer 18 three spring washer 17 and three allen head bolts 16 from it Attach the welded bracket of handlebar 2 with hand pulse senso...

Page 20: ...er hour DISTANCE Displays the distance from zero to 99 99 Kilometer NOTE The LCD will display an image of a bike This bike will travel around the window in a clockwise direction to track the distance...

Page 21: ...ase the load PRESET PROGRAMS P1 to P6 are preset automatic programs The present load level of the selected program will be shown in the LOAN INDICATOR in the LCD display Use the button to increase the...

Page 22: ...will count down from 30 00 to 00 00 Then the display will flash the program time 30 00 four times and start counting up from 30 oo The program will be repeated 7 To stop a running program stop pedalin...

Page 23: ...per unit 1 2 x per week approx 60 min per unit Cool down To introduce an effective cool down of the muscles and the metabolism the intensity should be drastically decreased during the last 5 10 minute...

Page 24: ...lectrical and electronic equipment together with other types of waste In accordance with the WEE directive on waste electrical and electronic equipment separate waste management processes should be ap...

Page 25: ...t pouze v p pad e je za zen dn sestaveno 8 Za zen by m lo b t pravideln kontrolov no z hlediska opot eben a po kozen pouze tehdy budou spln ny bezpe nostn podm nky Zvl tn pozornost je pot eba v novat...

Page 26: ...26 M2218 Mont n n kres...

Page 27: ...ada 2 3 5 4 6 5 8 d tka s idlem pulsu z str kou p novkou koncovkou p evodem 1sada 29 30 31 Sedadlo s podlo kami nylonov mi matkami 1sada 10 11 P edn sloupek s horn m p evodem 1sada 7 Po ta s p evodem...

Page 28: ...dlu 29 p ipevn n 3 ploch podlo ky 31 a t i nylonov matky 30 P ilo te t i otvory sedadla 29 k t em otvor m pro rouby nach zej c se na desti ce horn sti sloupku sedadla 28 a p ipevn te jej pomoc t ploch...

Page 29: ...s koncovkou p evodu vych zej c ho z monitoru 7 Spojen p evody 9 7 vlo te do otvoru desti ky p edn ho sloupku 10 P ipevn te monitor 7 k desti ce p edn ho sloupku 10 pomoc ty roub 12 Zapojte z str ku p...

Page 30: ...30 M2218 N KRES...

Page 31: ...L 3 21 epi kov matka M8 4 52 Magnet 1 22 Koncovka zadn ho stabiliz toru 3 v 1 2 53 Kladka emene 1 23 Koncovka p edn ho stabiliz toru 3 v 1 2 54 Klika 1 24 Hlavn r m 1 55 emen 1 25 Obj mka sloupku seda...

Page 32: ...ento po ta obsahuje 7 r zn ch program P0 a P6 M ete nastavit as program a po ta rozd l tento as na 10 interval Pokud as programu nenastav te pak po ta pou ije p ednastavenou hodnotu 20 minut Stupe zat...

Page 33: ...o minutu Jakmile nastav te po adovan as stiskn te SET as bude odpo t v n od nastaven hodnoty 4 Nyn m ete za t s tr ninkem Program se nespust dokdy neza nete lapat POZN MKA 1 P klad Pokud je as progra...

Page 34: ...n po ta e 2 Po ta pot ebuje 4 AA baterie 4 baterie jsou sou st balen Viz obr zek n e POZN MKA 1 Nepou vejte kombinaci star ch a nov ch bateri 2 Pou vejte jeden typ bateri Nem chejte alkalick baterie s...

Page 35: ...ninku m e b t d na na z klad t chto faktor Ka dodenn tr nink kolem 10 min 2 3 kr t t dn kolem 30 min 1 2 kr t t dn kolem 60 min Odpo inek Spole n s ukon en m tr ninku je pot eba postupn sni ovat z t...

Page 36: ...o za zen spole n s jin mi odpady Spole n se Sm rnic WEE o zp sobu nakl d n s elektrick mi a elektronick mi odpady je pot eba pro tento druh za zen pou vat odd len zp soby jejich likvidace U ivatel kte...

Reviews: