OM-498 Page 45
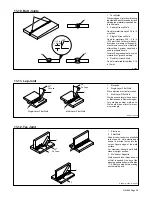
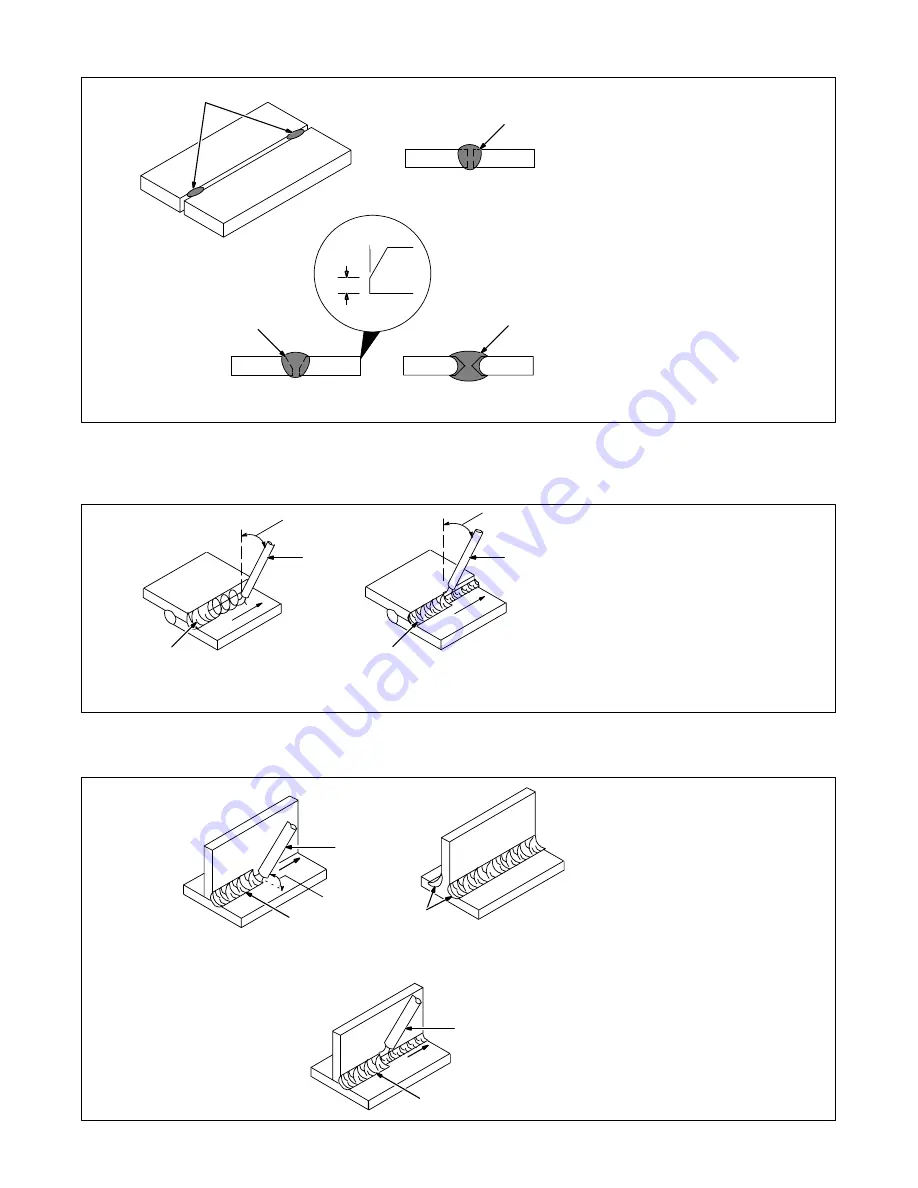
11-10. Butt Joints
S-0662
1
Tack Welds
Prevent edges of joint from drawing
together ahead of electrode by tack
welding the materials in position be-
fore final weld.
2
Square Groove Weld
Good for materials up to 3/16 in (5
mm) thick.
3
Single V-Groove Weld
Good for materials 3/16 – 3/4 in
(5-19 mm) thick. Cut bevel with oxy-
acetylene or plasma cutting equip-
ment. Remove scale from material
after cutting. A grinder can also be
used to prepare bevels.
Create 30 degree angle of bevel on
materials in V-groove welding.
4
Double V-Groove Weld
Good for materials thicker than 3/16
in (5 mm).
30
°
2
1
1/16 in
(1.6 mm)
3
4
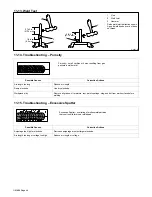
11-11. Lap Joint
S-0063 / S-0064
1
Electrode
2
Single-Layer Fillet Weld
Move electrode in circular motion.
3
Multi-Layer Fillet Weld
Weld a second layer when a heavi-
er fillet is needed. Remove slag be-
fore making another weld pass.
Weld both sides of joint for maxi-
mum strength.
30
°
Or Less
Single-Layer Fillet Weld
Multi-Layer Fillet Weld
30
°
Or Less
1
1
2
3
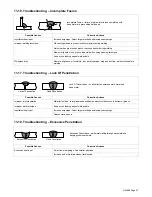
11-12. Tee Joint
S-0060 / S-0058-A / S-0061
1
Electrode
2
Fillet Weld
Keep arc short and move at definite
rate of speed. Hold electrode as
shown to provide fusion into the
corner. Square edge of the weld
surface.
For maximum strength weld both
sides of upright section.
3
Multi-Layer Deposits
Weld a second layer when a heavi-
er fillet is needed. Use any of the
weaving patterns shown in Section
11-9. Remove slag before making
another weld pass.
45
°
Or Less
1
2
1
3
2
Summary of Contents for 1435
Page 4: ......
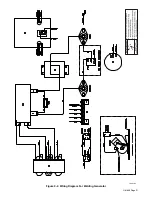
Page 35: ...OM 498 Page 31 198 014 C Figure 9 2 Wiring Diagram For Welding Generator ...
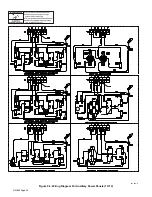
Page 36: ...OM 498 Page 32 201 026 A Figure 9 3 Wiring Diagram For Auxiliary Power Panels 1 Of 2 ...
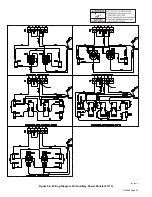
Page 37: ...OM 498 Page 33 201 026 A Figure 9 4 Wiring Diagram For Auxiliary Power Panels 2 Of 2 ...
Page 53: ...OM 498 Page 49 Notes ...
Page 58: ...OM 498 Page 54 Notes ...

