(1)
Controls
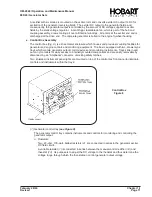
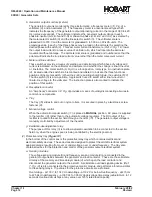
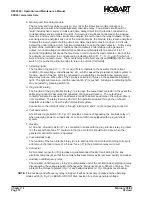
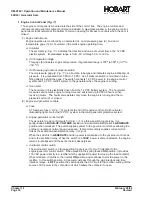
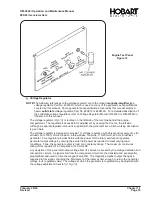
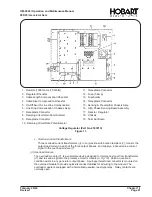
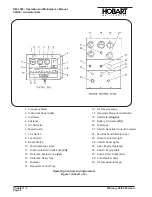
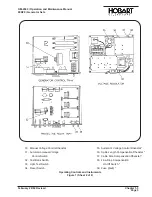
The rheostat
(2, Fig. 13)
is used to adjust the regulated voltage value of the generator output.
Compensation for cable size is adjusted by a potentiometer
(4)
. Cable length is compensated
for by adjustment of another potentiometer
(3)
. Cable compensation may be turned ON or OFF
by a toggle switch
(5)
. For this application, the switch must always be ON. An instruction plate
under the potentiometer knobs indicates proper setting for various cable sizes and lengths.
Regulator stability is adjusted by the damping circuit gain potentiometer
(8)
. Regulator response
time is adjusted by the damping circuit rate potentiometer
(10)
.
(2)
Protection
Internal circuitry of the voltage regulator is protected by a cartridge type 5-ampere fuse
(12)
.
(3)
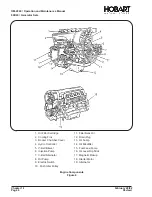
Components
(See Fig. 13)
Components of the basic circuits are mounted in two major subassemblies which are the line
drop compensation chassis assembly
(6)
, and the sensing and preamplifier chassis assembly
(15)
.
Receptacle connectors
(7, 9, and 11)
provide quick connect-disconnect facilities for
interconnecting wire leads. The two subassemblies are mounted on chassis
(18)
, along with
other main components of the regulator. These include a resistor
(1)
, voltage adjusting rheostat
(2)
, fuse
(12)
and fuseholder
(13)
, nineteen-pin receptacle connector
(14)
, and reactor
(17)
.
Field ballast resistors and line drop current transformer loading resistors are located at a point
remote from the voltage regulator and are not supplied with the regulator. The two field ballast
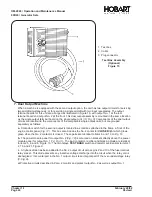
resistors are located in the generator control tray
(Ref. 2, Fig.9)
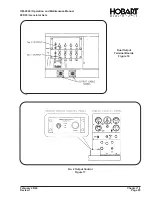
. Transformer loading resistors
are located on the power module panel assembly
(Ref. 8, Fig. 14)
.
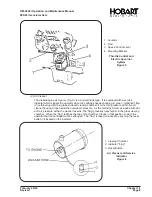
h. Power Module Panel Assembly
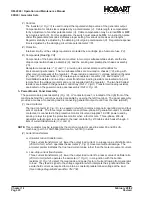
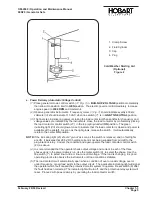
The power module panel assembly
(Fig. 14)
, or “contactor panel”, is located at the right front of the
machine behind the control box and is accessible by opening the left front door. The panel assembly
provides a means of connecting and disconnecting generator output to and from the load
(aircraft)
.
(1)
Load contactor
The load contactor
(6, Fig. 14)
is a sealed unit which contains a magnetic operating coil and four
sets of contacts. The three larger contacts conduct three-phase AC generator output. A smaller
contact set is connected in the protective monitor circuit and supplies 12-VDC power used by
sensing relays to signal the protective monitor when a fault occurs. Three-phase, 400-Hz
generator output power is conducted to the load contactor by 2/0 cables which pass through 3
sets of current transformers
(3, 4, and 9)
.
NOTE: This contactor may be replaced by the old style contactor used in earlier 60 and 90 kVA
machines, (part no. 75GH-566 [Hartman No. A-874C]) in stock.
(2)
Current transformers
a. Ammeter current transformers
Three current transformers
(4)
lower the output load current to a lesser value of definite ratio
(250-A to 5-A)
which operates the ammeter
(7, Fig. 9)
movement without damage. The
ammeter pointer indicates the true load current value rather than the meter movement current.
b. Line-drop current transformers
Three current transformers
(4)
, lower the output load current to a lesser value of definite ratio
(250-A to 5-A)
which operates the ammeter
(7, Fig. 9)
, in conjunction with the burden
resistors
(8, Fig. 14)
, detect the magnitude and power factor of current flowing from generator
to load. They feed a signal to the voltage regulator which interprets the signal and alters the
exciter field current as required to maintain a constant predetermined voltage at the load.
(See Voltage Regulator Manual No. TM-759).
OM-2040 / Operation and Maintenance Manual
90D20 / Generator Sets
Chapter 1-1
February 28/94
Page 20
Revised
Summary of Contents for 6921 Series
Page 2: ...This page intentionally left blank ...
Page 223: ......
Page 224: ......
Page 225: ......
Page 226: ......
Page 227: ......
Page 228: ......
Page 229: ......
Page 230: ......
Page 231: ......
Page 232: ......
Page 233: ......
Page 234: ......
Page 235: ......
Page 236: ......
Page 237: ......
Page 238: ......
Page 239: ......
Page 240: ......
Page 241: ......
Page 242: ......
Page 243: ......
Page 244: ......
Page 245: ......
Page 246: ......
Page 247: ......
Page 248: ......
Page 249: ......
Page 250: ......
Page 251: ......
Page 252: ......
Page 253: ......
Page 254: ......
Page 255: ......
Page 256: ......
Page 257: ......
Page 258: ......
Page 259: ......
Page 260: ......

