Prepare the pushrods Align the control horns
D 52. Locate the two wooden dowel pushrods and
apply thin CA to the ends of the shrink tubing on
both rods.
Install the pushrods
D 53. Insert the two pushrods, threaded end first,
through the fuselage and out the two pushrod exits at
the back of the fuselage. You may need to bend the rods
slightly to eliminate binding, but keep any bends to
a minimum. Excessive bending of the pushrod will
allow it to flex during operation.
Make the clevis retainers
D 54. Cut two 1/4" long pieces of the clear tube. Slide
one on each of the pushrods that protrude out of
the rear of the fuselage.
Install the two clevises
D 55. Screw a clevis onto each pushrod until the
threads protrude about 1/16" between the clevis forks.
Connect the control horns
D 56. Attach the two clevises to the control horns as
shown. Use the second hole from the outside for the
elevator and the third hole from the outside hole for the
rudder. Check to make certain that the pushrods do not
bind in the openings and that they operate smoothly.
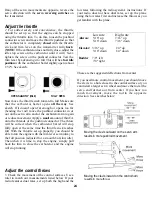
CORRECT INCORRECT
D 57. Position the control horn on the elevator so that
the pushrod will work without binding. Mark the two
holes using a felt-tip pen. Make sure that the control
horns are positioned even with the hinge line (see
sketch). Repeat this process for the rudder.
Secure the control horns
D 58. Drill two 3/32" (2.4mm) holes straight through
the balsa elevator at the marks. Insert two 2 x 15mm
machine screws through the control horn and the
elevator, finally threading them into the control horn
backplate. Tighten the screws but do not crush the
balsa. Cut off the excess threads that stick out using a
wire cutter. Repeat this process for the rudder.
Attach the pushrods
D 59. Slide the clevis retainers over the clevis forks.
20


