12
BALANCE PROPELLERS
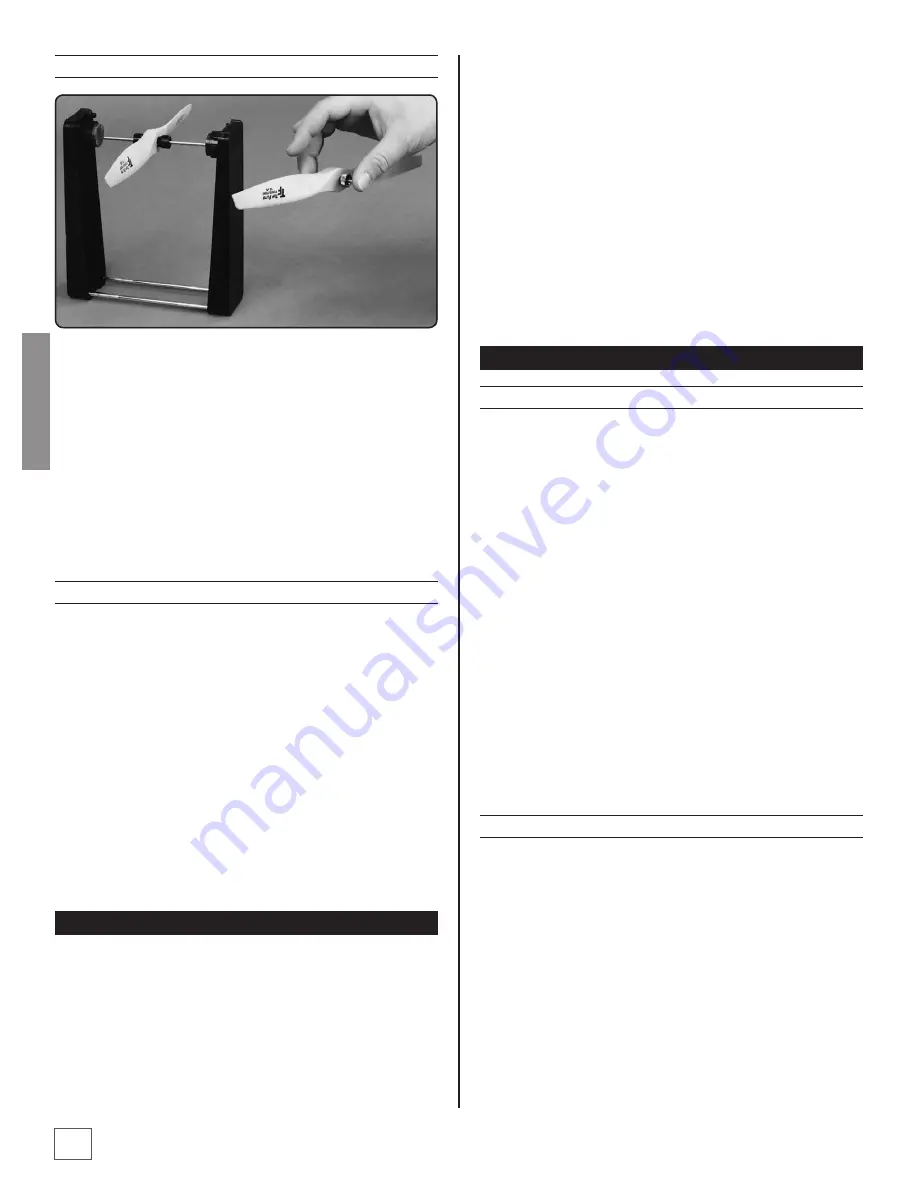
Carefully balance your propeller and spare propellers before
you fly. An unbalanced prop can be the single most significant
cause of vibration that can damage your model. Not only will
engine mounting screws and bolts loosen, possibly with
disastrous effect, but vibration may also damage your radio
receiver and battery. Vibration can also cause your fuel to
foam, which will, in turn, cause your engine to run hot or quit
We use a Top Flite® Precision Magnetic Prop Balancer™
(TOPQ5700) in the workshop and keep a Great Planes Finger-
tip Prop Balancer (GPMQ5000) in our flight box.
RANGE CHECK
Ground check the operational range of your radio before the
first flight of the day. With the transmitter antenna collapsed
and the receiver and transmitter on, you should be able to
walk at least 100 feet away from the model and still have
control. Have an assistant stand by your model and, while
you work the controls, tell you what the control surfaces are
doing. Repeat this test with the engine running at various
speeds with an assistant holding the model, using hand sig-
nals to show you what is happening. If the control surfaces do
not respond correctly, do not fly! Find and correct the problem
first. Look for loose servo connections or broken wires, corro-
ded wires on old servo connectors, poor solder joints in your
battery pack or a defective cell, or a damaged receiver crystal
from a previous crash.
ENGINE SAFETY PRECAUTIONS
Failure to follow these safety precautions may result
in severe injury to yourself and others.
❍
Get help from an experienced pilot when learning to
operate engines.
❍
Use safety glasses when starting or running engines.
❍
Do not run the engine in an area of loose gravel or sand;
the propeller may throw such material in your face or
eyes.
❍
Keep your face and body as well as all spectators away
from the plane of rotation of the propeller as you start
and run the engine.
❍
Keep these items away from the prop: loose clothing,
shirt sleeves, ties, scarfs, long hair or loose objects such as
pencils or screwdrivers that may fall out of shirt or jacket
pockets into the prop.
❍
The engine gets hot! Do not touch it during or right after
operation.
❍
Do not use hands, fingers or any other body part to try to
stop the engine.
❍
Do not throw anything into the propeller of a running
engine.
SAFETY CODE
GENERAL
❍
1. I will not fly my model aircraft in sanctioned events,
air shows, or model flying demonstrations until it has
been proven to be airworthy by having been previously
successfully flight tested.
❍
2. I will not fly my model aircraft higher than
approximately 400 feet within 3 miles of an airport
without notifying the airport operator. I will give right
of way to and avoid flying in the proximity of full scale
aircraft. Where necessary an observer shall be used
to supervise flying to avoid having models fly in the
proximity of full scale aircraft.
❍
3. Where established, I will abide by the safety rules for
the flying site I use and I will not willfully and deliberately
fly my models in a careless, reckless and/or dangerous
manner.
❍
7. I will not fly my model unless it is identified with my
name and address or AMA number, on or in the model.
❍
9. I will not operate models with pyrotechnics (any device
that explodes, burns, or propels a projectile of any kind).
RADIO CONTROL
❍
1. I will have completed a successful radio equipment
ground check before the first flight of a new or repaired
model.
❍
2. I will not fly my model aircraft in the presence of
spectators until I become a qualified flier, unless assisted
by an experienced helper.
❍
3. I will perform my initial turn after takeoff away from the
pit or spectator areas and I will not thereafter fly over pit
or spectator areas, unless beyond my control.
❍
4. I will operate my model using only radio control
frequencies
❍
currently allowed by the Federal Communications
Commission.
ENGLISH


