❏
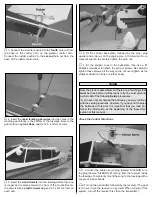
3. Connect the elevator pushrod to the fourth hole out from
the base of the control horn on the elevator control horn.
Connect the rudder pushrod to the second hole out from the
base of the rudder control horn.
❏
4. Insert the main landing gear wires into the holes in the
landing gear blocks in the bottom of the fuselage. Secure the
gear with two nylon straps and four 2.5 x 12mm screws.
❏
5. Insert the wood dowels into the fuselage. Note that one
is longer and is placed toward the front of the model. Secure
the dowels with a plastic dowel cap and a 3 x 4mm screw on
each end.
❏
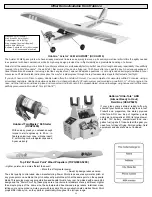
6. Fit the spinner back plate, followed by the prop, prop
washer and prop nut, on the engine. Use a 10mm wrench or a
crescent wrench to securely tighten the prop nut.
❏
7. Fit the spinner cone to the backplate, then use a #1
Phillips screwdriver to tighten the spinner screws. Be careful to
tighten these screws all the way but do not over-tighten as the
plastic material can strip out rather easily.
Check the Control Directions
❏
1. Connect the aileron servo plug labeled “AILERON A” to
the plug labeled “AILERON B” coming from the receiver inside
the fuselage. Temporarily mount the wing to the fuselage with a
couple of rubber bands.
❏
2. Turn on the transmitter, followed by the receiver. (The goal
is to never have the receiver on by itself. When turning off the
system, turn off the receiver first, then the transmitter.)
Now the plane is assembled, but there are a few things that
must be done before it will be ready to fly. You must carefully
perform all of the following Setup procedures.
If you have not yet charged the batteries, you may continue
with the setup procedures. However, if you have not charged
the batteries at this time it is important that you read and
follow the information at the beginning of the “Assembly”
section of this manual.
Setup
4


