5
position can be set by holding a straight edge (such as a ruler)
against the horizontal stabilizer and fi ne-tuning the elevator
pushrod in the clevis until the elevator rests fl at against the ruler.
Tighten the screw in the clevis.
Do not over-tighten the screw!
✰
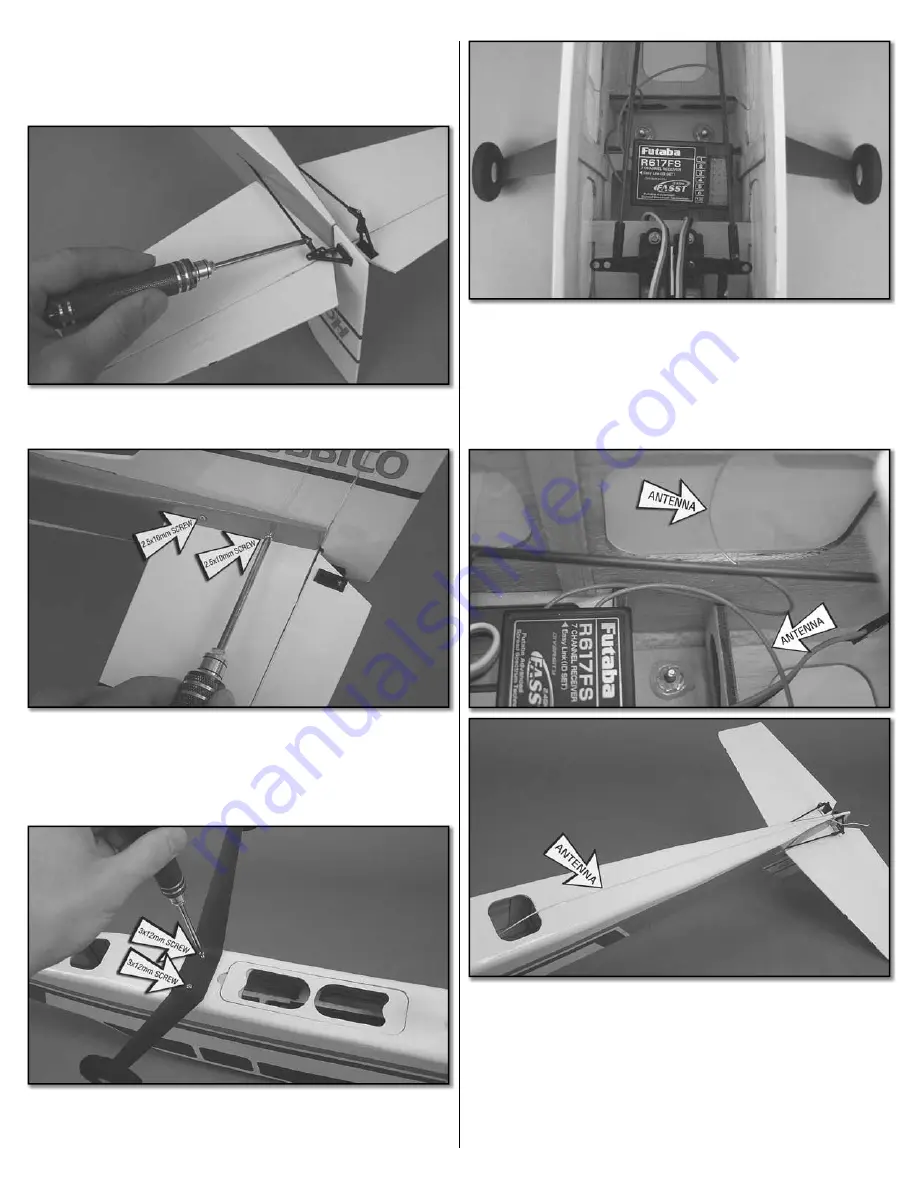
6. Set the neutral position of the rudder in the same manner.
✰
7. Secure the tail assembly in place by installing two 2.5mm
x 10mm self-tapping screws into the fuselage and through the
vertical fi n in the locations indicated by the two small holes in the
fi lm covering.
Do not over-tighten the screw!
✰
8. Install the
main landing gear
using two 3 x 12mm machine
screws. The tapered side of the gear should face the tail of
the plane.
✰
9. Cut a piece from the included hook and loop material and
use it to install your receiver behind the servos (2.4GHz receiver
shown).
✰
10. Tape the antennas to the side of the fuselage in the
orientation described in your radio manual. If you are using an
FM radio system, feed the antenna out through the cool air exit
hole in the bottom of the fuselage and tape it down the underside
of the fuse. Be sure that the antenna(s) will not contact the
pushrods or servo arms.
Summary of Contents for NexSTAR mini EP RxR
Page 16: ... ...


