If you have not yet charged the batteries, you may still
proceed. However, as the batteries have not yet been fully
charged, they may not provide enough power to make it all
the way through the setup procedures. If the batteries quit
working, set your tools aside and charge the batteries as
described in the instruction manual for the Futaba radio
control system that came with this kit.
The first thing that has to be done is to make sure all the
control surfaces are centered.
❏
1. Connect the aileron servo wire coming from the wing
labeled “Aileron A” to the plug in the fuselage labeled
“Aileron B” coming from the receiver. Temporarily mount the
wing to the fuselage with a nylon wing bolt.
❏
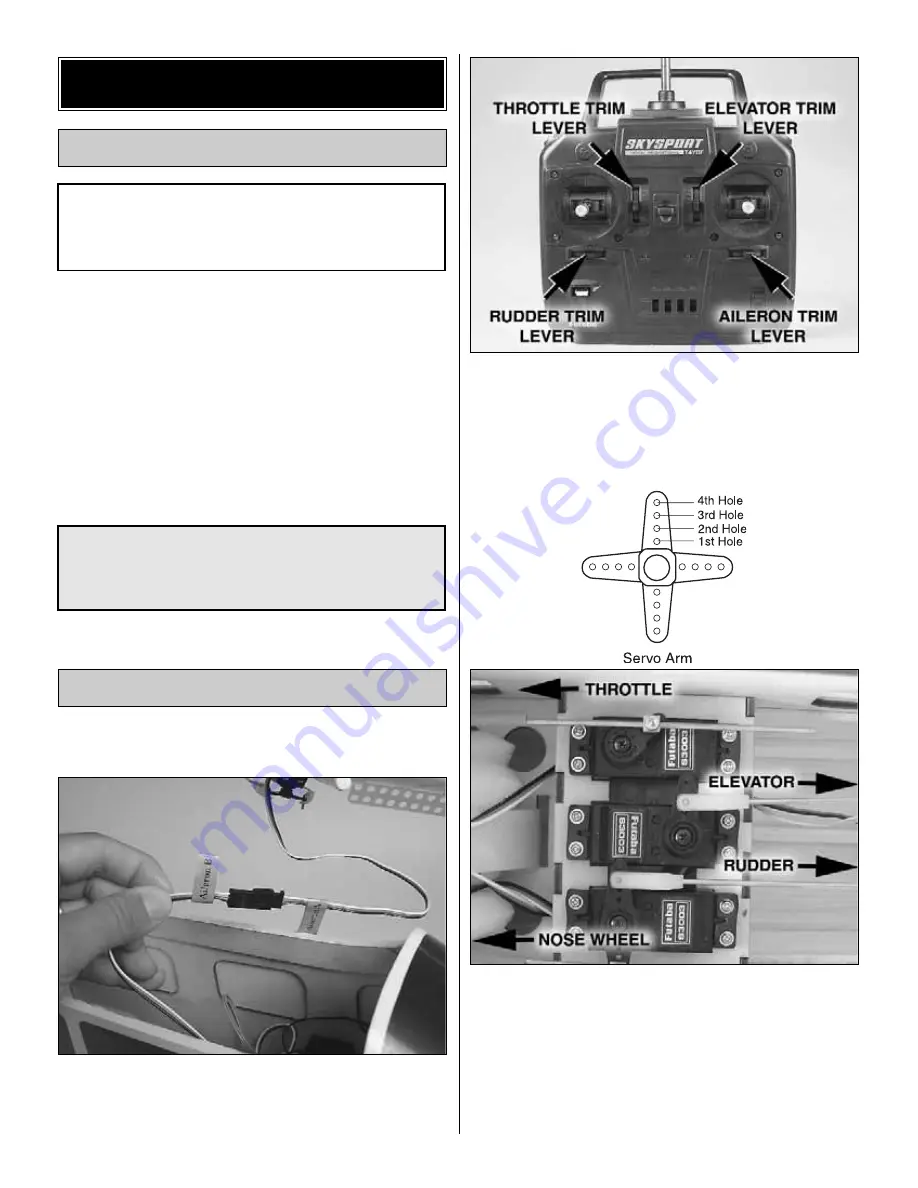
2. Turn on the transmitter and receiver. Center all the trim
levers on the transmitter. Look inside the radio compartment
and make sure that the elevator and rudder servo arms are
perpendicular to the sides of the fuselage as seen in the
image below. If necessary, unscrew the servo arm and
center them as shown in the image below. Remember to
replace the screw.
❏
3. Make certain the pushrods are connected to the servo
arms as follows: The elevator pushrod should be in the
second hole out on the servo arm, the rudder pushrod
should be in the third hole out on the servo arm, and the
aileron pushrods (not shown) should be in the third hole out
on the servo arm. If the pushrods are not connected to the
servo arms as described, remove the nylon connector,
insert the pushrod in the correct hole, and then reinstall the
nylon connector.
Center the Control Surfaces
The Active Flight Stabilization (AFS) device should be
unplugged at this point to ensure that the following setup
is successful. The AFS unit arrives unplugged from
the factory.
Now the plane is assembled, but there are a few things
that must be done before it will be ready to fly. You must
carefully perform all of the following Setup procedures. If
possible, have your flight instructor assist.
Charge the Batteries
SETUP
11
Summary of Contents for Nexstar select
Page 28: ...28 Correct Angle Rods Fin ...


