The NexSTAR Select comes with a receiver battery in the
airplane and a transmitter battery. Both of them can be
charged at the same time or independently with the Futaba
®
charger included.
❏
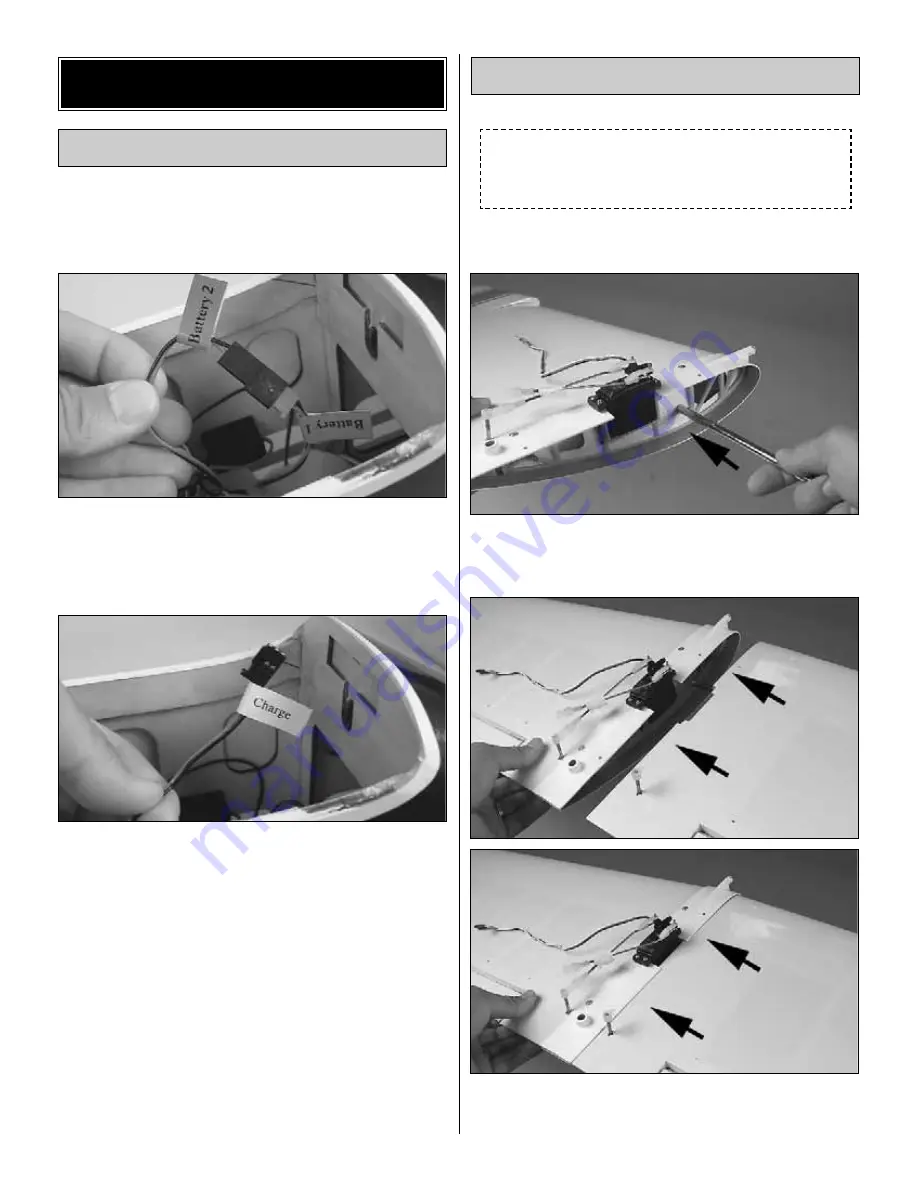
1. For safety reasons, the model is shipped with the
battery pack in the model (the receiver battery)
disconnected. In the fuselage, connect the plug from the
battery pack, labeled “Battery 1”, to the plug from the on/off
switch, labeled “Battery 2.”
❏
2. When shipped, the batteries are not fully charged.
They must be fully charged before use. If you plan to
assemble the plane now, the batteries may be charged
later. If you plan to assemble the plane later, charge the
batteries following the instructions in the instruction manual
supplied for the radio control system.
Note: When charging the receiver battery, connect the
charger to the plug labeled “Charge” inside the fuselage.
Note: Charging time of fully depleted receiver and
transmitter batteries is about 15 hours. Both batteries
should be charged overnight before every flying day. A fully
charged set of batteries should allow you to make three full
flights before needing to recharge the batteries again. In any
case, you should always check battery voltage before flying
and never fly with a receiver voltage less that 5 V.
For this section you will need:
Please note that all images show the bottom of the wing.
❏
1. Install the wing rod into the right wing Center Core wing rib.
The wire you see coming out of the servo is the servo lead. This
servo lead will not be used until the “Radio Setup” section.
❏
2. Carefully slide the left wing all the way onto the rod and
into the Center Core wing rib. The wing needs to be pushed
in all the way until it stops.
1 Left Wing
1 Right Wing
1 Steel Wing Rod
2 #4 x 20mm Screws
6 #4 x 8mm Screws
2 SpeedBrakes Training
Flaps
1 Phillips Screwdriver
Assemble the Wing
Charge the Batteries
ASSEMBLY
7
Summary of Contents for Nexstar select
Page 28: ...28 Correct Angle Rods Fin ...


