Carefully remove your Paradise sailboat and all remaining
components from the box.
IMPORTANT:
Use additional care
not to bend the mast while removing the mast and sail
assembly from the box.
ASSEMBLE THE STAND
❏
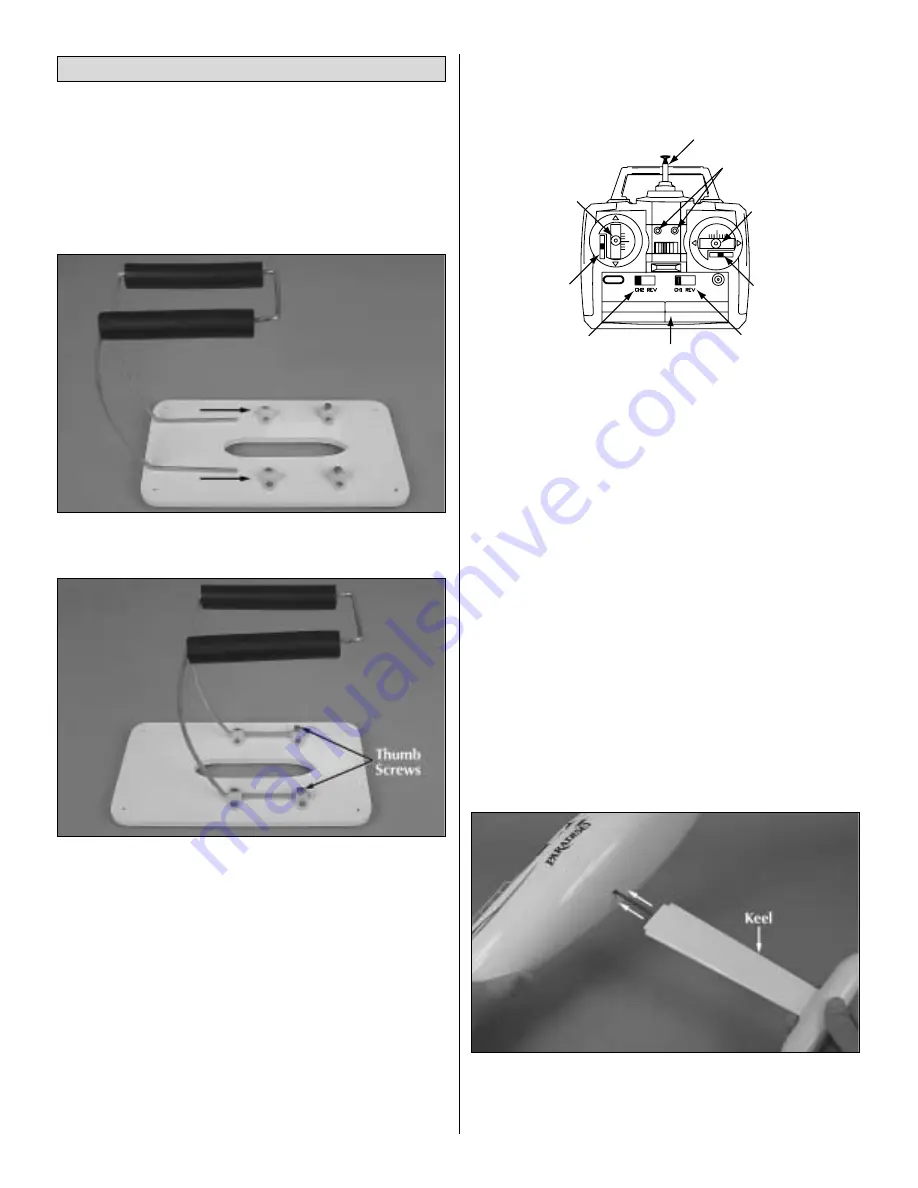
1. Insert the wire uprights into the base of the boat stand as
shown (note direction).
❏
2. Tighten the two (2) thumb screws firmly.
TRANSMITTER ASSEMBLY
Important Note:
The
transmitter is not water resistant
and
should never come in contact with water.
❏
1. Remove the transmitter antenna from the parts bag and
screw it into the top of the transmitter. To ensure that the
antenna is attached, lightly pull on the base of the antenna. If
it slides out, it is not installed properly.
❏
2. Slide off the battery door on the face of the transmitter.
Install 8 fresh “AA” batteries into the transmitter in the
configuration molded into the battery compartment.
Re-install the battery door onto the face of the transmitter.
❏
3. Turn the transmitter on using the switch on the front. The
green and red LED lights above the on/off switch should light
up. If they do not light up, turn the transmitter off and check to
make sure that the batteries are installed properly.
If you see a
flashing red LED, the batteries are low and need to be replaced.
INSTALL THE KEEL
❏
1. If you have not already done so, remove the Paradise
hull from the plastic bag and open the bag containing the keel
and rudder parts.
❏
2. Remove the thumbnut from the keel shaft and insert it
up through the bottom of the hull as shown. The keel has
been shaped to fit only one way. Pay close attention here or
the keel and hull may be badly damaged.
Antenna
Power Status
Indicators
Rudder
Trim
Sail
Control
Trim
Servo Reversing
Switch (Rudder)
Servo Reversing
Switch (Sail Control)
Rudder
Control
Stick
Sail
Control
Stick
Battery Tray
(shown with
door removed)
FINAL ASSEMBLY
4


