proper reinforcement. Make sure the tape is
applied with no wrinkles and that the strips
are straight and parallel from wingtip to
wingtip. If this tape is not applied, if it is
applied incorrectly or if a different type of
tape is applied, we cannot be responsible
for any wing failure that may occur.
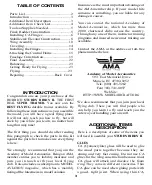
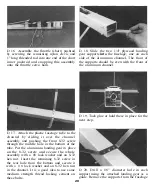
D 5. Place the wing upside down on the edge
of a table so that only 1/2 of the wing (from
one wing tip to the center joint) is resting on
the table. Starting at the wing tip that is
resting on the table, lay a strip of nylon-
reinforced strapping tape down so that it
crosses over the center joint directly over the
wing joiner.
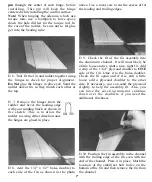
Press the tape firmly onto the wing and down
into the fillet (where the bottom of the wing
meets the mounting platform) and then flip
the wing around and continue the strip of
tape out to the other wing tip. Apply two
more strips of tape between this strip and the
trailing edge of the wing. The fourth strip
should be added between the first strip and
the leading edge of the wing. The previous
photo shows where the strips should be
located. Try to get this tape stuck down
as tightly as possible because it adds a
tremendous amount of strength to the wing
when properly applied. Make sure you do not
change the washout (twist) or dihedral
(V-shape) of the wing when applying the tape
strips. If you are planning on doing some
aerobatics or combat with your STURDY
BIRDY II, you should also put three strips of
tape on the top surface of the wing.
INSTALL THE WING PROTECTOR
D 1. Use a sharp hobby knife or a Dremel®
Tool with a tapered cutting bit to trim out the
servo and torque rod cut-outs in the Plastic
Wing Protector. There are scribe lines on the
bottom surface of the protector to help guide
you. Trial fit the aileron servo in place and
trim as necessary to make it fit properly. Use
scissors or your hobby knife to trim the
outside edges of the wing protector along the
remaining scribe lines.
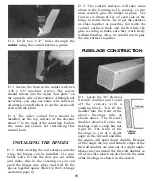
D 2. Place the wing protector on the center of
the wing so the torque rods fit through their
holes. Draw a line on the wing around the
servo cutout. Remove the protector and carve
out a hole in the foam wing to fit your servo.
Carve out an extra 1/4" square groove in front
and behind the servo cut-out for the servo
rails. Drill a 1/2" diameter hole for the servo
wires down through the front edge of the servo
cutout. Be careful not to cut the plywood wing
joiner when performing these operations.
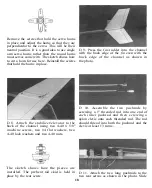
D 3. Glue the 3/16"x l/4"x 1-1/4" Basswood
Servo Rails in place along the front and back
edges of the servo cut-out. Put the aileron
servo in place and mark on the plastic
protector where the servo mounting screws
should be. Drill 1/1 6" diameter holes on the
marks you just made and mount the servo
using the screws provided with your radio.
D 4. Trial fit the wing protector assembly on
the wing and enlarge the cutouts in the foam
13


