13
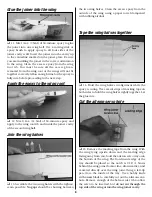
Remove the tail post
❏
6. Located at the rear of the fuselage, behind the
horizontal stabilizer slot, are the balsa tail posts.
These posts were left for manufacturing alignment.
The posts must be removed in order to insert the
horizontal stabilizer. Using a sharp hobby knife, cut
the posts even with the slot as shown in the picture.
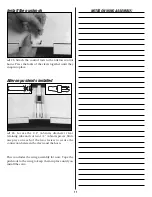
Locate the vertical fin slot
❏
7. Using your finger, locate the
vertical stabilizer
slot on the top of the fuselage. Remove the covering
with a hobby knife.
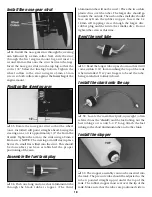
Check the rudder and elevator hinges
❏
8. Gently tug on the rudder and elevator at each
hinge location. If any of the hinges are loose, reglue
them as described here: First, flex the surface all the
way one direction (DO NOT REMOVE THE
SURFACE). Apply 5 drops of thin CA onto each hinge.
Use a paper towel to absorb the excess glue. Wait for a
few minutes for the glue to harden, then flex the
surface the other direction and
glue the other side of the hinges.
Finally, flex the surface back and
forth several times to free it up.
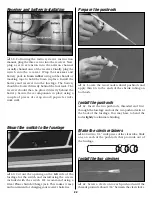
Mark the centerline
❏
9. Locate the horizontal stabilizer. Measure and
mark the exact center on the top surface and of the
trailing edge, in the hinge gap, as shown (DO NOT
MARK ON THE ELEVATOR).
Align the stabilizer with the wing
❏
10. Insert the stabilizer into the horizontal
stabilizer slot so it is centered in the fuselage. Place
the wing onto the fuselage and view the plane from
the rear. The stab should be parallel with the wing. If
not, sand the stabilizer mounting plate a little at a
time until correct.

