7
AerocrAft cAm quAd user’s Guide
prepArinG to fly the AerocrAft cAmquAd quAd-copter
Prior to charging the LiPo battery, please read and understand the LiPo Battery Warnings
section on page 5.
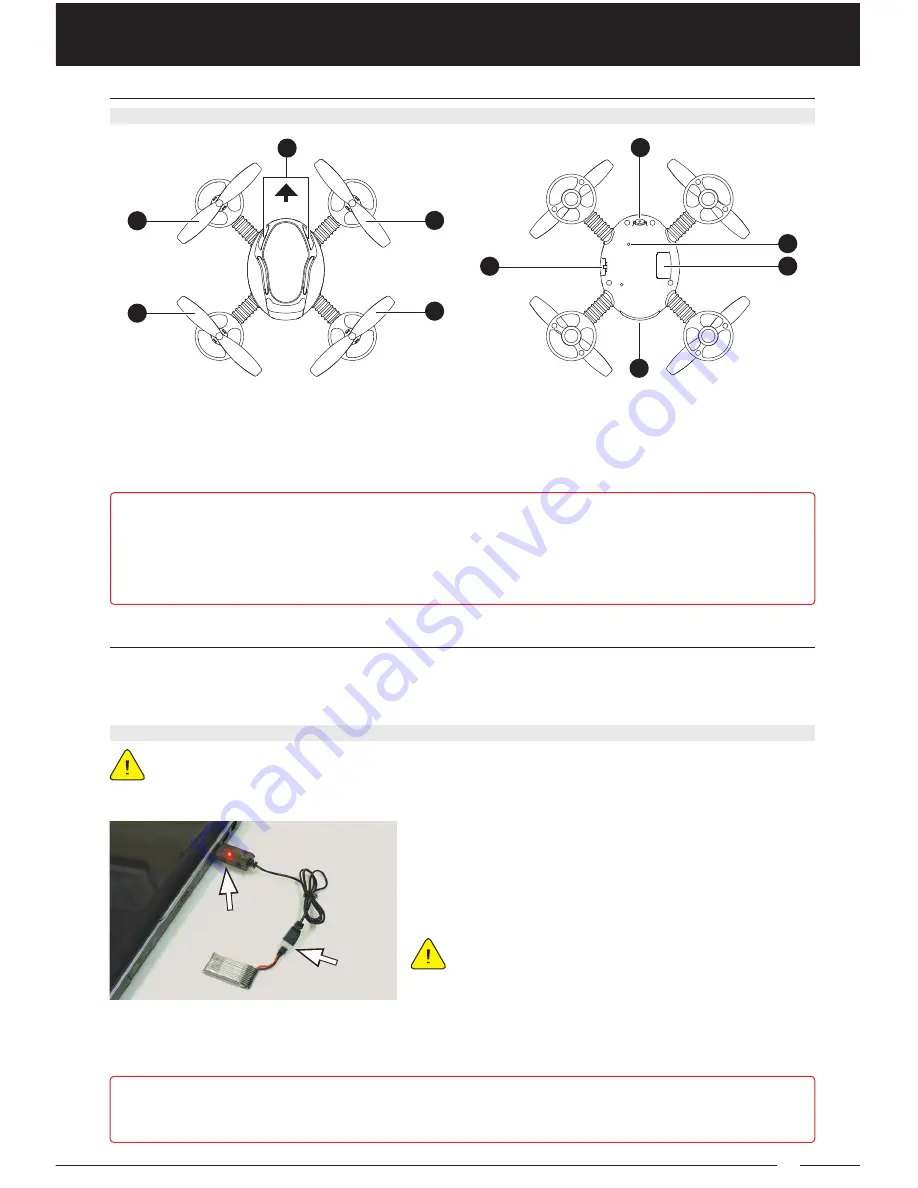
1) Plug the charger into a free USB port in your PC or Laptop.
2) Plug the connector from the charger into the
matching connector on the LiPo battery. The
charge indicator will turn red, indicating the LiPo
battery is charging.
On some PCs and Laptops, you may need to
turn the device ON to power the USB port.
3) Allow the LiPo battery to charge. When the LiPo battery is fully charged, the charge indicator
will turn OFF. At this time, unplug the LiPo battery from the charger, then unplug the charger
from its power source.
Follow the steps in this section to get the Aerocraft CamQuad Quad-Copter ready for its first
flight. This includes charging the LiPo battery, installing the transmitter batteries, installing the
LiPo battery, calibrating the gyro and arming the ESC.
chArGinG the lipo bAttery
On average, the LiPo battery will take approximately 45 minutes to 1 hour to fully charge. To
prevent any chance of over-charging, unplug the LiPo battery from the charger immediately
after the charging process completes.
AerocrAft cAmquAd quAd-copter lAyout overview
2
1
5
4
3
FRONT
1 - Propeller (Red ‘A1’)
2 - Propeller (Red ‘B2’)
3 - Propeller (Black ‘B2’)
4 - Propeller (Black ‘A1’)
Quad-Copter Power Indicator Conditions:
• Flashing Rapid - Gyro Initializing / After Arming, Indicates Low LiPo Battery Voltage*
• Flashing Slow - Ready for Arming / After Arming, Indicates Photo Taken or Video Started or Stopped*
• Solid - Armed (Ready for Flight)
*LED lights also flash in addition to the Power Indicators.
5 - Power Indicators
6 - On/Off Switch
7 - Still/Video Camera
lAyout And functions overview
7
8
6
9
10
8 - Memory Card LED Indicator
9 - Memory Card Slot
10 - Battery Cover


