super multi-rotor controller
If you should have trouble with any of the steps listed in this User's Guide, have any questions, or
require additional information, please contact our Customer Service Center at the address below:
Hobby People shall not be liable for any damage resulting from the use of this product. As Hobby People has no control over the use, setup,
modification or misuse of this product, no liability shall be assumed nor accepted for any resulting damage or injury. By the act of using this
product, the user accepts all resulting liability.
In no case shall Hobby People's liability exceed the original cost of the purchased product.
Features and Specifications are Subject to Change Without Notice • All contents © 2014 Hobby People • All Rights Reserved • Revision 1 03.17.2014 • Made in China
service and support
Global Services
18480 Bandilier Circle
Fountain Valley, CA 92708
Phone: (714) 963-0329
Fax: (714) 964-6236
Email: service@globalhobby.net
-4-
transmitter calibration, continued....
2) Press and HOLD the Setup button to start the calibration process. The Status LED will go out.
Continue to HOLD the Setup button until the Status LED illuminates again (after ~ 5 seconds).
Release the Setup button. The calibration process is now complete.
control sensor calibration
gain adjustment
locking and unlocking the motors
The control sensor should be calibrated after installing the Super Multi-Rotor Controller or if your
model seems unusually difficult to control or unstable.
1) Set your model on a flat, level surface. Do not move it during the calibration process. Pull the
throttle stick all the way back, then turn your transmitter ON. Plug your model’s flight battery into its
power adapter to power ON the Super Multi-Rotor Controller. The Status LED will flash twice to
indicate what flight mode and receiver type is configured, then turn solid green, indicating the
motors are locked.
2) Move and HOLD the throttle stick all the way forward and all the way left (full throttle and full left
rudder position). The Status LED will go out. Continue holding the throttle stick in this position until
the Status LED illuminates green again (after ~ 5 seconds). Return the throttle stick to its lowest
position. The calibration process is now complete.
The gain dial is used to fine-tune the sensitivity of your model’s flight controls. For the first few flights,
we suggest using a low value, then increase the gain value on successive flights until you’re happy
with the results. Decreasing the gain value (turn counter-clockwise) will reduce the control sensitivity
and increasing the gain value (turn clockwise) will increase the control sensitivity. Increasing the gain
too much can make your model very difficult to control and isn’t recommended.
To Unlock the Motors - With the throttle stick pulled all the way back, push the throttle stick all the way
to the right. Hold it in this position until the motors spin up at low speed and the Status LED flashes
green. You now have control over the throttle.
To Lock the Motors - With the throttle stick pulled all the way back, push the throttle stick all the way to
the left. Hold it in this position until the motors shut off and the Status LED is solid green.
If the motors do not lock and unlock, check the throttle channel high and low EPAs. They should
be -100% to +100% (or both 100%, depending on transmitter brand). In addition, the unlock and
lock controls are opposite of what’s described, reverse your transmitter’s rudder channel.
checking the flight controls
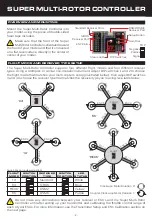
For the first flight of your model, check that each motor is turning the correct direction, as shown in
the diagram on page 2 that matches the model type you have. If one or more motors is turning the
wrong direction, swap any two of the ESC/motor wires to change the motor direction. Next, check
the flight control directions to ensure they’re correct. If necessary, change the transmitter servo
reversing settings to correct any flight control direction errors.


