background image

41

42

(in accordance with ISO/IEC 17050-1)

No. HH20090202

Product(s): 

Super Cub LP RTF 

Item Number(s):  HBZ7300

Equipment class:   

1

The objects of declaration described above are in conformity with the requirements 

of the specifications listed below, following the provisions of the European R&TTE 

directive 1999/5/EC:

EN 301 489-1 v.1.6.1 

General EMC requirements 

EN 301 489-17 v.1.2.1

Signed for and on behalf of:

Horizon Hobby, Inc.

Champaign, IL USA

Feb 02, 2009

Declaration of Conformity

Steven A. Hall 

Vice President 

International Operations and  

Risk Management 

Horizon Hobby, Inc.

Summary of Contents for SuperCub

Page 1: ...05 Fieldstone Road Champaign IL 61822 2009 Horizon Hobby Inc Horizon Hobby UK Units 1 4 Ployters Rd Staple Tye Harlow Essex CM18 7NS United Kingdom Horizon Hobby Deutschland GmbH Hamburger Strasse 10 25335 Elmshorn Germany PRC patent number ZL 2005 1 0028326 6 13792 Printed 3 09 ...

Page 2: ...y Two sensors on the Super Cub LP one on the top and one on the bottom of the fuselage monitor the posi tion of the plane in relation to the ground When the plane is fly ing level the top sensor sees the sky while the bottom sees the ground and they tell the on board computer that the plane is flying correctly If the plane enters a dive and the sensors detect that the plane s orientation is incorr...

Page 3: ...charging make certain the battery is on a heat resistant surface 1 The 12V DC 3S Li Po balancing charger provides a charge current of approximately 1 3 amps The typical charge time for the included 11 1V 1300mAh Li Po is approximately 1 hour 2 Locate the safety charge lead on the battery pack Connect the battery pack to the charger Charge through the balance lead on the battery pack The blue EC3 c...

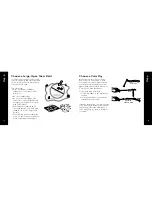
Page 4: ...brightly 4 Replace the batteries with fresh AA batteries when you hear the low voltage battery alarm beeping 5 Once the alarm goes off you only have a few minutes of power left so don t delay landing your plane any longer than necessary to land it safely 1 Locate the included wire landing gear 2 Slide the landing gear into the allotted slot on the bottom of the fuselage 3 Make sure the gear is sec...

Page 5: ...uts are in the small bag labeled B 5 Make certain the wing is properly attached and centered prior to each flight 1 Locate the rudder and horizontal stabilizer assemblies and carefully remove them from the box 2 Install the rudder assembly into the horizontal stabilizer as shown 3 Install the complete tail assembly into the fuselage as shown 4 Secure this assembly to the fuselage from the bottom w...

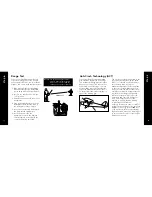
Page 6: ... Tail Control Test 1 Make certain the throttle slider is in the off position Turn on the transmitter 2 Install the flight battery in the fuselage and plug the battery lead into the lead inside the airplane 3 Move the stick on the transmitter rudder control side to side while observing the vertical control surface is moving per the input as shown Right Left 4 Push the stick full forward elevator co...

Page 7: ... be able to be done by using the trim levers on the transmitter To do this place the control stick at center and use the trim lever below the stick to adjust the rudder vertical surface until it is in line with the vertical fin To adjust the elevator so that it is in line with the horizontal stabilizer use the trim lever to the left of the control stick 2 After making adjustments using the trim le...

Page 8: ...8km h so it can cover ground quickly Plan on flying in an area that gives you more space than you think you need especially with first flights 600 feet We know you want to fly your Super Cub LP as soon as you have it How ever flying in too much wind can place your aircraft in jeopardy On your first flights make sure that the winds are no more than 5 7 mph 8 11km h To check the wind conditions Tie ...

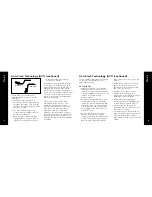
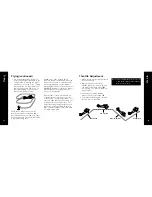
Page 9: ...uper Cub LP comes equipped with exclusive Anti Crash Technology This software will help prevent crashes due to over control The sensors that are located on the fuselage see the horizon One sensor is located at the top of the windshield and the other is on the bottom side of the fuselage in front of the landing gear The electronic system connected to the sensors knows that the airplane with ACT on ...

Page 10: ... on or off while in flight but sufficient altitude is required To turn off ACT simply move the switch on the top of the transmitter to the appropriate position ACT Flying Tips Never fly at too low of an altitude and expect ACT to save you from a crash You must maintain an altitude of at least 200 feet 61 meters for the software to be able to help prevent crashes Even when flying with ACT on if you...

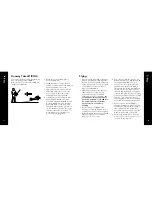
Page 11: ...p you launch the plane This will allow you to focus entirely on the transmitter input 1 Make sure the battery is fully charged 2 Make certain that no one is flying or preparing to fly on the same channel within approximately mile 8 kilometers If someone were to turn on a transmitter on the same frequency as yours you will lose control of your airplane This could cause damage to your airplane cause...

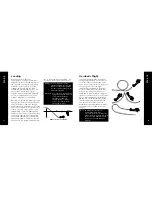
Page 12: ...n the throttle slider and control stick that are necessary to keep your aircraft heading directly into the wind Do not attempt a turn until you have reached a minimum of 50 100 feet 15 25 30 5 meters of altitude about as tall as a four story building 3 Control range is 2500 feet 762 meters so if you fly beyond that you will lose control of your airplane At that distance however you would likely lo...

Page 13: ...want to reduce altitude reduce throttle to less than 50 4 To increase altitude again increase throttle to more than 50 Rudder trim If the Super Cub LP seems to drift in one direction when the control stick is in the neutral centered position gradually move the rudder trim lever below the control stick in the OPPOSITE direction of the drift Adjust until the plane flies straight with the control sti...

Page 14: ...ot attempt to catch the airplane or injury may occur Turn the motor off prior to touchdown in order to prevent damage to the wing and or propeller Expert Tip As you get more experienced at flying try adding a small amount of UP elevator just before touchdown to flare the airplane With more and more practice your landings will be smooth and on target 10 FT Reduce power at 10 feet It is recommended ...

Page 15: ...the wing and or tail are bent replace the damaged parts prior to flying again There is a complete list of replacement parts in the back of this manual Replace wing immediately Once you are an accomplished pilot and you are ready for the next exciting challenge you may want to try the thrill of float flying The Super Cub LP has the mounts installed for the optional HobbyZone Super Cub LP floats HBZ...

Page 16: ...near people vehicles train tracks buildings power lines water or trees and never attempt to catch the airplane 4 Age Recommendation 14 years or over This is not a toy This product is not intended for use by children without direct adult supervision 5 Only use a LiPo battery charger that is compatible for use with the Super Cub LP battery We recommend us ing the charger that comes with your airplan...

Page 17: ...l conditions improve 3 Turn ACT off and postpone using ACT until sun is higher in the sky PROBLEM POSSIBLE CAUSE SOLUTION Success Tips gently to level flight and level the wings 4 Don t attempt to fly or do maneuvers beyond your flying abilities without seeking the assistance of an experienced pilot 5 If you re gliding with the motor off allow the Super Cub LP more area for turns 6 Position yourse...

Page 18: ...RIPTION RETAIL HBZ1002 9 x 6 Propeller 3 49 HBZ1003 DC LiPo Balancing Charger 19 99 HBZ1004 1 5A AC Power Supply 19 99 PKZ1033 1300mAh 11 1V Li Po Battery with EC3 Connector 41 99 HBZ1058 Transmitter Antenna 4 99 HBZ6057 Transmitter Battery Cover 2 50 HBZ7071 Transmitter Ch 1 26 995 32 99 HBZ7072 Transmitter Ch 2 27 045 32 99 HBZ7073 Transmitter Ch 3 27 095 32 99 HBZ7074 Transmitter Ch 4 27 145 32...

Page 19: ...bility Failure to operate this Product in a safe and responsible manner could result in injury or damage to the Product or other Warranty Warranty Period Exclusive Warranty Horizon Hobby Inc Horizon warranties that the Products purchased the Product will be free from defects in materials and workmanship at the date of purchase by the Purchaser Limited Warranty a This warranty is limited to the ori...

Page 20: ...oduct is not intended for use by children without direct adult supervision The Product manual con tains instructions for safety operation and maintenance It is essential to read and follow all the instructions and warn ings in the manual prior to assembly setup or use in order to operate cor rectly and avoid damage or injury Questions Assistance and Repairs Your local hobby store and or place of p...

Page 21: ...ipped to the following address Horizon Service Center 4105 Fieldstone Road Champaign Illinois 61822 All other Products requiring warranty inspection or repair should be shipped to the following address Horizon Product Support 4105 Fieldstone Road Champaign Illinois 61822 Please call 877 504 0233 or e mail us at productsupport horizonhobby com with any questions or concerns regarding this product o...

Page 22: ...with the requirements of the specifications listed below following the provisions of the European R TTE directive 1999 5 EC EN 301 489 1 v 1 6 1 General EMC requirements EN 301 489 17 v 1 2 1 Signed for and on behalf of Horizon Hobby Inc Champaign IL USA Feb 02 2009 Declaration of Conformity Steven A Hall Vice President International Operations and Risk Management Horizon Hobby Inc ...

Reviews: