#3156 / Page 2 of 4
#3156 MAST STEPPER III
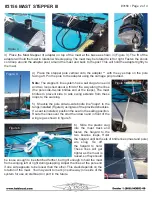
3) Place the Mast Stepper III adapter on top of the mast at the base as shown in (Figure 3). The fit of the
adapter will hold the mast in rotation while stepping. The mast may be rotated to left or right. Fasten the shock
cord loop around the adapter post, around the mast and back to the post. This will hold the adapter tightly to
the mast.
4) Place the stepper pole vertical onto the adapter ** with the eye strap on the pole
facing aft. Pin the pole to the adapter using the carriage pin provided.
Note:
The stepper's line system has a sail slug at one end
and two loops tied about a third of the way along the lines
(the pole side-to-side bridles end at the loops). The mast
bridles to prevent side to side swing extends from these
loops to the sail slug.
5) Shackle the pole side-to-side bridle line "loops" to the
tangs installed (Figure A) using two of the provided shackles.
If a seat is installed, position the seat in the sailing position.
Route the lines over the strut then down and in front of the
wing leg as shown in figure 5.
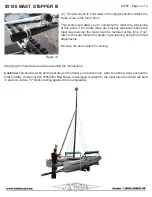
6) Slide the plastic slug
into the mast track and
fasten the halyard to the
two bowline loops. Hoist
the halyard until both sets of bridle lines (mast and pole)
are snug. Tie off
the halyard to hold.
These lines will get
tighter as the mast is
raised, so they should
be loose enough to be stretched further, but tight enough to hold the mast
from swinging left or right during stepping. Adjust the lines at the pole end
if one side appears to be looser than the other. This slack depends on the
rotation of the mast. You may want to mark (in some way) one side of the
system for use on starboard or port in the future.
Figure 3
Figure 4
Figure 5
Figure 6


