background image


GRW Weighing Scale


User Manual 

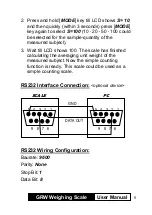
2.  Press and hold [

MODE

] key till LCD shows 

S= 10

and then quickly (within 3 seconds) press [

MODE

key again to select 

S=100

 (10

20

50

100 could 

be selected for the sample-quantity of the 
measured subject). 


3.  Wait till LCD shows 100. The scale has finished 

calculating the averaging unit weight of the 
measured subject. Now the simple counting 
function is ready. This scale could be used as a 
simple counting scale. 


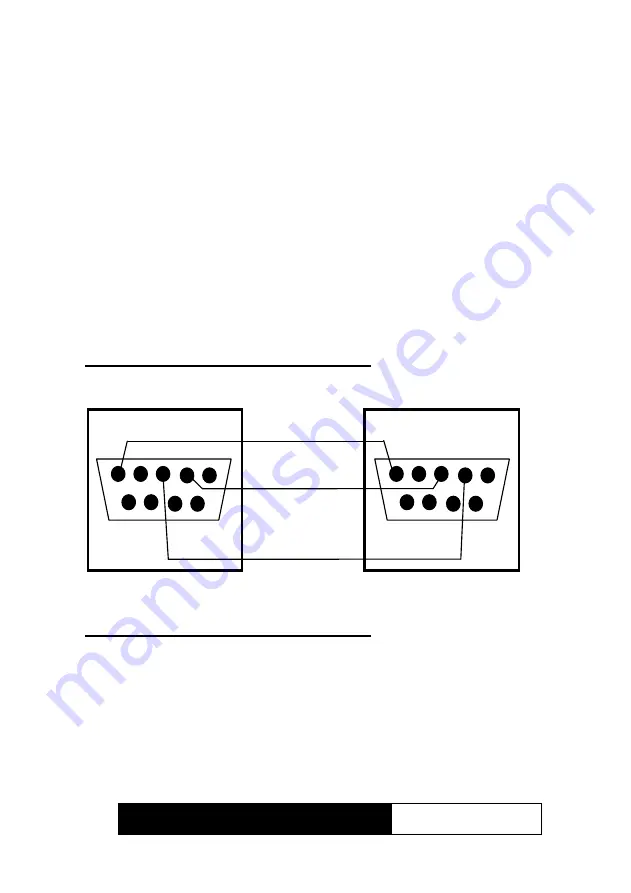
RS232 Interface Connection:

 <

optional device


RS232 Wiring Configuration: 

Baurate: 

9600


Parity: 

None


Stop Bit: 

1


Data Bit: 


5  4  3  2  1 

9  8  7  6 

SCALE 

5  4  3  2  1 

9  8  7  6 

PC 

8   

GND 

DATA OUT 

Summary of Contents for GRW Series

Page 1: ...GRW Weighing Scale User Manual User Manual GRW Series Digital Weighing Scale ...

Page 2: ...er a long period of storage more than one month It takes 8 10 hours to fully recharge the battery Please assemble the platter before powering on the scale Do not keep the weight placed on the platter for a long period Keep the scale away from the environment with high temperature high humidity heavy press and heavy bump Always make sure the scale is located in a flat and plane surface 1 ...

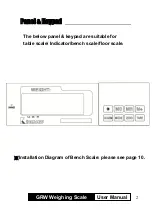
Page 3: ...GRW Weighing Scale User Manual Panel Keypad The below panel keypad are suitable for table scale Indicator bench scale floor scale Installation Diagram of Bench Scale please see page 10 2 ...

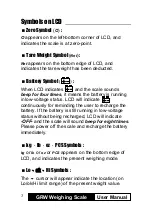
Page 4: ...s running in low voltage status LCD will indicate continuously for reminding the user to recharge the battery If the battery is still running in low voltage status without being recharged LCD will indicate OFF and the scale will sound beep for eight times Please power off the scale and recharge the battery immediately kg lb oz PCS Symbols kg or lb or oz or PCS appears on the bottom edge of LCD and...

Page 5: ... key has no funtion ALARM 1 Over Weight alarm Place a specific weight on the platter and then press ALARM key to set the weight for Over Weight alarm The scale will sound beep repeatedly e g Put 5kg weight on the platter and then press ALARM key The scale will sound beep repeatedly At this moment if the measured weight 5kg the scale will sound beep repeatedly Press ALARM key again could disable th...

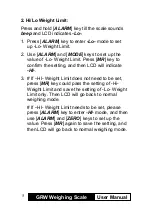
Page 6: ...key to confirm the setting and then LCD will indicate HI 3 If HI Weight Limit does not need to be set press MR key could pass the setting of Hi Weight Limit and save the setting of Lo Weight Limit only Then LCD will go back to normal weighing mode If HI Weight Limit needs to be set please press ALARM key to enter HI mode and then use ALARM and ZERO keys to set up the value Press MR again to save t...

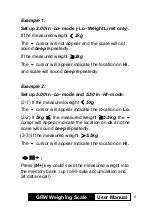
Page 7: ...und beep repeatedly Example 2 Set up 5 00 in Lo mode and 5 50 in HI mode 2 1 If the measured weight 5kg The cursor will appear indicate the location on Lo 2 2 If 5kg the measured weight 5 5kg the cursor will appear indicate the location on ok and the scale will sound beep repeatedly 2 3 If the measured weight 5 5kg The cursor will appear indicate the location on Hi M Press M key could save the mea...

Page 8: ...in the memory bank ZERO Press this key to make the scale be at zero point LCD will indicate O on the left bottom corner TARE Press this key to deduct the tare weight Put the package or container on the platter and then press TARE key LCD will show O and Net Simple Counting Mode Under PCS mode The suggested unit weight of the measured subject should be heaver than the division of this scale 1 Put 1...

Page 9: ...of the measured subject 3 Wait till LCD shows 100 The scale has finished calculating the averaging unit weight of the measured subject Now the simple counting function is ready This scale could be used as a simple counting scale RS232 Interface Connection optional device RS232 Wiring Configuration Baurate 9600 Parity None Stop Bit 1 Data Bit 8 5 4 3 2 1 9 8 7 6 SCALE 5 4 3 2 1 9 8 7 6 PC 8 GND DAT...

Page 10: ...C outlet CHARGE LED will indicate the ongoing status of the battery It takes about 8 10 hours to fully recharge the battery CHARGE LED Color of LED Status of the battery RED Initial connection ORANGE Charging GREEN Fully charged Power Requirements AC 220V 10 50Hz DC 6V 4Ah rechargeable battery P 0 2W max 9 ...

Page 11: ... Screw 2 Regulator and 3 Stainless Steel Tube together with 1 screw and 1 clip of Regulator D Please refer to the Diagram pull 7 Cable of Load Cell from the bottom to the top through 3 Stainless Steel Tube and then screw the Clip on the bottom of 4 Tube Base with 1 screw of Clip E Connect 1 Indicator with 2 Regulator Notice the direction Please refer to the arrow on the diagram for proper directio...

Page 12: ...GRW Weighing Scale User Manual We do more than you expect Digital Weighing Scale ...

Reviews: