background image

G

E

L

H

S

F

R

5

E

O

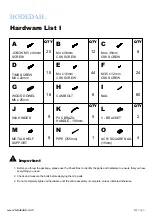
M4 x 16mm CSK SCREW

8

M3.5 x 12mm CSK SCREW

E

12

F

16

G

6

H

2

METAL RUNNER 14"

R

2

V - BRACKET

L

4

AC51 SQUARE NAIL (15mm)

O

S

G

G

H

4

3

7

9

14

15

17

19

18

G

G

H

H

H

H

H

S

R

R

R

R

O

O

O

O

L

L

G

G

G

G

G

G

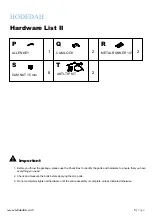
WOOD DOWEL 6 x 25mm

6

S

S

CAM NUT 15 mm

CAM BOLT

S

19

18

17

S

G

G

G

G

G

G

S

www.Hodedah.com

9 | 

Page

Step 1

HODEDAH

®

Step 2

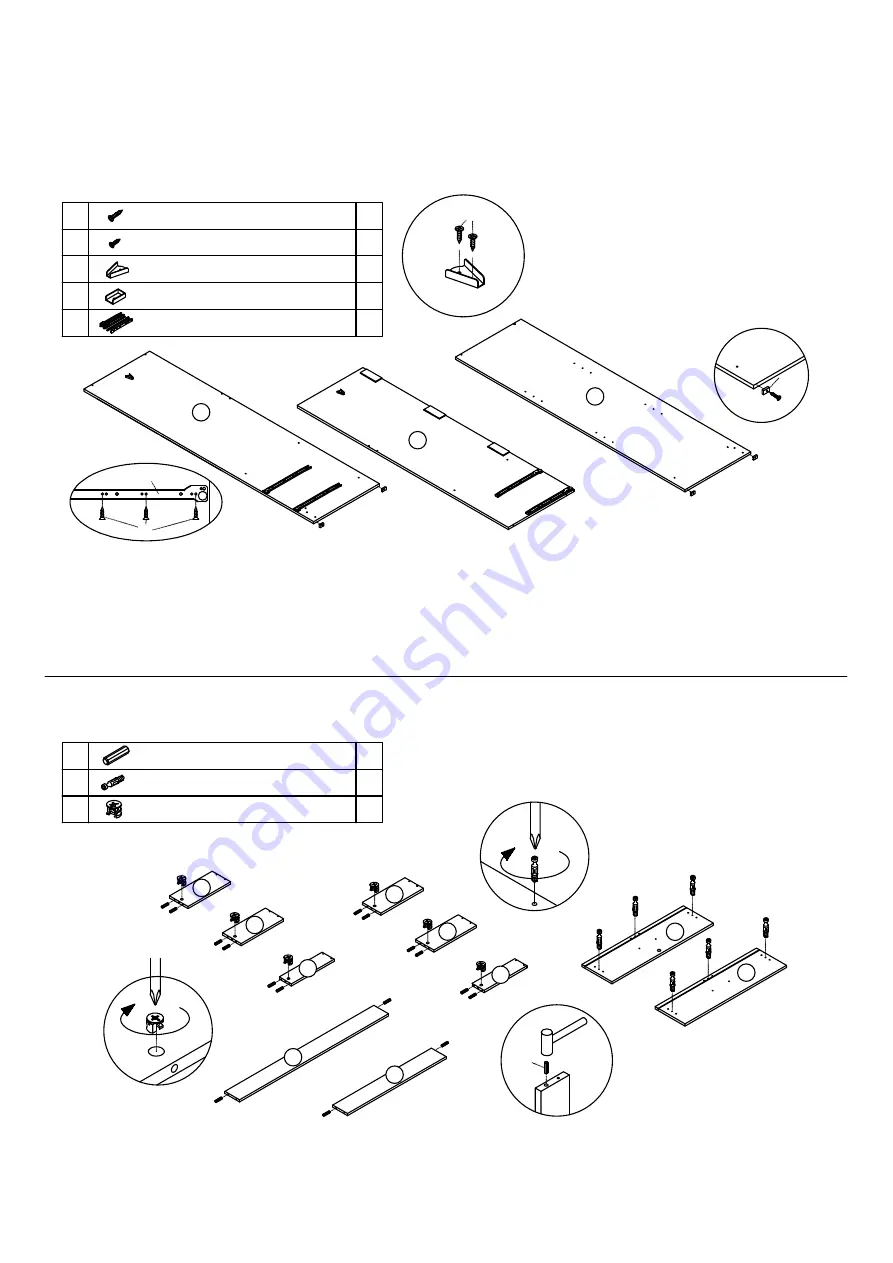
- Insert 16 x Dowels (G) into panels (7) , (9) , (17) , (18) , (19) using a Hammer.
- Insert 6 x Cam Nuts (S) into panels (17) , (18) , (19).
- Screw 6 x Cam Bolts (H) into panels (14) & (15) using a Phillips head screwdriver.

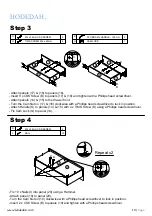
- Attach V - Bracket (L) to panels (3) & (5) with 4 x CSK Screw (E)

  using a Phillips head screwdriver.

- Attach Metal Runner (R) to panels (3) & (5) with 12 x CSK Screw (F)

  using a Phillips head screwdriver.

- Attach Square Nails (O) to panels (3) & (4) with 4 x CSK Screw (E)

  using a Phillips head screwdriver.

Summary of Contents for HID 4400-D

Page 1: ...25 Ibs Weight Capacity per shelf 25 Ibs Assembly Instructions This instruction booklet contains important safety information please read and keep for future reference ITEM HID 4400 D 3 DOOR WARDROBE F...

Page 2: ...any way To obtain warranty service original purchaser must present the following original bill of sale date of purchase where the product was purchased and images if applicable Components replaced wa...

Page 3: ...ble your furniture it will strip and damage parts Your package should include the following hardware and parts Parts are labeled or stamped on the raw edge Please inspect contents to ensure you have r...

Page 4: ...hten all hardware until the entire assembly is complete unless indicated otherwise A QTY B QTY C QTY Hardware List I D E F G H I HODEDAH 20 JCBCW M5 x 40mm SCREW M4 x 38mm CSK SCREW M4 x 35mm CSK SCRE...

Page 5: ...are to ensure that you have everything you need 2 Check and measure the bolts before applying them to parts 3 Do not completely tighten all hardware until the entire assembly is complete unless indica...

Page 6: ...www Hodedah com 6 Page 1 QTY 3 QTY 4 QTY Part List I 5 8 10 HODEDAH 1 1 1 2 2 2 1 6 1 1 7 1 9 1 11 12 1 1 13 14 16 15 17 1 1 1 2 2...

Page 7: ...www Hodedah com 7 Page 18 19 20 Part List II HODEDAH 2 21 22 4 1 2 2...

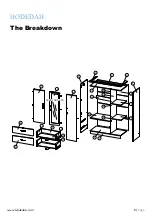
Page 8: ...www Hodedah com 8 Page The Breakdown HODEDAH 1 1200 x 395 x 15 2 2 3 4 5a 5b 5b 5b 22 6 7 10 10 9 8 11 12 13 14 15 16 17 18 19 20 21...

Page 9: ...ww Hodedah com 9 Page Step 1 HODEDAH Step 2 Insert 16 x Dowels G into panels 7 9 17 18 19 using a Hammer Insert 6 x Cam Nuts S into panels 17 18 19 Screw 6 x Cam Bolts H into panels 14 15 using a Phil...

Page 10: ...18 and tighten with a Phillips head screwdriver Attach panels 14 15 to the drawer front Turn the Cam Nut on 17 18 clockwise with a Phillips head screwdriver to lock in position Attach Handle K to pane...

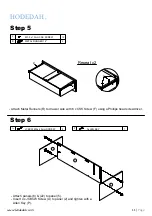
Page 11: ...2 F 2 METAL RUNNER 14 R R F R R Repeat x2 www Hodedah com 11 Page Step 5 HODEDAH Step 6 Attach Metal Runners R to drawer side with 6 x CSK Screw F using a Phillips head screwdriver Attach panels 6 22...

Page 12: ...8 3 JCBCW M5 x 40mm SCREW 3 A 1 P ALLEN KEY JCBCW M5 x 40mm SCREW 8 A 1 P ALLEN KEY Attach panels 8 9 to panel 5 Insert 3 x JCBCW Screw A to panel 5 and tighten with a Allen Key P Attach panel 3 to pa...

Page 13: ...CREW 8 C JCBCW M5 x 40mm SCREW 5 A 1 P ALLEN KEY 22 5 C C C C C C C C Attach panel 4 to panels 6 7 22 Insert 5 x JCBCW Screw A to panel 4 and tighten with an Allen Key P Attach panels 1 2 to panels 3...

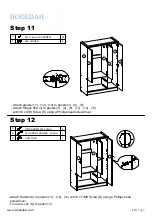
Page 14: ...J M4 x 16mm CSK SCREW 36 E 4 3 www Hodedah com 14 Page Step 11 HODEDAH Step 12 Attach panels 11 12 13 to panels 3 4 5 Attach Hinges 95A J to panels 3 4 5 11 12 13 with 36 x CSK Screw E using a Phillip...

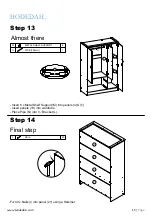
Page 15: ...Step 14 Final step 21 40 NAIL I 21 21 21 10 M 8 METAL SHELF SUPPORT M 5 10 10 N 1 PIPE 765mm N I Insert 8 x Metal Shelf Support M into panels 4 5 Insert panels 10 into wardrobe Place Pipe N into V Bra...

Page 16: ...other mounting bracket a on the wall stud 2 inches below the mounting bracket secured to the back of your unit Attach to the wall stud using c through the smaller hole of a FURNITURE STEP 3 Repeat th...

Page 17: ...www Hodedah com 17 Page Job Complete Enjoy Thank you for purchasing from Hodedah HODEDAH...

Reviews: