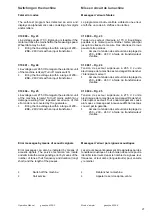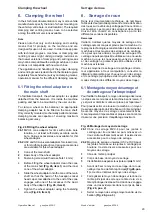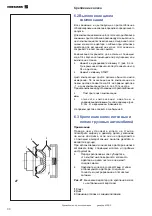
Commandes et affi cheurs
Mode d’emploi
Controls and displays
Operation Manual
15
3. Branchement
électrique
Toute intervention concernant le système électrique,
tel que le montage d’une fi che ou changement de
connexions, doit systématiquement être effectuée
par un électricien qualifi é, suivant les normes
nationales relatives et les instructions données par
l’entreprise d’électricité locale.
L’équipement électrique standard et le moteur
d’entraînement de l’équilibreuse sont conçus pour
être branchés sur un secteur de 1/N/PE ou 2/PE AC
50/60 Hz, 200–240 V.
Le câble de raccordement de la machine est équipé
d’un connecteur (norme européenne CEE 7/VII).
La protection secteur est à la charge du client et doit
être effectuée devant le connecteur enfi chable par
des fusibles à action retardée de 6 – 16 A ou par des
coupe-circuits automatiques à action retardée.
Le schéma des connexions électriques se trouve
au § 16. De plus, un schéma des connexions
électriques se trouve dans une enveloppe fi xée sous
le couvercle du châssis de la machine.
4. Commandes et affi cheurs
4.1 Touches de commande et affi cheurs
Fig. 7
Vue d’ensemble
1
Touche
START
– Initialiser une lancée de mesure
–
Si la touche START est actionnée après la
lancée de mesure alors que le carter est ouvert et le
frein de positionnement activé, la roue fait au maximum
un tour et freine ensuite, de sorte que la masse
d’équilibrage du plan de correction droit puisse être
positionné verticalement au-dessus de l’arbre principal.
2
Touche
STOP
– Interrompre la lancée de mesure.
– Effacer un code d’erreur affi ché
– Si l’entrée d’un mode de fonctionnement est
achevée par la touche STOP, le nouvel état est annulé
automatiquement et l’état préalable est rétabli.
3
Clavier avec touches de fonction
(voir Fig. 8)
4
Affi cheurs
(voir Fig. 9)
5
Symboles
pour:
– Quatre indicateurs Type de véhicule,
– Nombre de rayons détecté,
–
Identifi cateur Utilisateur autorisé
Fig. 8
Clavier avec touches de fonction
1
Touche
OP
– Initialiser une lancée d’optimisation.
– Dans le programme d’optimisation:
mémoriser la position de la valve.
2
Touche de
Precision
–
Affi cher grandeur de balourd avec une résolution
plus élevée:
1 g au lieu de 5 g ou 0,05 oz au lieu de 0,25 oz
(seulement tant que la touche est maintenue
appuyée).
–
Affi cher le balourd résiduel en-deça de la valeur
seuil pour la suppression des faibles balourds:
3. Electrical
connection
In general any work on the electrical system such
as fi tting of a plug or changing of connections,
if necessary, must be carried out by a qualifi ed
electrician in line with relevant national standards
and the regulations of the local power station.
Electrical standard equipment and drive motor of the
wheel balancer are provided for operation on 1/N/PE
or 2/PE 50/60 Hz,200–240 V.
The connecting cable of the machine is provided
with a protective plug (European Standard CEE 7/
VII).
Fusing is by the customer before the plug connector,
using slow-blow fuses of 6 – 16 A or automatic cut-
outs of the slow-blow type.
The electrical diagram is shown in § 16. Electrical
diagram. An electrical diagram is also provided in an
envelope attached under the cover of the machine
cabinet.
4. Controls and displays
4.1 Key pad and display
Fig. 7
Overview
1 START
key
–
Start a measuring run
– If the START key is pressed after the measuring
run with wheel guard open and activated positioning
brake, the wheel rotates by only one revolution at
most and slows down such that the weight for the
right correction plane can be fi tted in a position
perpendicular to and above the main shaft.
2 STOP
key
– Interrupt the measuring run.
– Delete an error code
– If input of a mode of operation is completed
with the STOP key, the new state is deselected
automatically and the former state is reestablished.
3
Key pad with function keys
(see Fig. 8)
4
Display panel
(see Fig. 9)
5
Symbols
for:
– Four Vehicle Type indicators,
– Number of Spokes Detected,
– Enabled User ID
Fig. 8
Key pad with Function key
1 OP
key
– Start an optimisation run.
– In the opto-ride program:
enter valve position.
2 Precision
key
– Show amount reading with higher resolution:
1 gramme instead of 5 grammes or 0.05 oz instead
of 0.25 oz (only for as long as the key is pressed)
– Display residual wheel unbalance below the
threshold for suppression of minor unbalance
geodyna 6300-2
geodyna 6300-2


