background image

25

Layout

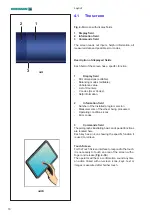
Abb. 4-7


BALANCING

Bildschirm Auswuchten.

Der  Zugriff  erfolgt  über  die 

Taste BALANCING

 (

5

Abb. 4-5

)

.

Die Befehle sind:

1 – 

Taste HELP 

– Um die HILFE-Texte einzublenden.

2 – 

Taste HOME

 – Geht zur Einstiegsseite (INTRO 

SCREEN) zurück.


3 – 

Taste START

 – Startet den Messlauf.

4  – 

Taste ESC 

–  Um  die  Option,  die  gerade 

durchgeführt bzw. angezeigt wird, zu schließen.

5  – 

Taste BALANCE

  –  Geht  zum  automatischen 

Auswuchtprogramm zurück.

6  – 

Taste OPT/MIN

  –  Startet  das  Programm  zur 

Optimierung / Minimierung.

7 – 

Taste SPLIT

 – Start den Vorgang zur Verteilung 

des  Gegengewichts,  dass  hinter  den  Radspeichen 

angebracht werden muss. 

8 – 

Taste FINE 

 – Erhöht die Auflösung der angezeigten 

Werte, um die Restunwuchten abzulesen.

9 – 

Taste STATIC 

– Um die statische Auswuchtung 

aufzurufen.  Durch  erneutes  Drücken  wird  die 

dynamische Auswuchtung wiederhergestellt. 

10  – 

Taste LASER POINTER 

–  Gibt  die  erneute 

Anordnung  des  Gegengewichts  im  Modus  Laser 

Pointer frei. Durch erneutes Drücken wird die Änderung 

der Position bestätigt.

11 – 

Taste RAD-DATEN SPEICHERN 

– Die Daten der 

Abmessungen des Rads, das gerade vermessen wird, 

werden gespeichert, um an den nächsten Rädern mit 

den gleichen Abmessungen (Rad-Set) verwendet zu 

werden. Auf diese Weise wird der Messlauf verkürzt. 

12 – 

Taste RIM DATA ENTRY

 – Um die Bildschirmseite 

für die Eingabe der Felgendaten aufzurufen, und um 

den Betriebsmodus “Manuell” herzustellen, falls man 

von “Automatisch” kommt.

13 - 

Taste WAP 

  -  Die  Taste  befindet  sich  beim 

Unwuchtwert. Wenn man die Taste berührt, wird das Rad 

automatisch auf der Position zur Gewichtanbringung 

eingedreht;  das  Rad  startet,  um  die  WAP-Position 

auf der entsprechenden Ebene zu erreichen und hält 

dort an. 

Disposition

Fig. 4-7


BALANCING

Page-écran Équilibrage.

Pour accéder à la page, presser la 

touche BALANCING


(

5

Fig. 4-5

)

.

Commandes :

1 - 

Touche HELP 

- Sélection de textes d’AIDE.

2 - 

Touche HOME

 - Retour à la page principale (INTRO 

SCREEN). 

3 - 

Touche START

 - Démarrage du lancement roue.

4 - 

Touche ESC

  -  Sortie  de  l’option  en  cours 

d’exécution ou d’affichage.

5 -  

Touche BALANCE

 - Retour au programme 

automatique d’équilibrage.

6 - 

Touche OPT/MIN

 - Lance le programme 

d’Optimisation/Minimisation.

7 - 

Touche SPLIT

 - Lance la procédure de division du 

contrepoids à appliquer derrière les rayons. 

8 - 

Touche FIN

 - Augmente la résolution des valeurs 

affichées pour la lecture des déséquilibres résiduels.

9 - 

Touche STATIC

 - Permet de repasser en 

équilibrage  statique.  Une  nouvelle  pression  fait 

repasser en équilibrage dynamique. 

10 - 

To u c h e   L A S E R   P O I N T E R

 - Active le 

repositionnement du contrepoids en mode Laser 

Pointer. Une nouvelle pression confirme la modification 

de la position.

11 - 

Touche GEL DONNÉES ROUE

 - Les données 

de dimensions de la roue en cours de traitement sont 

enregistrées pour être utilisées avec d’autres roues de 

dimensions identiques (jeu de roues). On obtient ainsi 

un lancement plus court. 

12 - 

Touche RIM DATA ENTRY

 - Permet de passer 

à la page de Saisie de données de la jante, ainsi qu’à 

la fonction manuelle si l’on est en « Automatique ».

13 - 

Touche WAP 

- La touche se trouve à hauteur 

de  la  valeur  du  balourd.  Toucher  pour  orienter 

automatiquement la roue dans la position où les 

masses seront posées ; la roue démarre pour atteindre 

et s’arrêter dans la position WAP. 

........ ..

Summary of Contents for geodyna 8200

Page 1: ...geodyna 8200 geodyna 8250 Betriebsanleitung Operator s Manual Manuel Opérateur Radauswuchtmaschine Wheel balancer Équilibreuse Roues ...

Page 2: ...tationienlighetmedavsnittAibilagaVIIidirektiv2006 42 EG TUR Teknik Ofis Sorumlusu 2006 42 EC Yönetmeliği nin VII ekinin A harfinde belirtilen teknik dosyayı hazırlamaya yetkilidir HUN AMűszakiIrodaIrodavezetőjefeljogosította2006 42 EKirányelvArészénekVII Mellékletébenmeghatározott műszakidokumentációösszeállítására RUS Руководитель технического отдела уполномочен составить технический лист в соотв...

Page 3: ...ication WHEEL BALANCER Zum Produkt gehörendes Dokument AUSWUCHTMASCHINEN Publication de support au produit EQUILIBREUSE Публикация для поддержки изделия БАЛАНСИРОВОЧНЫЙ СТАНОК original language edition in ITALIAN Originalausgabe in ITALIENISCH langue d origine de la publication ITALIEN оригинальное издание на ИТАЛЬЯНСКОМ ЯЗЫКЕ Date of first publication Datum der Erstveröffentlichung Date de la pre...

Page 4: ...l is correct complete and up to date the right to change any part of this document at any time without prior notice is reserved Before installing maintaining or operating this unit please read this manual carefully paying extra attention to the safety warnings and precautions Table of Contents Warranty terms iv 1 0 Safety 6 2 0 Specifications 8 3 0 Introduction 10 4 0 Layout 14 5 0 Operation 44 6 ...

Page 5: ... Layout 15 5 0 Betrieb 15 6 0 Wartung 133 7 0 Fehlerbeseitigung 141 8 0 Entsorgung 175 9 0 Anhang 175 Anhang Installationsanweisugen 177 LIMITES D APPLICATION DE LA GARANTIE ET LIMITATIONS DE LA GARANTIE Bien que les auteurs aient accordé la plus grande attention à la rédaction du présent manuel aucun élément figurant dans ce dernier ne modifie les conditions et les termes standards d un accord d ...

Page 6: ...FOLLOWING ACTION MAY RESULT IN DAMAGE TO THE UNIT OR OBJECTS ATTACHED TO IT WARNING INDICATES THAT THE FOLLOWING ACTION MAY RESULT IN SERIOUS INJURY TO THE OPERATOR OR OTHERS Bulleted list Indicates that action must be taken by the operator before proceeding to the next step in the sequence TOPIC no see the Chapter number The topic indicated is explained in full in the charter specified 1 2 Manual...

Page 7: ... Konformitätserklärung befindet sich im Er satzteilhandbuch Sécurité 1 0 Sécurité Les mesures de sécurité importantes relatives à l unité sont décrites dans le Livret de Sécurité voir Figure 1 1 Les consignes de sécurité doivent être totalement comprises et observées par chaque opérateur Nous suggérons de conserver une copie du Livret de Sécurité près de la machine à la portée de l opérateur Le Ma...

Page 8: ...ce time Data entry Wheel 195 65R15 Start Stop balance time Data entry and spoke counting Wheel 195 65R15 Start Stop balance time Data entry spoke counting and run out 195 65R15 Manual data Entry Rim diameter range Offset range Rim width range Semi Auto data Entry GEODATA Rim diameter range Offset range Rim width range Working range Auto data Entry SCANNER SMART SONAR Rim diameter range Rim width r...

Page 9: ...ewindetiefe Querkraft Optimierung Reihe von Rädern 2 0 Spezifikationen Specifications Données Equilibreuses Véhicules compatibles Vitesse de mesure Précision d équilibrage Résolution angulaire Diamètre arbre Longueur arbre Offset bride équilibreuse Temps d équilibrage Rotation de contrôle Roue 195 65R15 Marche Arrêt temps d équilibrage Données Roue 195 65R15 Marche Arrêt temps d équilibrage Donnée...

Page 10: ...he vehicle wheel balancer is designed for dynamic and static balancing of passenger car and light truck wheels that fall within the limits stated in the technical specifications 2 This is a high accuracy measuring device Handle with care Versions This wheel balancer model is available in two versions A Model with integrated wheel lifter The lifter is located below the wheel shaft and is inte grate...

Page 11: ...zeitlagerung dürfen die folgenden Werte nicht überschritten werden Temperaturbereich 0 50 C Luftfeuchtigkeitsbereich 10 90 nicht kondensierend Introduction 3 0 Introduction Cette équilibreuse vous offre une technologie avancée de haute performance solidité et fiabilité et son opération est très simple et conviviale La faible vitesse de rotation de la roue assure que cette équilibreuse peut être ut...

Page 12: ...0005D24A EAM0005D23A EAM0005D40A 8 04250A EAA0247G21A Accessories 3 2 Accessories Refer to Figure 3 1 The standard accessories are Power Clamp Nut Plastic Sleeve Universal drum cushion Universal drum Spacer ring Large cone Medium cone Small cone Calibration weight Weight pliers Gauge ...

Page 13: ...dardzubehör steht zur Verfügung Power Clamp Spannmutter Druckmuffe aus Kunststoff Schützring für Drucktopf Drucktopf Distanzring Großer Konus Mittlerer Konus Kleiner Konus Benutzerkalibriergewicht Gewichtzange Meßlehre Accessoires 3 2 Accessoires Se reporter à la Figure 3 1 Les accessoires standard sont Embout de blocage Power Clamp Manchon en plastique Joint protection de la coupelle Coupelle pla...

Page 14: ...r 4 7 6 Internal Scanner Refer to Chapter 4 9 7 Control pedal Brake Power Clamp Refer to Chapter 4 5 8 Weight compartments 9 Storage areas for cones and nuts 10 Lifter control if present 11 Lifter platform if present 12 Rear Scanner Refer to Chapter 4 9 Refer to Figure 4 2 1 Mains switch ON OFF 2 Fuse holder 3 Monitor Power Supply 4 Machine Power Supply 5 USB Ports 6 Network Connector 7 Video VGA ...

Page 15: ...es Monitors 4 Netzanschluss der Maschine 5 USB Ports 6 Netzverbinder 7 Video Verbinder VGA Disposition 4 0 Disposition Se reporter à la Figure 4 1 Description fonctionnelle de la machine 1 Affichage Se reporter au Chapitre 4 1 2 Carter de roue 3 Capteur externe Sonar Se reporter au Chapitre 4 8 4 Embout d arbre 5 Jauge de déport Se reporter au Chapitre 4 7 6 Scanner interne Se référer au Chapitre ...

Page 16: ... Help information 2 Information field Number of the installed program version Measurements of the wheel being processed Operating conditions icons Error codes 3 Commands field The pictographs illustrating basic and special functions are located here Each key has an icon showing the specific function it is used to retrieve Touch Screen For the Touch Screen interface to respond to the touch it is ne...

Page 17: ...ssignal vernehmen können sobald er durch entsprechendes Berühren die mit Symbolen Tasten oder Abbildungen am Bildschirm verknüpfte Aktion umsetzt Disposition 4 1 Écran Fig 4 3Écran avec zones d affichage 1 Zone d affichage 2 Zone d information 3 Zone Commandes Sur l écran sont affichés les paramètres les textes d aide toutes les valeurs mesurées et les messages d erreur Description des zones d aff...

Page 18: ...o explain a situation and in case of error codes provides hints for remedy 5 START key Starts the measuring run Press to start wheel rotation with the wheel guard down 6 STOP key forced stop Immediately brakes the measuring run and any other automatic movement in progress for example wheel clamping and the Lifter if present 7 CONFIRMATION key Inserts the selected options 8 RETURN key Returns you t...

Page 19: ...ischen Bewegungen an Die Taste ermöglicht außerdem den Zugriff auf die Benutzer Codes 7 1 Disposition 4 1 1 Commandes de base Figure 4 4 Clavier 1 Type de touche fondamentale ce type de touche se trouve toujours dans le Champ Commandes 2 Touche HOME 3 Touche ESC 4 Touche HELP 5 Touche START 6 Touche STOP 7 Touche CONFIRMATION 8 Touche RETOUR Description des touches 1 Touches Exemple Sélection des ...

Page 20: ...performs tyre run out and possibly rim run out 1 Balance Selects the automatic complete balancing program 2 Balance No Spokes Selects the automatic balancing program excluding the spoke identification process 3 Manual Data Entry Selects the manual balancing program 4 HELP key Selects HELP texts for the current function 5 BALANCING key Opens the BALANCING Screen Page 6 VEHICLE key Allows selections...

Page 21: ...s Benutzers 7e Taste COMPENSATION RUN Ruft den Kompensationslauf auf 8 Taste START Startet den Messlauf vorausgesetzt dass der Radschutz zuvor nach unten gestellt wurde Disposition 4 1 2 Pages écran Commandes La zoneAffichage donne accès aux principales pages écran opérationnelles Chaque page contient des commandes de base si tuées en bas dans le Champ Commandes D autres commandes peuvent se trouv...

Page 22: ...he rim nominal width value set The right arrow increases the value The left arrow reduces the value Note Rim width is displayed in 0 10 steps 7 DIAMETER keys For changing the rim nominal diameter value set The upper arrow increases the value The lower arrow reduces the value 8 START key Starts the measuring run 9 INCH MM key For selecting alternatively inches or millimetres press directly on one o...

Page 23: ...scheint verdunkelt 12b 13 Für manuelle Eingabe der Radgröße Disposition Fig 4 6 RIM DATA ENTRY Page écran de saisie des données de la roue Pour accéder à la page presser la touche Manual Data Entry 3 Fig 4 5 Commandes spécifiques 1 Touche HELP Sélection de textes d AIDE 2 Touche HOME Retour à la page principale INTRO SCREEN 3 Touche SPECIAL Accès à la page PROFILS ROUE pour l enregistrement ou la ...

Page 24: ...s the resolution of the values shown for reading remaining unbalances 9 STATIC key For retrieving static balancing Press again to restore dynamic balancing 10 LASER POINTER key Enables relocation of the wheel weight in Laser Pointer mode Press again to confirm the position change 11 FREEZE WHEEL DATA key Size data for the wheel being processed are saved so that they can be used with subsequent whe...

Page 25: ...h auf der Position zur Gewichtanbringung eingedreht das Rad startet um die WAP Position auf der entsprechenden Ebene zu erreichen und hält dort an Disposition Fig 4 7 BALANCING Page écran Équilibrage Pour accéder à la page presser la touche BALANCING 5 Fig 4 5 Commandes 1 Touche HELP Sélection de textes d AIDE 2 Touche HOME Retour à la page principale INTRO SCREEN 3 Touche START Démarrage du lance...

Page 26: ...he wheel shaft When the required value is reached press it to enter it and complete the selection Fig 4 9 COUNTERS Counters Screen Open with the SETTINGS key 7 Fig 4 5 Counters A Fig 4 9 The screen pages for Counters and System Information B Fig 4 9 both accessible from the Setting Screen Page do not have parameter selection commands but instead they respectively show Statistical Information and i...

Page 27: ...die Läufe des Kundendienstes die Läufe seit der letzten Kalibrierung die Zyklen der Radaufspannung Disposition Fig 4 8 SETTINGS Page écran Paramètres Pour accéder à la page presser la touche SETTINGS 7 Fig 4 5 Commandes 1 Touche HELP Sélection de textes d AIDE 2 Touche HOME Retour à la page principale INTRO SCREEN 3 Touche USER CAL Lancement de la procédure d ÉTALONNAGE UTILISATEUR 6 2 4 Touche ES...

Page 28: ...T MIN key Continues the previously interrupted Optimisation Minimisation cycle 8 CONFIRM key Confirm enter completed wheel positioning as required by the program 9 BACK key Takes you back one step during execution of the OPT MIN program Fig 4 11 WHEEL PROFILE Wheel Profile Screen Page Open with the SPECIAL key 3 Fig 4 6 before the measuring run Commands 1 HELP key Selects HELP texts relating to th...

Page 29: ...il in der Liste und stellt sie ein 5 Taste ESC Geht zum HAUPTMENÜ zurück Um die C Codes zu schließen Löschen Hilfetexte und MELDUNGEN Disposition Fig 4 10 OPTIMISATION MINIMISATION Page Optimisation de stabilité de marche Minimisation des masses On accède à cette page par la touche OPT MIN 6 Fig 4 7 lorsqu elle est visible à l écran à la suite du lancement de mesure Les commandes possibles pendant...

Page 30: ...ing off for grams ounces remains 4 1 3 1 Dimension Unit Toggle Default diameter and width unit setting inches Press the mm or inch icon 14 Fig 4 12 The measuring unit changes to the possible alternative 4 1 3 2 Weight Unit Toggle Default weight unit setting grams Proceed as follows to change the weight unit of measurement before or after a measuring run Press the g or oz icon 22 Fig 4 13 The measu...

Page 31: ...hl vor oder nach dem Messlauf Geben Sie am Symbol g o oz ein 22 Abb 4 13 DieMaßeinheitwirdaufdiejeweilsandereumgeschaltet Disposition 4 1 3 Réglages Après l allumage de l unité un type de roue est affiché par défaut Si l unité montre ensuite un type de roue différent 5 5 3 L unité de mesure par défaut de la machine est le pouce mais le réglage sélectionné avant d éteindre la machine pour les gramm...

Page 32: ...u 1 Alu 1P P5 Alu 2 Alu 2P P6 Alu 3 Alu 3P P7 Alu 4 P8 Alu 5 P9 Gauge arm for distance and rim diameter P10 Gauge arm for distance and rim diameter with stick on weight P11 Display of unbalance measured and rotation direction red arrows or arrows head A No colour greater distance from position B Red rotation direction to reach the position the higher the number of lit segments the more the wheel m...

Page 33: ...wicht anzuwenden P13 Kompensationlauf durchgeführt Disposition 4 2 Symboles Pictogrammes Sur l écran des pictogrammes sont affichés dans toutes les zones d affichage dans les zones d information les zones de menu et dans la zone d affichage P1 Type de roue 1 roue standard dimensions nominales en pouces ou en millimètres P2 Type de roue 2 roue de moto P3 Alu 0 normal mode d équilibrage standard P4 ...

Page 34: ... on rim and inflate to the specified inflation pressure P20 Turn the tyre over on the rim P21 Rotate rim until valve is exactly perpendicular to and above the chuck P22 Rotate wheel until valve is exactly perpendicular to and above the chuck P23 Push tyre on rim until the mark coincides precisely with the valve P24 Push tyre on rim until the double mark coincides precisely with the valve P25 Compe...

Page 35: ...den Disposition Symboles utilisés pour les opérations d OPTIMISATION MINIMISATION P15 Le démarrage du lancement roue est demandé P16 L application de la masse étalon est demandée P17 Placer repère à gauche sur le pneu P18 Placer repère à droite sur le pneu P19 Monter le pneu sur la jante et gonfler jusqu à la pression prescrite P20 Renverser le pneu sur la jante P21 Tourner la jante jusqu à ce que...

Page 36: ...the following page use keys 1 and 2 fig 4 13 if present The second screen with help information to the WHEEL DATA ENTRY appears Fig 4 14 Warning On pressing the HELP key in the last screen with help information the display jumps to the first screen again Quit help information Press the ESC key 4 3 1 Troubleshooting Help The machine is in working conditions with no errors Fig 4 15 In case system er...

Page 37: ...bb 4 16 Die HELP Taste drücken Abb 4 17 Disposition 4 3 Textes d aide Les textes d aide expliquent l opération en cours et donnent des consignes en cas de messages d erreur pour pouvoir trouver un remède Appeler texte d aide Appuyer sur la touche HELP Fig 4 12 La première page écran des textes d aide est affichée par exemple l encadré ENTREE DONNEE DE ROUE Fig 4 13 Pour accéder à la page précédent...

Page 38: ...ted to immediately stop wheel shaft rotation as well as any other balancer Lifter automatic movement In the event of a stop due to an unexpected action by the unit reconstruct the steps taken Did the operator make an error or omit to do something Correct the error and continue working No special procedure is required Did the unit do something unexpected Read the relevant chapters again Prepare the...

Page 39: ...s Gerät wieder ein Wiederholen Sie vorsichtig die Befehle und befolgen Sie dabei dieAnweisungen in der Betriebsanleitung Wenn das Gerät nicht richtig funktioniert WARNUNG VERHINDERN SIE EINE WEITERE BENUTZUNG DES GERÄTS Rufen Sie sofort den Kundendienst an Disposition La page relative à l erreur signalée apparaît en fournissant une information initiale ou de premier niveau à propos de l anomalie F...

Page 40: ...the brake and stop the chuck 4 6 Clamping a wheel Fig 5 17 The main shaft lock pedal has two functions A PEDAL DOWN Stopping rotation PEDAL UP POWER CLAMP lock The pedal in addition to the brake has a control function for the POWER CLAMP device and the wheel Lifter if present for clamping and removing the wheel on from the balancer Each time the pedal is moved UP the Power Clamp alternatively rele...

Page 41: ...r Clamp Vorrichtung mit ganz geöffneten Backen C Power Clamp Vorrichtung mit ganz geschlossenen Backen Disposition 4 5 Blocage de l arbre principal Figure 4 22 Pédale de blocage L arbre principal est bloqué quand la pédale est actionnée Cela permet de serrer ou de desserrer l écrou de serrage plus facilement et de maintenir la roue en position de correction pour une mise en place correcte des mass...

Page 42: ...y of the balancing 4 9 Laser Pointer Scanner Figure 4 24 The machine has a laser scanner to automatically acquire the wheel distance and diameter inside of rim The machine uses the Laser Pointer to indicate the precise point for fitting the stick on weights on the rim 5 9 The internal scanner also performs the rim run out Note If the machine is set in Gauge arm mode as default the Laser Pointer mo...

Page 43: ...ap on verwendeten Laser sind Laser der Klasse II DieAbwehrreaktiondesAugesbietetnormalerweise Schutz z B durch den Blinzelreflex Disposition 4 7 Piges de mesure Figure 4 23 Pige de mesure pour écart et diamètre de la jante 1 Pige de mesure télescopique et pivotable vers le haut 2 Porte masse pour tenir la masse autocollante pour palper la position dans laquelle la masse d équilibrage devra être pl...

Page 44: ...ceed or if an error code is shown 7 0 The unit will beep and perform a self test now In this phase this message is displayed on the screen WAIT LOADING Fig 5 2 As long as the machine is carrying out the self tests no inputs and no other operations whatsoever must be made During the self test phase the machine must not be subjected to shocks or vibrations Upon completion of the self test an acousti...

Page 45: ...heber zu aktivieren Das Steuerpedal A Abb 5 4 drücken Falls erforderlich senkt sich der Radheber vollständig Die Maschine ist einsatzbereit Utilisation 5 0 Utilisation 5 1 Allumage Veuillez vous familiariser avec les dangers possibles 1 0 la machine 4 0 Surtout pour les premiers essais de travail avec la machine veuillez s v p bien étudier les instructions de service et procéder en conséquence L o...

Page 46: ...th wheel lifter Machine operation enabling after start up depends on activation with the control pedal 5 1 3 Shutting down Always shut down properly when work is complete Remove the wheel from the balancer Remove the cones from the stub shaft Check the surfaces internal and external of the cones for damage The conditions of the cone are very important for a good balance quality Clean the cones nut...

Page 47: ...n den Rädern entfernt wurden und alles sonstige Material das unter das Auswuchtgerät geraten könnte auf Utilisation 5 1 2 État à la mise en circuit L unité électronique est programmée par le fabricant de façon que les modes de fonctionnement suivants soient disponibles juste après le démarrage Mode de fonctionnement AUTOMATIQUE Type de roue 1 roue de voiture tourisme avec dimensions nominales en p...

Page 48: ...eel to the centre of the shaft Support the wheel vertically and move the platform to bring it near to the rotary unit Bring the wheel near to the centring cone or ring WITH YOUR LEFT HAND hold the wheel vertical WITH YOUR RIGHT HAND grasp the plastic sleeve of the selected clamping adapter fit it on the shaft and press firmly against the wheel Fig 5 7 WARNING HAND CRUSHING HAZARD COMPLY WITH THE M...

Page 49: ... wenn das Rad richtig gespannt und der Radschutz geschlossen sind Utilisation 5 2 Serrage desserrage de roue La commande électrique est conçue telle qu après la mise en circuit de l interrupteur secteur les mors de serrage restent dans leur position instantanée et que tout changement doit être effectué exprès par un actionnement de la pédale 5 2 1 Serrage de roue Remarque Avant le serrage d une ro...

Page 50: ...rom the shaft Support the wheel then move the platform out of the shaft area towards the right Press and release the control pedal the platform will be completely lowered Roll the wheel off the balancer 5 2 2 Unclamping the wheel Note While the jaws unclamp support the wheel WITH YOUR LEFT HAND so that it will not tilt when unclamped Lift the pedal Fig 5 8 Remove the clamping sleeve from the chuck...

Page 51: ...annung löst Das Pedal anheben Bild 5 8 Die Spannhülse von der Hauptwelle abziehen Abb 5 7b Das Rad abnehmen Utilisation 5 2 2 1 Utilisation de l élévateur automatique si présent Fig 5 8b L élévateur monte automatiquement dès que l opérateur actionne la pédale pour retirer la roue Après avoir sorti l outil de fixation de l arbre Soutenir la roue puis déplacer la plateforme pour la mettre hors de po...

Page 52: ...y from the clamping cone 3 Figure 5 9 and pull it out until the hexagon screw heads come out of the bayonet disc Pull the clamping device outwards Fig 5 10 Operate the stop brake remove the screws and the clamping device by hand from the tie rod Mount the tool required Figure 5 11 For fitting the motorcycle wheel adaptor p see the separate fitting and operating instructions Prepare the clamping de...

Page 53: ...tiviert stellen das Entspannen der Spannvorrichtung Power Clamp sperren Utilisation 5 3 Replacement du moyen de serrage pour roues sans trou central Pour le centrage et le serrage des jantes sans trou central ou des roues de moto sur une équilibreuse p le moyen de serrage MZV p peut être remplacé par un moyen de serrage SCA ou par un moyen de serrage de roues de moto p Avant de procéder au changem...

Page 54: ...side Remove the special clamping tool if mounted from the cone of the chuck Mount the basic body of the Power Clamp screw it onto the tie rod to the end of the thread and then release it again by a quarter of a revolution Slide the basic body of the Power Clamp by hand onto the taper part inserting the screw heads through the bayonet disc holes Turn the basic body of the Power Clamp until the scre...

Page 55: ... Die Spannhülse mit dem Andrucktopf aufschieben und anziehen Die Schrauben gleichmäßig mit einem Maulschlüssel SW 13 anziehen Utilisation Montage du moyen de serrage Power Clamp Il n y a pas de roue sur la machine Mise en garde Si la machine est à nouveau modifiée pour le moyen de serrage Power Clamp remettre le mode C22 à l état pas activé Desserrage du moyen de serrage Power Clamp bloqué Voir la...

Page 56: ...Spring weight on rim left edge stick on weight inside rim channel aluminium Alu 4 Spring weight on rim left edge stick on weight on rim right shoulder aluminium Alu 5 Spring weight on rim right edge stick on weight on rim left shoulder aluminium Alu 1P Stick on weights Stick on weights on rim shoulders aluminium Alu 2P Stick on weights Stick on weight on rim shoulder stick on weight hidden inside ...

Page 57: ...ion zum Anbringen der Gewichte Utilisation 5 4 Modes d application des masses et relevé des mesures 5 4 1 Positions d application des masses Normal Positionnement normal des masses masses à ressort sur les bords de la jante acier Alu 1 Application symétrique des masses autocollantes sur les épaulements de la jante aluminium Alu 2 Masses autocollantes Masse autocollante sur l épaulement de la jante...

Page 58: ...iameter Alu 4 Offset Distance machine rim Rim nominal diameter Rim nominal width Alu 5 Offset Distance machine rim Rim nominal diameter Rim nominal width Alu 1P Position for weight application on the left shoulder Rim nominal width Note After the first touch select the ALU selection key Alu 2P Weight application positions Alu 3P Weight application positions position detected by the arm gauge for w...

Page 59: ...in anderen Modi Betriebsarten werden diese Positionen automatisch gemessen Utilisation 5 5 Données nécessaires pour l application des masses Normal Distance Offset machine jante Diamètre nominal de la jante Largeur nominale de la jante Alu 1 Distance Offset machine jante Diamètre nominal de la jante Largeur nominale de la jante Alu 2 Distance Offset machine jante Diamètre nominal de la jante Alu 3...

Page 60: ...inches The measuring unit inches is displayed Normal and Alu 1 to Alu 5 weight positioning can be selected Note When operating on standard Vehicle wheels with nominal dimensions in millimetres e g TD or TRX wheels once the RIM DATA ENTRY screen has been displayed Fig 4 6 press on the rim Diameter or Width values to change the measuring unit to millimetres 2 SUV vehicle wheel nominal dimensions in ...

Page 61: ...ion 5 6 Mode de saisie des données 5 6 1 Sélections par l utilisateur Pour des arrondissements adéquats des résultats et pour une application correcte des seuils il est nécessaire de sélectionner avant le lancement de mesure le mode de fonctionnement Fig 5 15a Le type de véhicule avant le lancement de roue Fig 4 6 5 6 2 Sélection du type de véhicule Dans la page HOME SCREEN Fig 5 15b Sélectionner ...

Page 62: ...ncorrect manoeuvre showing a specific warning icon on the screen Fig 5 25 The message is cleared automatically after a few seconds when you reopen the wheel guard when you press the STOP key or the ESC key With the wheel guard already lowered a measuring run can be performed by pressing the START key In this way the wheel width is not automatically detected by the sensor and the machine uses the l...

Page 63: ...e kann jedoch bei Bedarf vor dem Fortfahren manuell vom Bediener eingegeben werden Utilisation 5 7 Lancer la roue Mode AUTOMATIQUE Remarque Abaisser la protection roue en partant de la position de carter complètement soulevé doucement et lentement en évitant les à coups les arrêts et les mouvements brusques même latéraux Mises en garde Faire particulièrement attention lors de l abaissement de la p...

Page 64: ...h a rim with a particularly complex shape enable the Advanced Spoke Detection function which recognises any type of spokes even those with unusual shapes for example paired oblique with holes or of different sizes to one another Fig 5 28 Before performing the measuring run From the FUNCTIONS screen select Spoke Detection then ADVANCED Perform the normal procedures for the run Note This function in...

Page 65: ... Funktion Zählen der Speichen aktiviert ist erscheint beim Messlauf die Bildschirmseite der Abbildung Abb 5 29 Utilisation 5 7 1 Identification avancée rayons Ce mode à activer si besoin est exclusivement en mode ÉQUILIBRAGE 5 9 et ÉQUILIBRAGE AVEC RUN OUT 5 8 autorise une précision absolue dans l identification de la position et de la dimension des rayons de la jante Vise une mise en place plus p...

Page 66: ...s mode allows operator to measure wheel and rim run out by means of laser scanners Fig 5 16 Two different measuring options can be set through the setting panel Fig 5 17 If user sets Rim run out measurement to Limit exceeded Fig 5 17 the machine will only run wheel measurement and rim will be measured too only if the value set for Wheel radial run out limit 1st Harmonic is exceeded If user sets Ri...

Page 67: ...MER Abb 5 18 in das Feld Rim runout measurment eingegeben erfolgt die Messung sowohl am Rad als auch an der Felge Utilisation 5 8 M o d e A U T O M AT I Q U E BALANCE WITH RUN OUT Les instructions suivantes décrivent les fonctionnalités spécifiques de l équilibreuse dans le mode ÉQUILIBRAGE AVEC RUN OUT L icône de la Fig 5 15 identifie la condition de ÉQUILIBRAGE CON RUN OUT active L unité fonctio...

Page 68: ...ighted in orange and pressing key 1 Fig 5 21 will open radial run out or rim charts to view rim run out chart press both keys 2 Fig 5 21 All ACCESS TO CHARTS pages indicate the Peak index of the 1st harmonic 1 Fig 5 22 which facilitates rim and wheel advanced diagnosis Details on run out run out first harmonic are displayed below the chart Act Run out value at the position of the chart where the c...

Page 69: ... P Der Wert Spitze Spitze ist die Differenz zwischen dem maximalen und dem minimalen Wert Utilisation Lorsque le contrôle de l excentration aura été effectué la page écran avec le bouton 1 Fig 5 19 s affiche en y appuyant dessus on accède aux graphiques relatifs au contrôle de l excentration que l on vient d exécuter Au cas où la valeur relevée de l excentration serait sous la valeur de seuil Fig ...

Page 70: ...DF format 5 8 1 Print Report After enabling the printing function of the screen page in the settings page the print key is available 1 By pressing key 1 all the three available options will be shown 2 Single report prints 3 Multiple report prints 4 Current screen prints The report can be printed Fig 5 98 with optional printer or USB flash drive to summarise technical information only for BALANCE W...

Page 71: ...n der Felge oder der Felge mit montiertem Reifen gespeichert wurden Abb 5 99 Utilisation 5 8 1 1 Impression sur clé USB Au lieu d imprimer sur un support en papier il est possible de créer et d enregistrer les données dans un fichier PDF Procéder comme suit Introduire une clé USB dans un des ports USB de la machine 4 0 Habiliter simultanément dans RÉGLAGES les trois fonctions indiquées Fig 5 100 T...

Page 72: ... on the tyre in the position prompted by the machine Fig 5 103 and press 3 to confirm The machine suggests moving the tyre to the tyre changer in order to align the mark on the tyre with the wheel valve Fig 5 104 After the tyre changer clamp the wheel on the balancer and confirm with 3 The machine prompts to carry out a checking cycle Lower the wheel guard and if necessary press START the balancer...

Page 73: ...hing zurück von dort aus kann man durch Drücken von 1b den vorher unterbrochenen Vorgang des geometrischen Matchings wieder aufnehmen Utilisation 5 8 2 Centrage géométrique Il est possible d accéder à la procédure de Centrage avec la touche 1 Fig 5 101 La page écran du Centrage géométrique apparaît Fig 5 101 5 8 2 1 Centrage géométrique À la fin du lancement roue l équilibreuse pourrait suggérer d...

Page 74: ...BALANCING mode and only the Menu items that refer to this mode are explained For information about the other Items and icons refer to the basic chapter 4 0 During the wheel measuring run the screen in figure Fig 5 24 appears and at the end the weights shown can be suggested yellow or possible alternatives grey An additional icon is displayed if the Spokes Count is active during the measuring run 2...

Page 75: ...weis Die Änderung der Anbringungsart der Gewichte wird automatisch bei allen folgenden Reifen gleicher Größe vorgeschlagen bis die Maschine ausgeschaltet wird Utilisation 5 9 Mode AUTOMATIQUE ÉQUILIBRAGE Les instructions suivantes décrivent les fonctionnalités spécifiques de l équilibreuse dans le mode AUTOMATIQUE ÉQUILIBRAGE L icône de la Fig 5 23 identifie la condition de Mode BALANCE activé L u...

Page 76: ...et on the machine you can freeze the rim data by selecting the icon 1 Fig 5 35 Rim Data Freeze Immediately the information field displays the icon 2 Fig 5 35b The subsequent wheels will be balanced without running the rim profile detection The use of the previously frozen data reduces the cycle time considerably If previously enabled the laser pointer function can be used for weight placement This...

Page 77: ... 5 35a wodurch angezeigt wird dass das Scannen der Felgen beim nächsten Messlauf gestattet ist Utilisation 5 9 1 Bloquer les données de la roue Cette fonctionnalité dénommée Rim Data Freeze permet de mémoriser les données mesurées sur une première jante pour un groupe de roues identiques généralement quatre à équilibrer Cette fonctionnalité augmente le rendement de la machine puisqu il réduit sens...

Page 78: ...grey hatching with yellow only for the lower part of the detector on the inside of the wheel indicate that the Wheel Data Freeze function is activated and the Laser Pointer mode previously activated is ON The machine will not scan the wheel and will use the data previously detected and saved The internal laser will still be available for pointing to the areas where stick on weights must be fixed S...

Page 79: ...e verwendet Beim nächsten Aufspannen des Rads tastet die Maschine die Profile wieder vollständig ab Utilisation La condition paramétrée de bloc données roue Rim data freeze est signalée aussi par une icône sur l écran à droite à interpréter comme suit Fig 5 36 a Les hachures en jaune pour les capteurs externe et interne indiquent que la fonctionnalité Bloquer les données de la roue n est pas activ...

Page 80: ... 5 9 except that it excludes automatic rim spoke detection When it is established that no information about spokes is needed in depth spoke detection by the laser can be switched off This noticeably reduces the overall measuring run time After the measuring run the condition is identified by the pair of symbols 2 Fig 5 38 Automatic BALANCING Rim with question mark ...

Page 81: ...b 5 38 auf diesen Zustand hin Automatische Betriebsart AUSWUCHTUNG Felge mit Fragezeichen Utilisation 5 10 M o d e A U T O M AT I Q U E RAYONS EXCLUS ÉQUILIBRAGE SANS RAYONS Le mode Automatique Rayons exclus a les mêmes caractéristiques que la fonction Automatique précédemment décrite 5 9 à la seule différence qu il ne comprend pas l automatisme d identification des rayons de la jante Lorsqu il n ...

Page 82: ... Check the wheel is clamped correctly 5 2 Select the Type of Vehicle 5 6 2 Enter the rim dimension parameters 5 13 If more than one wheel of the same type needs to be balanced the same nominal dimensions the data need only be set for the first wheel The selections stay set until other new data are set or the machine is switched off ...

Page 83: ... getroffenen Wahlen bleiben so lange gespeichert bis neue Daten eingegeben werden bzw die Maschine ausgeschaltet wird Utilisation 5 11 Lancement de roue en Manuel La fonction s active avec le bouton 1 Fig 5 41 disponible dans le Menu principal Serrage correct de la roue 5 2 Sélection du type de véhicule 5 6 2 Introduire les dimensions de la jante 5 13 Si plusieurs roues du même type dimensions nom...

Page 84: ...il a short beep is heard to indicate that the value has been acquired Note a result recalculation can be performed by the machine only after the start Select psi application positions by pressing on the screen Selected positions yellow Available positions grey To shift to a different balancing Mode If more than one wheel of the same type needs to be balanced the same nominal dimensions the data ne...

Page 85: ...der Unwuchten werden an die neu getroffenen Wahlen angepasst Utilisation 5 11 2 Mode MANUEL avec identification du bras Le bras est utilisé pour introduire l écart entre la machine et la jante et le diamètre nominal de la jante Remarque La largeur de la roue doit être toujours introduite manuellement S assurer que le bras 1 de mesurage est dans la position de repos Positionner correctement le déte...

Page 86: ...u function is used only with the gauge arm 5 12 1 Automatic rim dimension reading and setting and Alu Mode NORMAL and Alu1P Fig 5 47 Move the arm gauge into position on the rim to select the initial weight application position rim internal side Keep it in this position until an audible signal is heard Alu2P and Alu3P Fig 5 47 Position and hold the gauge in the second position on the rim to select ...

Page 87: ...ie den Messlauf beginnen oder können über die EasyAlu Toggle Taste 12 Abb 4 10 Utilisation MANUAL MODE 5 12 Fonction Easy Alu La fonction Easy Alu consiste à reconnaître automatiquement l Alu voulu par l opérateur et les dimensions de la jante suite au positionnement du palpeur sur la jante La machine présente exclusivement les Alu possibles Fig 5 47 en fonction des points de contact choisis par l...

Page 88: ...ing will not be as precise No more ALU P modes will be available even if selected 5 12 2 Easy Alu Toggle function Automatic correction of the proposed Alu Depending on the gauge contact points on the rim the machine has interpreted a probable Alu mode required by the user Every time the Alu presented by the machine does not correspond exactly to the one required it can be corrected using the Easy ...

Page 89: ... wenn ein anderer Alu Modus als der für die Felge vorhandene gewünscht wird Hinweis Der Wechsel des Alu muss vor dem Messlauf ausgewählt werden Utilisation MANUAL MODE Conseil Bien que disponible la sélection manuelle d un mode Alu n est pas conseillé pour les opérations d équilibrage habituelles Le changement d Alu en effet exécuté avant ou après le lancement annule l utilisation des données réel...

Page 90: ...igure 5 46 or data acquisition from the rim Acquire rim nominal length by reading the value on the rim Press on the Length value W Fig 4 6 or the relative green arrows the number box indicates the possibility of editing the value Manually turn the wheel forward or back to obtain the value corresponding to that measured or read or obtained by using the arrows then press again to set the value Note ...

Page 91: ...Pfeile verwenden dann nochmals darauf tippen um den Wert einzugeben Utilisation PROFILING 5 13 Sélections de la part de l utilisateur du mode manuel avec introduction des données disponibles Il est toujours nécessaire de sélectionner le type de véhicule La sélection doit être faite avant d extraire le bras de mesure des positions sur la jante 5 13 1 Entrée manuelle d écart de la jante X Écart entr...

Page 92: ...ly setting wheel data This function is particularly useful for workshops that carry out series fitting of tyre rim assemblies or frequently handle the same wheel types e g workshops that offer rims for retrofitting The once only storage of the rim data in the profiles guarantees that the same correction planes are always used in particular for alloy wheels thus providing consistent balance quality...

Page 93: ... Bildschirmseite RADPROFILE Abb 4 11 Utilisation MANUAL MODE 5 14 Fonction Profils de roue Si plusieurs roues du même type et de valeurs nominales identiques sont équilibrées les dimensions de la roue ne doivent être entrées que pour la première roue Les entrées restent mémorisées jusqu à ce qu une nouvelle entrée soit effectuée ou que la machine soit éteinte Remarque Cette fonction est utilisée e...

Page 94: ...ess key 3 Fig 4 11 to save data The data are now saved permanently in the chosen position and can be recalled when required Note If the profile is overwritten with other data it is no longer shown in the list 5 14 2 Recalling a Wheel Profile from the memory Clamp the wheel to the balancer In the RIM DATA ENTRY screen press the SPECIAL key Fig 5 48 The WHEEL PROFILES screen is displayed Fig 4 11 Ty...

Page 95: ...n und in der Zustandsleiste richtig sind Die Maschine ist bereit den Messlauf zu starten 5 13 Utilisation MANUAL MODE 5 14 1 Mémorisation d un profil de roue Il est possible de mémoriser un maximum de 9 profils de roue Mettre en place la roue dont on souhaite mémoriser le profil Saisir et acquérir toutes les données de roue y compris le nombre de rayons éventuels au cas où un Alu P soit requis Sur...

Page 96: ...5 1 Attaching a clip on weight Clip on weights must be applied at 12 o clock The lip should be inserted on the rim edge Use the weight pliers to correctly position it In STATIC mode only the left hand DISPLAY is used 5 15 2 Attaching a stick on weight See paragraph 5 13 3 Apply by hand at 12 o clock in all other cases In STATIC mode only the left hand display is used 1 Fig 5 51 ALU or STATIC modes...

Page 97: ...s Rads die Ausgleichsgewichte entsprechend der vorgesehenenALU Positionierunganbringen Utilisation 5 15 Pose des masses Les types de masses et méthodes de pose suivantes sont disponibles Masses agrafées Poser toujours manuellement Figure 5 23 Masses autocollantes Après avoir lancé la roue observer les indicateurs de rotation pour le plan gauche de la roue 1 Fig 4 13 Tourner à la main la roue pour ...

Page 98: ...ed by the pointer Weight application to the right of the laser dot to the right of the Laser Dot Fig 5 47a When a run is completed the BALANCING screen Fig 5 47b shows the correction values and the position of the weights to be applied To carry out corrections Select a stick on weight of the indicated size Move the wheel until the correction position is reached and the two green arrows light up Be...

Page 99: ...ge andrücken Abb 5 47 Das Verfahren zum Auswuchten der anderen Seite des Rads wiederholen Utilisation 5 15 3 Modes de pose des masses Alu 2P et Alu 3P 5 15 3 1 Utiliser le Laser Pointer Avec le mode Laser Pointer actif dans les modes Alu 2P et Alu 3P les plans de correction pour les masses autocollantes sont indiqués avec précision par le pointeur laser directement sur la jante Fig 5 47 Remarque Q...

Page 100: ...sition Decide whether to use the Split Weight Mode SWM now 5 15 4 Clean the application point before attaching the stick on weight Insert at the centre of the gauge arm a stick on weight that complies with the imbalance measured and remove the protective tape from the adhesive strip Figure 5 28 Note When the gauge arm has been removed and the correct position has been reached the unit beeps Apply ...

Page 101: ...Sie das Gewicht am Bezugspunkt der linken Ebene Führen Sie am Ende einen Prüflauf durch Utilisation 5 15 3 2 Application avec bras palpeur Remarque L utilisation du bras palpeur reste une option alternative à l application de la masse avec le Laser Pointer Mise en garde Pour l application des masses en haut à l aide de la tête du bras le Laser Pointer doit résulter désactivé Se reporter à la Figur...

Page 102: ...w 5 15 4 1 Selecting the Split Weight Mode The behind the spokes placement mode is activated with key 17 Fig 5 58 in the BALANCING screen Weights can be positioned behind the spokes in the Alu 2 Alu 2P Alu 3 and Alu 3P hidden compensation weight balancing modes and can be selected in these spheres as required Note The Hidden Weight selection key 17 Fig 5 58 is only active after the number of spoke...

Page 103: ...nanzahl kann von 3 bis 15 variieren Das Rad so drehen dass eine Speiche direkt mittig über der Hauptwelle steht Abbildung 5 59 Pfeil Utilisation 5 15 4 Positionnement des masses derrière les rayons SWM Split Weight Mode Le programme d équilibrage pour le positionnement des masses derrière les rayons SWM permet de subdiviser les masses de correction que la machine autrement suggèrerait d appliquer ...

Page 104: ...62 proceed in the same way Use key 17 Fig 5 60 As long as an Alu 2 Alu 2P Alu 3 or Alu 3P are set weight placement behind the spokes can be activated at any time Exiting the BALANCING screen does NOT exit the Hidden Weight function Warnings The unbalance reading is subdivided on two fitting positions only after the spoke position is acquired When balancing with counterweights positioned behind the...

Page 105: ...utomatisch auf zwei Anbringungspunkte hinter den Speichen aufgeteilt Utilisation Remarque Il est conseillé de bloquer la roue en position avec le frein de blocage jusqu à la fin de la sélection Sélectionner avec la touche 17 Fig 5 60 l option Masse Cachée derrière les rayons La fonction est maintenant sélectionnée et deux indicateurs d équilibrage sont présents à droite de l écran au lieu d un seu...

Page 106: ...heel to move one of the split imbalances on the right side A Figure 5 64 into the compensation position green arrows then lock the wheel with the brake pedal Clean the application point before attaching the stick on weight Apply the correction weight at the indicated point in the example 40 grams A Figure 5 64 Turn the wheel to reach the remaining split weights compensation position on the right s...

Page 107: ...ät bei der Anbringung der geteilten Gewichte Der Bediener entscheidet welches Gewicht er zuerst anbringt Utilisation 5 15 4 2 Fixation d une masse cachée Placer la masse autocollante sur le côté gauche du disque de jante Avant de fixer les masses autocollantes nettoyer l emplacement de fixation Placer la masse autocollante sur le côté gauche du disque de jante Figure 5 63 Fixation d une masse auto...

Page 108: ...limit To check how much imbalance is left Select the FINE key 21 Fig 5 56 Note The operator should decide if applying the stated weight is necessary 5 16 1 Results recalculation After spinning a wheel it is possible to enter new rim data or select another weight mode The results are recalculated automatically if possible Selecting another weight mode NORMAL ALU and STATIC no additional steps are r...

Page 109: ...n Drehen Sie das Rad in die Position WAP der rechten Ebene und bringen Sie das Gewicht an Führen Sie einen Kontrolllauf durch Utilisation 5 16 Lancement de contrôle Il est conseillé d effectuer un lancement de contrôle après avoir appliqué les masses Effectuer le lancement Quand le lancement de vérification est terminé et que la roue est parfaitement équilibrée les deux indicateurs numériques affi...

Page 110: ... readjusted compared to the unbalance of the tyre in a way that the they compensate each other and a lower correction weight is required 5 17 2 Operating instructions for optimisation weight minimisation During tyre changing operations as required for optimisation minimisation the wheel balancer can be used as a conventional wheel balancer by another operator For this purpose interrupt the optimis...

Page 111: ...ungsunwucht aufgehoben Utilisation 5 17 Optimisation Minimisation des masses 5 17 1 Généralités L optimisation du balourd sert à maximiser le silence de marche Au cours du processus d optimisation la jante et le pneu sont adaptés l un à l autre sur la base de diverses mesures de balourd En règle générale le voilage et le faux rond ainsi que des variations des forces radiales et latérales éventuell...

Page 112: ...isation result has already been saved press key 7 Fig 5 66 in this way the program continues from the step where it was interrupted with the relative measurement values and settings and the optimisation minimisation may continue At this point you can choose whether to continue with Optimisation Key 8 or go to Minimisation Key 4 5 17 3 1 OPTIMISATION Clamp the rim only Move the gauge arm into posit...

Page 113: ... die Menütaste 8 Abb 5 66 Es erscheint die Bildschirmseite OPTIMIEREN 2 Abb 5 67 Utilisation 5 17 3 Démarrer optimisation de stabilité de marche ou minimisation des masses Procédure Serrer la roue ou la jante Entrer les dimensions de jante correctes ou vérifier que les valeurs entrées sont correctes Fermer le carter de roue appuyer si nécessaire sur la touche START A partir du Menu BALANCING press...

Page 114: ...ate to specified inflation pressure Confirm by pressing key 8 The OPTIMISATION 4 screen appears Fig 5 70 Figure 5 70 OPTIMISATION 4 first measuring run with tyre Clamp the wheel Position the valve so that it is exactly perpendicular to and above the chuck Confirm the valve position by pressing key 8 The OPTIMISATION 5 screen appears Fig 5 71 Figure 5 71 OPTIMISATION 5 START is signalled on the scr...

Page 115: ... durchgeführt Es erscheint die Bildschirmanzeige OPTIMIEREN 6 Abb 5 72 Utilisation Figure 5 68 OPTIMISATION 2 START est alors affiché sur le moniteur Effectuer un lancement de roue Le lancement de compensation est effectué La page écran OPTIMISATION 3 est alors affichée Fig 5 69 Figure 5 69 OPTIMISATION 3 Monter le pneu correctement sur la jante ligne de centrage et le gonfler à la pression prescr...

Page 116: ...o continue optimisation so as to improve wheel silent running conditions even below the limit value critical vehicle To continue optimisation Continue as shown on screen OPTIMISATION OP 7 Fig 5 75 To abort optimisation To abort optimisation press the STOP key return to the balancing program and balance the wheel according to the instructions displayed 5 9 Figure 5 75 OPTIMISATION 7 On the tyre cha...

Page 117: ...elle steht Die Ventilposition mit der Taste 8 bestätigen Utilisation Figure 5 73 OPTIMISATION 6 2ème lancement de mesure de l ensemble pneu jante Tourner la roue en position de marquage flèches de direction Dans cette position marquer le pneu sur sa partie extérieure exactement au dessus de l arbre principal Confirmer avec la touche 8 Il peut apparaître la page écran OPTIMISATION 7 Fig 5 75 Ou bie...

Page 118: ...ndication H2 a Silent wheel running conditions cannot be improved Press ESC or STOP 3 6 Fig 5 78a to quit Optimisation b However it is possible to readjust the tyre with rim to obtain a quite considerable reduction of weights i e smaller weights without having an adverse effect on wheel running conditions Press MINIMISATION 4 Fig 5 78a Splitting faults At this stage of the program the faults index...

Page 119: ...OPTIMIEREN so wie auf der Bildschirmseite 10 Abb 5 78b beschrieben fort Utilisation La page écran OPTIMISATION 9 est alors affichée Fig 5 77 Figure 5 77 OPTIMISATION 9 START est alors affiché sur le moniteur Effectuer un lancement de roue Le lancement de mesure est effectué La page écran OPTIMISATION 10 externe Fig 5 78 ou la page écran OPTIMISATION 10 interne s affiche Fig 5 79 Affichage H 0 La c...

Page 120: ...cal and Directional press key A Fig 5 79 then continue as shown on screen OPTIMISATION 10 Fig 5 78b If the wheel can be turned over on the rim Rotate the wheel into marking position following the arrows In this position make a double mark on the inside of the tyre exactly perpendicular to and above the chuck Turn the tyre over on the rim tyre changer Confirm by pressing key 8 The OPTIMISATION 11 s...

Page 121: ...ontiermaschine Mit Menütaste 8 bestätigen Es erscheint die Bildschirmanzeige OPTIMIEREN 12 Abb 5 81 Utilisation Figure 5 78b OPTIMISATION 10 externe Tourner la roue en position de marquage flèches de direction Dans cette position faire un repère double sur l extérieur du pneu exactement sur l arbre principal Confirmer avec la touche 8 La page écran OPTIMISATION 11 est alors affichée Fig 5 80 Figur...

Page 122: ...osition by pressing key 8 The OPTIMISATION 13 screen appears Fig 5 82 Figure 5 82 OPTIMISATION 13 START is signalled on the screen Perform the wheel measuring run A measuring run is performed The BALANCING screen appears Fig 5 83 Finish weight Optimisation Figure 5 83 BALANCING Balance the wheel according to the readings Fig 5 84 If the silent wheel running conditions are optimal the following cod...

Page 123: ... wird empfohlen weiteres Optimieren bringt keine Verbesserung Utilisation Affichage du code d erreur E9 Si E9 est affiché c est qu il y a eu au moins une erreur relative à la séquence de programme lors de la procédure d optimisation Messages de système 7 1 Quitter le programme d optimisation en appuyant sur la touche STOP et si cela est souhaité relancer l optimisation Figure 5 81 OPTIMISATION 12 ...

Page 124: ...on the valve so that it is exactly perpendicular to and above the chuck Acquire the valve position by pressing key 8 The MINIMISATION 2 screen appears Fig 5 86 Figure 5 86 MINIMISATION 2 START is signalled on the screen Perform the wheel measuring run The MINIMISATION 3 screen appears Fig 5 87 The H1 indication may appear If H1 appears at this point it means that the machine recommends you do not ...

Page 125: ...rhalten auch mit Werten die unterhalb des Schwellenwerts liegen Problemfahrzeug Utilisation 5 17 3 2 MINIMISATION DES MASSES Pour effectuer directement la minimisation des masses de compensation procéder comme suit A partir du Menu BALANCING presser la touche 6 Fig 4 10 Optimisation Minimisation La page écran OPTIMISATION MINIMISATION s affiche Fig 4 10 Appuyer sur la touche 4 Fig 4 10 La page écr...

Page 126: ...nfirm by pressing key 8 The MINIMISATION 5 screen appears Fig 5 89 Figure 5 89 MINIMISATION 5 Clamp the wheel Rotate the wheel until the valve is exactly perpendicular to and above the chuck Confirm the valve position by pressing key 8 The MINIMISATION 6 screen appears Fig 5 90 Figure 5 90 MINIMISATION 6 START is signalled on the screen Perform the wheel measuring run A measuring run is performed ...

Page 127: ...ts erreicht und kann nicht verbessert werden Wie auf der Bildschirmseite AUSWUCHTEN Abb 5 83 Utilisation Figure 5 87b MINIMISATION 3 Tourner la roue en position de marquage flèches de direction Dans cette position marquer le pneu sur sa partie extérieure exactement au dessus de l arbre principal Valider avec la touche 8 La page écran MINIMISATION 4 est alors affichée Fig 5 88 Figure 5 88 MINIMISAT...

Page 128: ... Directional press the menu key A Fig 5 93 then continue as shown on screen MINIMISATION 7 outside Fig 5 92 If the wheel can be turned over on the rim Rotate the wheel into marking position following the arrows In this position make a double mark on the tyre on the inside of the wheel exactly above the chuck Turn the tyre over on the rim tyre changer Confirm by pressing menu key 8 The MINIMISATION...

Page 129: ...montiermaschine Mit Menütaste 8 bestätigen Es erscheint die Bildschirmseite MINIMIEREN 9 Abb 5 95 Utilisation Figure 5 92 MINIMISATION 7 externe Tourner la roue en position de marquage flèches de direction Dans cette position faire un repère double sur l extérieur du pneu exactement sur l arbre principal Confirmer avec la touche 8 La page écran MINIMISATION 8 apparaît Fig 5 94 Figure 5 93 MINIMISA...

Page 130: ...lar to and above the chuck Confirm the valve position by pressing key 8 The MINIMISATION 10 screen appears Fig 5 96 Figure 5 96 MINIMISATION 10 START is signalled on the screen Perform the wheel measuring run A measuring run is performed The BALANCING screen is displayed Fig 5 83 Finish weight Minimisation Figure 5 83 BALANCING Balance the wheel according to the readings If the silent wheel runnin...

Page 131: ...ruhe des Rades kann nicht durch eine weitere Optimierung verbessert werden Utilisation Affichage du code d erreur E9 Si E9 est affiché c est qu il y a eu au moins une erreur relative à la séquence de programme lors de la procédure d optimisation Messages de système 7 1 Quitter le programme d optimisation en appuyant sur la touche STOP et si cela est souhaité relancer l optimisation Figure 5 95 MIN...

Page 132: ...be performed after switching on the machine or after changing the clamping tool especially in case of motorcycle wheel tools also see Chapter 5 2 3 This mode cannot be transferred into the permanent memory Fit the clamping device properly on the balancer shaft Fig 6 1 Do not fit the wheel Starting from the screen main Menu Fig 6 2 press the Compensation run key 1 Fig 6 2 Start the compensation run...

Page 133: ...fruhenoptimierung oder durch Ausschalten der Maschine Entretien 6 0 Entretien Cette machine est conçue pour vous donner un service de longue durée Si l opérateur éteint correctement la machine 5 1 3 après son utilisation aucune maintenance supplémentaire n est nécessaire Cette machine ne doit pas être ouverte par l opérateur autre que conformément aux instructions explicites ci dessous 6 1 Lanceme...

Page 134: ...ol other than the one supplied and no wheel or other device is mounted on the machine shaft From the MAIN MENU press key 2 Fig 6 2 The CALIBRATION 1 screen Figure 6 4 will open Close the wheel guard press the START key and launch the first calibration run if the run takes a long time it means residual imbalances have been detected The CALIBRATION 2 screen will open Figure 6 5 Screw the Calibration...

Page 135: ...en W und wieder an seinem Aufbewahrungsort ablegen Drücken Sie die ESC Taste auf die HAUPTMENÜ zurückzukehren Entretien 6 2 Étalonnage par l opérateur S il faut effectuer plusieurs lancements de mesures afin d équilibrer une roue en particulier pour corriger la grandeur et la position de la masse d équilibrage ce phénomène sera dans la plupart des cas dû à un manque de précision des mesures Dans c...

Page 136: ...cess starts The process is performed in 3 stages The operator must touch in three different times the white dot with the cross indicator shown on the screen First stage Touch the top left dot A Second stage Touch the middle right dot B Third stage Touch the centre bottom dot C At the end of the calibration process the machine restarts automatically The Touch Screen is now operational ...

Page 137: ... Am Ende des Kalibriervorgangs startet die Maschine automatisch neu Das Touchscreen System ist nun betriebsbereit Entretien 6 3 Calibrage du moniteur Suivre les Figures 6 7 1 2 3 Lorsque la touche STOP de la page écran d introduction est enfoncée pendant plus de 3 secondes le processus de calibrage est lancé Il est constitué de trois étapes L opérateur doit toucher en trois étapes le point blanc a...

Page 138: ...status by following the steps above in reverse order 6 5 Cleaning the lifter Figure 6 9 To clean the wheel lifter do not use liquids DO NOT SPILL LIQUID ON THE LIFTER Clean the lifter with a dry cloth and compressed air Check for too much play in the connecting parts DO NOT LUBRICATE THE HORIZONTAL SLIDE RAILS 1 Fig 6 9 Wipe with a cloth and lubricate the trapezoidal thread screw Use only specific...

Page 139: ...he Anwendungen Wir empfehlen die Verwendung spry Fett nicht Öl Im Falle eines Schadens unterbrechen Sie den Gebrauch und wenden Sie sich an den technischen Kundendienst von Snap on Entretien ATTENTION AVANT TOUTE OPERATION D ENTRETIEN OU DE REPARATION DEBRANCHER L EQUILIBREUSE DE L ALIMENTATION ELECTRIQUE 6 4 Changer le fusible du secteur Se reporter à la Figure 6 8 Éteindre la machine Débrancher ...

Page 140: ...o ON position 2 No power cable connected Connect power cable to power outlet 3 No mains power check power supply and power system fuses 4 Unit fuse s blown Replace unit fuse s If the fuse s has have recently been replaced call service to check the unit When switched on a beep is heard for 1 second 1 Configuration error Call technical service team Display appears frozen or locked up 1 The unit may ...

Page 141: ...um Gerät kann unterbrochen worden sein Schalten Sie das Gerät aus Warten Sie 20 Sekunden und schalten Sie das Gerät dann wieder an Fahren Sie mit der Arbeit fort Lassen Sie die Stromversorgung überprüfen wenn dies öfter passiert Wenn damit alles in Ordnung ist rufen Sie den technischen Kundendienst Dépannage 7 0 Dépannage En cas de problème avec l équilibreuse procéder comme suit pour résoudre le ...

Page 142: ...led properly Make sure the unit rests on its three feet only Make sure the floor is not transmitting shocks for example from trucks passing close to the unit 2 The wheel may be mounted incorrectly Check stub shaft cones and adapters clearance Use appropriate spacers to eliminate play Perform a measuring unit calibration 3 The electronic system may be faulty Call technical service team A mode or in...

Page 143: ...ät dann wieder an Rufen Sie den Kundendienst Radheber blockiert 1 Das Rad Hebesystem nicht aktiviert ist Drücken Sie die Steuerpedal um den Heber 5 1 1 zu aktivieren 2 Die Elektronik könnte defekt sein Rufen Sie den Kundendienst Dépannage Lesparamètresdelajaugediffèrentdesdimensions de la roue indiquées sur la jante ou le pneu 1 Avez vous positionné correctement la jauge de déport Se reporter au C...

Page 144: ...Message 300 or C10 7 1 1 E codes E1 Rim dimensions were entered incorrectly or incompletely When the message is displayed enter data once again E2 Wheel guard is not closed E3 Geodata gauge for distance and rim diameter is not in home position E4 The Geodata width gauge arm is not in home position E5 Range of compensation exceeded wheel adaptor has unacceptable unbalance Press the STOP key or ESC ...

Page 145: ...e Wahl der Gewichteplatzierung möglich Gegebenenfalls einen anderen Radtyp anwählen Dépannage 7 1 Messages de système L équilibreuse est en mesure d envoyer à l opérateur des messages relatifs aux erreurs codes E ex E 2 Fig 7 1 avertissements codes H ex H 33 Fig 7 2 ou problèmes matériel codes X Les codes sont décrits dans les chapitres suivants Lorsqu un code apparaît Prendre note de ce code Véri...

Page 146: ...arried out service E16 During the first recalibration run the calibration weight was fitted by mistake Unscrew the calibration weight and start the measuring run again E17 Wheel slips on clamping tool The clamping nut is not well tightened the chuck accelerates too quickly The machine will stop Firmly tighten the clamping nut or in special cases press the START key a little bit longer E23 Lifter f...

Page 147: ...ste verklemmt oder der Pedalschalter ist betätigt Verklemmte Taste suchen und lösen Oder Dépannage E8 La position de la valve n a pas été entrée code d erreur seulement en programmes d optimisation minimisation Positionner la valve exactement perpendiculaire au dessus de l arbre principal et appuyer sur la touche OP E14 Le dispositif power clamp n est pas accroché Il a été démarré un cycle de mesu...

Page 148: ...the function key and rotating the wheel 5 7 2 E141 The content of the number 1 permanent memory is not reliable The balancing can only be performed in certain conditions Call technical support E144 The CRC of the EEPROM 1 and 2 are incorrect E145 The contents of both permanent memories are different but both contain valid data E341 The content of permanent memory number 2 is not reliable The balan...

Page 149: ...an E501 Fehlfunktion Laser Pointer Rufen Sie den Kundendienst an Dépannage Appuyer sur la touche STOP ou ESC pour examiner le commutateur Si l erreur ne peut pas être éliminée la fonction de pédale est interrompue en appuyant sur la touche STOP ou ESC Faire appel au service après vente E92 La pige de mesure geodata pour écart et diamètre de jante est défectueuse Faire appel au service après vente ...

Page 150: ...nclamping could damage the tie rod H26 The gauge was moved too quickly Return the gauge to the starting position and repeat the operation making the gauge approach the weight application point more slowly E502 Laser Pointer failure Contact technical service team E503 Laser Pointer failure Contact technical service team E504 Laser Pointer failure Contact technical service team E505 The Lifter does ...

Page 151: ...aschinenmodell ist unbekannt E901 Die Maschine ist nicht justiert Dépannage E502 Dysfonctionnement pointeur laser Faire appel au service après vente E503 Dysfonctionnement pointeur laser Faire appel au service après vente E504 Dysfonctionnement pointeur laser Faire appel au service après vente E505 L élévateur ne répond pas aux commandes Faire appel au service après vente E506 Le scanner arrière n...

Page 152: ...g the STOP key H90 Wheel acceleration was too slow or braking was too weak after a measuring run If the main shaft does not reach the required rpm check whether the brake was activated or whether the mass of the wheel is too great In this case Release the brake Make sure that the shaft with the wheel clamped on it can rotate freely Turn the wheel by hand then press the START key If the error canno...

Page 153: ...épannage H28 La pige de mesure a été actionnée trop lentement Remettre la pige en position de repos et l approcher de nouveau au point de palpage du positionnement des masses d équilibrage H33 Le SONAR ne fonctionne pas H80 Un étalonnage par l opérateur n a pas été prévu dans l étalonnage de base Par conséquent l étalonnage par l opérateur n est pas possible Appuyer sur la touche STOP le code d er...

Page 154: ...nit of the machine is likely Turn off mains switch Set the transformer output voltage within a range of 200 230 240 Volts Any damage resulting from repeated occurrence of this error code is not covered by the warranty 300 804 or C10 804 Line voltage over 275 V Damage to the electronic control unit of the machine is likely Turn off mains switch Set the transformer output voltage within a range of 2...

Page 155: ...pannage 7 1 3 Message d erreur fatale L afficheur affiche un code à 6 chiffres et ou lettres S il y a des messages commençant par 300XXX l erreur se présentait pendant le contrôle de fonctionnement interne s il s agit d un message C10XXX l erreur se présentait pendant l auto contrôle mené après l allumage de la machine Si nécessaire faire appel au service après vente 300 800 ou C10 800 Tension de ...

Page 156: ...634 622 8994 Reception 49 8634 622 0 Snap on Equipment Germany Konrad Zuse Straße 1 D 84579 Unterneukirchen 7 2 Storage When the unit will be stored for a several weeks or longer prepare the unit correctly Shut down the unit properly 5 1 3 Remove the stub shaft from the balancer Apply a thin layer of non corrosive oil on all threads and cones Wrap oiled items in paper to protect parts against dust...

Page 157: ...eölten Teile mit Papier um diese staubfrei zu halten Reinigen Sie alle geölten Teile wenn das Gerät wieder in Betrieb genommen werden soll Dépannage 7 3 Service après vente Contacter votre représentant de zone Le site Internet fournit des informations concernant le service après vente dans les différents pays http www snapon equipment eu Hotline International 49 8634 622 8996 Hotline German 49 863...

Page 158: ...e Basic List panel will be immediately active 1 Fig 7 4 CATEGORIES The various items can be selected An active panel presents an illuminated edge A When an item is selected the panel that contains it turns a darker colour B CATEGORIES 1 Figure 7 4 Select a Category General settings Setting Measurements Network and Printer connections Counters System information This takes you to the central PARAME...

Page 159: ...e n t e n Z ä h l e r u n d Informationen können keine Wertänderungen vorgenommen werden Um zum Bildschirm EINFÜHRUNG zurückzukehren die Taste F1 drücken 1 Abb 7 4a gedrückt Réglage des paramètres 7 4 Réglages Pourlefonctionnementnormal iln estgénéralementpas nécessaire de changer les modes de fonctionnement ou leur état programmé par le fabricant Toutefois cela est toujours possible en cas de bes...

Page 160: ...operating mode must be changed permanently enter the desired operating mode e g ON OFF or a scale value and then transfer it into the permanent memory as described above 7 4 1 Settings List Selection of some functions On Off and threshold settings by the operator directly affect the Run out and the advanced functions that the machine might display on screen From the Optima Mode customised options ...

Page 161: ... überschritten wurde lautet der Wert Immer erfolgt die Messung immer Vordefinierter Wert Immer Réglage des paramètres Mémoriser les paramètres modifiés Les modifications des modes de fonctionnement peuvent également être enregistrées dans la mémoire permanente avec la fonction Sauvegarde des modes de fonctionnement dans mémoire permanente pour être proposés à chaque nouveau branchement de la machi...

Page 162: ...g any further runs after the first so as to optimise operating time Set to 0 to scan automatically and only upon first run just after wheel clamping Set to 1 to scan automatically upon every single wheel run Default value G Limit threshold for rim lateral radial Run out of 1st Harmonic Default value 0 7 mm H Limit threshold for rim peak to peak lateral radial Run out Default value 1 mm I Enable Di...

Page 163: ...rt die Anzeige der Analyse der drei Harmoniken bezüglich des Seiten und Höhenschlags Réglage des paramètres D Choix de l unité de mesure du voile en mm ou inch Valeur prédéfinie mm E Limite seuil pour le Voile radial crête crête de la roue Valeur prédéfinie 1 5 mm F Le balayage pour la saisie des données relatives à la roue est toujours effectué pendant le premier lancement Avec cette fonction on ...

Page 164: ...ctive Recalls the values pre set by the factory The selected operating mode can be acquired in the permanent memory Language selection Selecting the menu language A number of languages are available such as English German Italian French Spanish Portuguese Russian Volume of the audible signals Scale of volume 0 to 100 low high Factory adjusted to 50 The selected mode of operation can be transferred...

Page 165: ...Die gewählte Funktionsweise kann in den Dauerspeicher übertragen werden Réglage des paramètres Programmé par le fabricant 7 4 2 Liste des modes de fonctionnement Ci dessous sont listés les changements possibles des modes de fonctionnement Ensemble des modes opératoires possibles Voir 5 Mise en circuit de la machine NO Aucune action Active Rappel des valeurs prédéfinies en usine Le mode de fonction...

Page 166: ...measurement depends on the settings made under Measurement unit of the unbalance amount readings see below Unit of measurement grams Range 3 50 to 20 0 g Factory adjusted to 3 5 g Unit of measurement ounces Range 0 25 to 2 00 oz Factory adjusted to 0 25 oz The selected operating mode can be acquired in the permanent memory Measurement unit of the unbalance amount readings Selecting unbalance readi...

Page 167: ... werden Hinweis Die Rücknahme derAnzahl der Messumdrehungen hat eine reduzierte Messgenauigkeit zur Folge Réglage des paramètres Programmé par le fabricant Résolution affichage valeur du balourd Choix des échelons pour l affichage du balourd de 1 ou 5 g ou 0 05 ou 0 25 oz Normal Échelons de 5 g 0 25 oz Fin Échelons de 1 g 0 05 oz Le mode de fonctionnement choisi peut être transféré à la mémoire pe...

Page 168: ...KING CLOTHES On Braking The selected operating mode can be acquired in the permanent memory Adjusting the DATE TIME COUNTERS After selecting the Date adjustment in the SETTINGS screen a keyboard is displayed with the data entry field Enter the date as follows Year Month Day yyyy mm dd Note A different structure set by the operator does not affect the setting sequence After selecting the Time adjus...

Page 169: ...speicher eingeschrieben Bei jedem Neustart erscheinen sie automatisch Réglage des paramètres Programmé par le fabricant Démarrage lancement de mesure par fermeture du carter de roue Off Lancé par la touche START On Lancé par fermeture du carter de roue Le mode de fonctionnement choisi peut être transféré à la mémoire permanente Arrêt automatique si le carter est relevé Off Pas de freinage Remarque...

Page 170: ...runs Total number of measuring runs completed b With OK Total number of measuring runs completed with balancing result OK c Optimisations Total number of optimisations or minimisations d Service runs Total number of measuring runs in Service mode e Since last Total number of measuring runs completed calibration since the last calibration f Clamps Total number of wheels clamped 7 6 Promotional text...

Page 171: ...te Werbetext erscheint auf der Hauptseite INTRO SCREEN genau so wie er vom Benutzer eingegeben wurde Réglage des paramètres 7 5 Compteurs Chaque lancement de mesure terminé sera mis en mémoire Le compte maxi est de 999 999 lancements de mesure Une fois ce nombre atteint le compteur est remis à zéro Ce renseignement intéresse surtout pour les buts statistiques pour savoir p ex les intervalles de so...

Page 172: ...er b Wheel Wheel commercial data c Rim info Rim commercial data d Type of vehicle Vehicle model e Plate Vehicle number plate data f Wheel position Memo of the wheel position on the vehicle before the operations Press field f Figure 7 9 to activate it Press field f1 a few times to select the position of the wheel on the vehicle The sequence is Front Left Front Right Rear Left Rear Right To fill in ...

Page 173: ...en Kundendaten 5 Geht einen Schritt zurück UNDO 6 Löscht die Daten des letzten Felds 7 Löscht alle Daten der Bildschirmseite Réglage des paramètres 7 7 Saisie Données Client Customer Data Entry Avec la fonctionnalité Saisie Données Client Customer Data Entry Figure 7 9 le système permet de compléter une fiche client véhicule pour la personnalisation des rapports d impression fournis par l équilibr...

Page 174: ...d separate collection is mandatory 2 Ask the retailer about collection points authorised for regular disposal 3 Stick to the standards for correct waste management to prevent potential effects on the environment and human health This symbol indicates that separate collection of electrical and electronic equipment is mandatory during scrapping 9 0 Appendix This chapter contains additional informati...

Page 175: ...d unterschiedlich sein kann NähereAngaben finden Sie in der Auftragsbestätigung Vente Annexes 8 0 Vente Au moment de l élimination et de la mise au rebut de l unité contacter le revendeur pour une offre ou pour prendre connaissance des dispositions en matière d élimination et mise au rebut prévues pour l unité 8 1 TRAITEMENT DES DECHETS DANS LES PAYS DE L UE Pour appareillages électriques et élect...

Page 176: ...176 Blank Page ...

Page 177: ...ang und die Überprüfungen beschrieben Appendice Instructions d installation Cet appendice contient les conditions requises les procédures et les vérifications nécessaires pour l installation Appendix Installation Instructions This appendix describes the installation requirements installation procedures and checks ...

Page 178: ... the balancer as stated in Chapter 2 of the Operator s Manual The floor on which the balancer will be installed should not transmit vibrations from other devices or from outside the building External vibrations may affect the accuracy of the unit Note The balancer should be positioned on the floor directly Do not use spacers to fill gaps If the above conditions are satisfied the balancer does not ...

Page 179: ...UGELASSENE UND MIT D E M S T R O M N E T Z V E R B U N D E N E WANDSTECKDOSE ZUR VERFÜGUNG STEHT HINWEIS VERLEGEN SIE STROMKABEL NIEMALS ÜBER DEM BODEN AUSSER SIE WERDEN DURCH EINE ZUGELASSENE SCHUTZABDECKUNG GESCHÜTZT Installation i Conditions d installation Conditions d espace Le dessin montre les conditions minimum nécessaires à la sécurité Fig i 1 geodyna 8250 Fig i 2 geodyna 8200 Chaque dessi...

Page 180: ...The shipment contains a wheel balancer a Declaration of Conformity EC the accessories mentioned in Section 3 1 of the Operator s Manual 3 threaded pins with accessory support plate a power cable a wheel guard if present Tools required screwdriver bar diameter 4 5 5 mm wrenches 13 mm 17 mm Allen wrench 5 mm Positioning Remove the bolts that secure the wheel balancer on the pallet WARNING DO NOT LIF...

Page 181: ...tgerät von der Palette und stellen Sie es an seinen Einsatzort Hinweis Benutzen Sie vorzugsweise die Zubehörhalterungsbolzen sie werden montiert wie im abschnitt iii beschrieben und oder die Achse des Radschutzes falls vorhanden um das Gerät zu bewegen Installation ii Manipulation déballage et contenu Transport L unité est fournie sur une palette Utilisez un transpalette Figure ii 1 pour l apporte...

Page 182: ... to the monitor Figure iii 3 Connection of monitor and PC Warning Before connecting any cable turn off the mains switch Plug in the plug 1 Fig iii 3 of the power supply cable Insert the monitor plug 2 in the connection socket VGA of the built in unit Insert the USB connector 3 into the PC and the monitor Insert the monitor connector 4 into the monitor socket Insert the audio jack 5 in the monitor ...

Page 183: ...Bediener wie das Gerät an und ausgeschaltet wird Erklären Sie wie eine Notabschaltung vorgenommen wird Erklären Sie wie der Radtyp ausgewählt wird Daten eingegeben werden und ein Gewicht angebracht wird Installation iii Procédures d installation Unité Voir le graphique correct section i pour positionner correctement l équilibreuse Si l équilibreuse doit être fixée nous conseillons des éléments de ...

Page 184: ...OM_GEODYNA 8200_8250_17 11_GB FR DE_C_ZEEWB770A03 Notice The information contained in this document is subject to change without notice Hofmann makes no warranty with regard to present documentation Hofmann shall not be liable for errors contained herein or for incidental consequential damages in connection with furnishings performance or use of this material ...

Reviews:

Related manuals for geodyna 8200