BA_PH_245-20_EN_15-22.docx
46
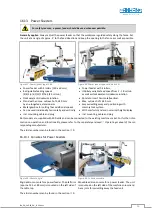
Lifting off and removing the fence
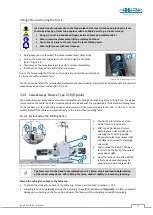
Increased risk of accidents due to the high weight of the fence! Lifting and placing the fence
should be done by at least two people or with a suitable hoist (e.g. an indoor crane)!
•
Danger of crushing hands and fingers between fence and machine table!
•
Wear protective gloves when lifting or placing the fence.
•
Acute risk of injury to the feet from the fence falling down!
•
Wear safety shoes with steel toecaps.
•
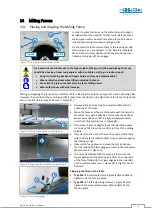
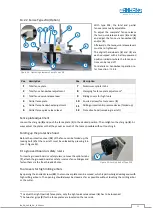
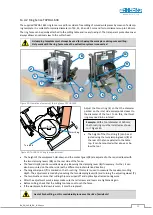
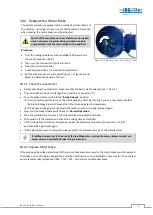
Only loosen (do not remove!) the quick-release levers (
3
) and (
6
).
•
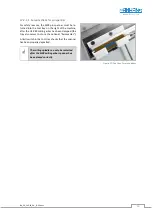
Fold up the two cover plates (
A
) to the left and right of the fence
(see
•
Then remove the two clamping screws (
S
) (unscrew completely).
•
Erst Then the fence can be lifted off and removed.
Due to the heavy weight of the fence, this operation should be carried out by
2 persons or with a suitable hoist.
Figure 35: Clamping screws
The fence can be lifted off and swivelled backwards even more easily, conveniently and safely with the optional
swivel-away device (see next section
14.3
Swivel-Away Device Type 219 (Option)
The hydraulic swivel-away device ensures comfortable, safe lifting and swivelling of the milling fence. The device
is mounted on the table top of the machine and can be locked with the supplied key. If the standard milling fence
is not needed, e.g. for upcoming curved milling work with the curved milling fence (see
14.4.2), it can be
quickly lifted off the table and swivelled away to the rear without exerting force.
14.3.1
Swivel away the Milling Fence
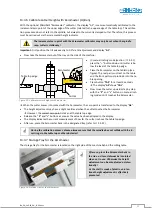
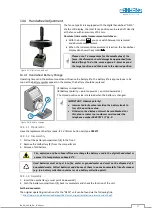
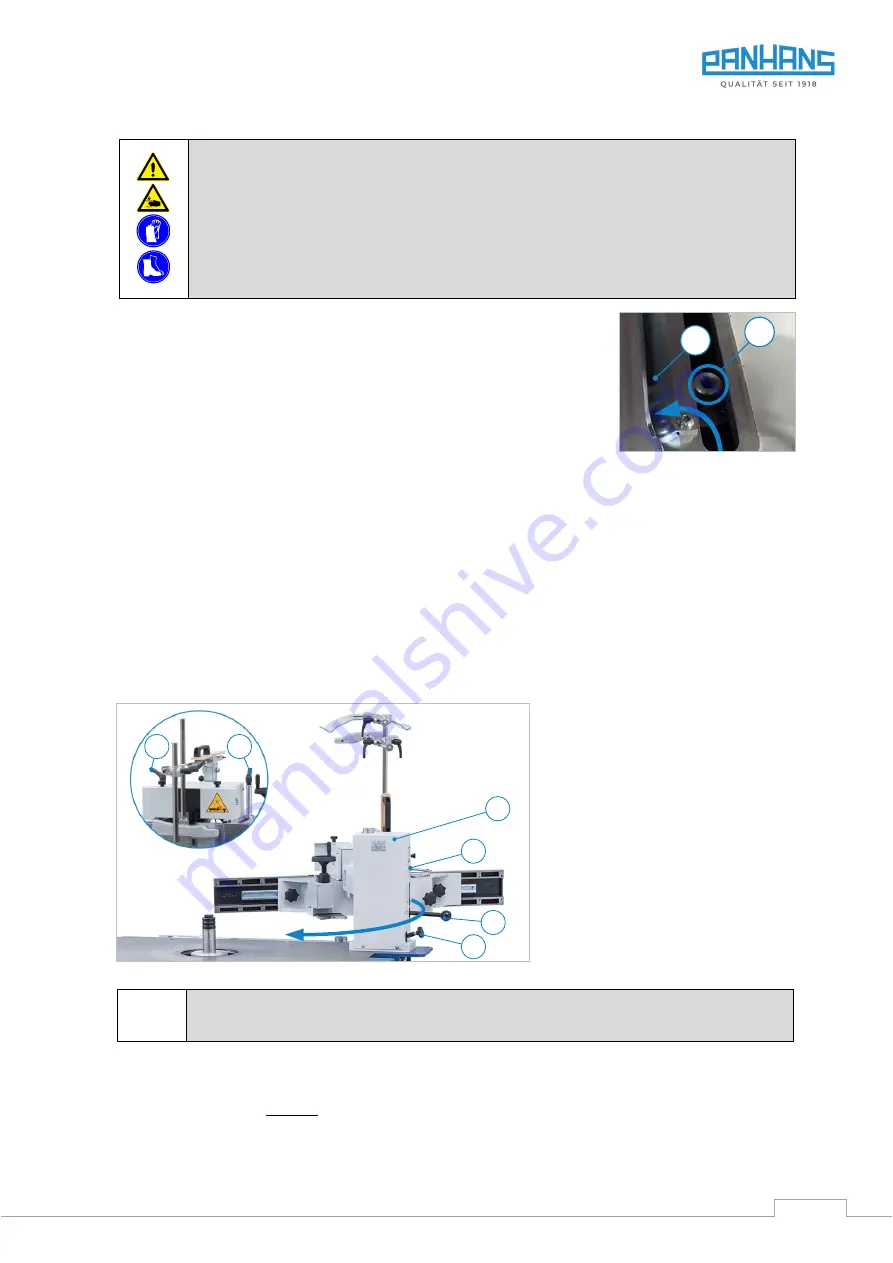
Figure 36: Hydraulic swivel-away device
•
Position the total fence and the
partial fence to 0 mm each.
•
With type 216 remove the two
clamping levers (
3
) and (
6
) by un-
screwing them. With type 204,
loosen the quick-release levers (
3
)
and (
6
) and unscrew the clamping
screws (
S
).
•
Then unlock the lock (
V
). The key
for this is on the back of the swivel-
away device (
W
).
•
Now the fence can be lifted off the
table top and swivelled away by
pumping it up with the lever (
P
).
The fence must not be fixed to the tabletop when it is lifted, as this can lead to deformation
of the swivel-away device. When lifting the fence, shake it slightly to loosen any jamming.
Attach the milling fence back to the table top:
•
To attach the milling fence back to the table top, proceed as described in section
•
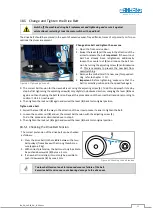
Lowering is done by carefully turning the adjusting screw (
R
) anticlockwise.
Important:
In order to prevent
damage when putting on the fence, do not lower the fence with the adjusting screw (
R
) too quickly.
S
A
R
6
3
P
V
W

