BA_PH_436-100_EN_44-21.docx
37
13
Changing the Planer Knives
To be able to change the planer knives, please first proceed as follows:
•
Set the main switch (
1
) shown in Figure 11 to the
“
I
”
position.
•
Set the brake release switch (
10
) shown in
Figure 12 to the left
“
Brake Released
”
position.
(so that the cutter head can be turned by hand into the optimum position for changing the knives).
•
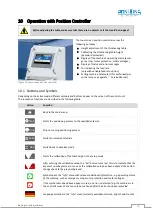
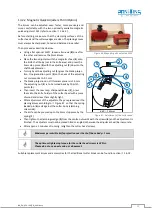
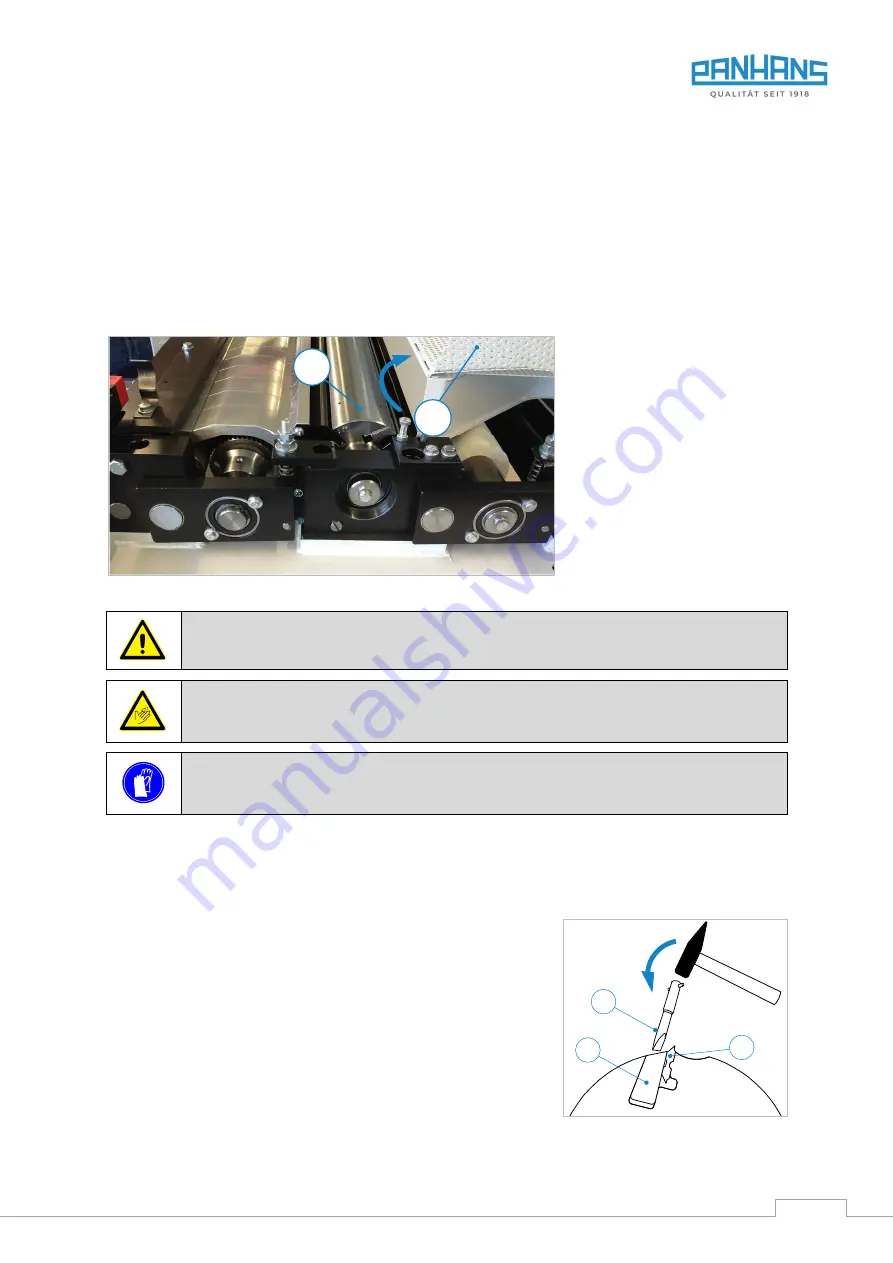
Then turn the cutter block (
M
) shown below manually to the desired position.
•
Turn the main switch (
1
) back to position
“
0
”
.
•
Then open the protective cover with the bow handle (
4
) shown in
•
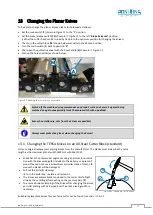
Fold up the hole cover (
A
) as shown below.
Figure 42: Making the cutter block accessible
Switch off the machine during maintenance and repair work and secure it against being
switched on again unexpectedly! Lock the main switch with a padlock!
Even when stationary, cuts from the knives are possible!
Always wear protective gloves when changing the knives!
13.1
Changing the TERSA Knives on an All-Steel Cutter Block (standard)
Only use original replacement planing knives from the manufacturer. The blades must always be the same
length as the maximum planer width (630 mm with 436|100).
•
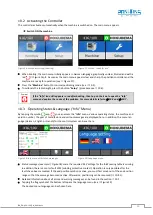
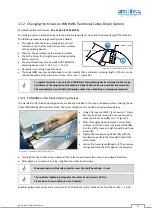
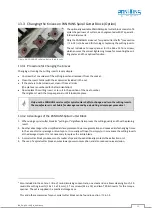
Knock back the pressure bar segments using a hammer in combina-
tion with the brass wedge (
3
) included in the delivery or a piece of
wood. Please do not use a screwdriver or similar made of steel, oth-
erwise the blades will be damaged!
•
Pull out the knife (
1
) sideways
→
Turn the knife resp. replace and reinsert it.
•
The knives are automatically tensioned to the correct knife flight
circle by the centrifugal force acting on the pressure bars (
2
).
•
To ensure absolute clamping of the knives after changing the knives,
an initial planing with hardwood over the entire planing width is
necessary.
Figure 43: Changing Tersa knives
Suitable replacement knives for your Tersa cutter can be found in section
A
M
2
3
1

