ASSEMBLY INSTRUCTIONS
• Before using or reusing, inspect product carefully. Discard any products that have cut, damaged or
frayed wire insulation or cords, cracks in the lamp holders or enclosures, loose connections,
or exposed copper wire.
• When storing the product, carefully remove the product from wherever it is placed, including trees,
branches, or bushes, to avoid any undue strain or stress on the product conductors, connections
and wires.
• When not in use, store neatly in a cool, dry location protected from sunlight.
CARE AND MAINTENANCE
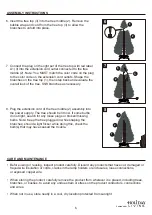
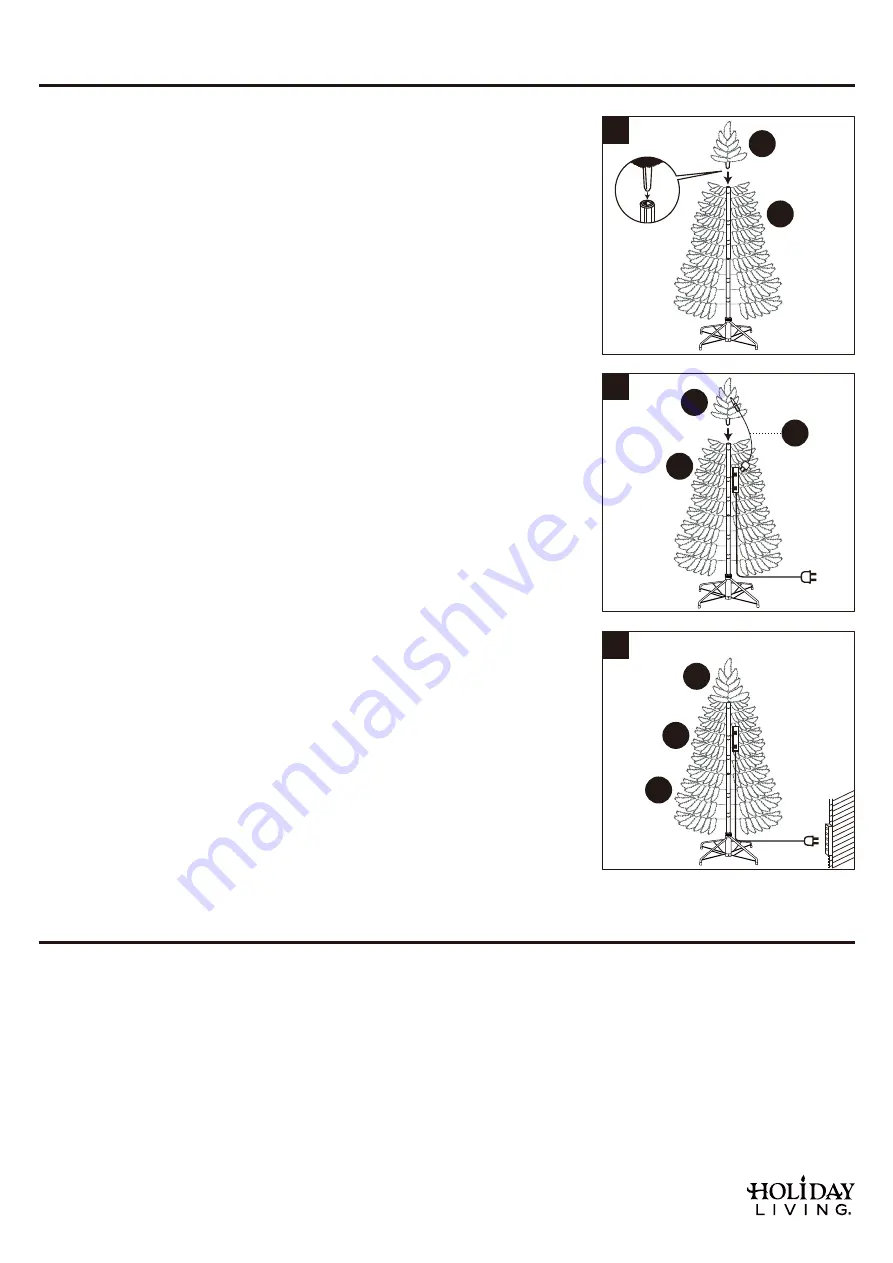
6. Insert the tree top (3) into the tree middle (2). Remove the
bubble wrap and cord from the tree top (3) to allow the
branches to unfold into place.
7. Connect the plug on the light set of the tree top with red label
8. Plug the extension cord of the tree middle (2) assembly into
the power supply. The tree should be lit now. If some bulbs
do not light, search for any loose plugs or broken/missing
bulbs. Note: Keep the tree plugged in while shaping the
branches; should a light flicker while doing this, check the
bulb(s) that may have caused the trouble.
A1 (3) into the extension cord outlet connected to the tree
middle (2). Note: You MUST match the color code on the plug
to the color code on the extension cord outlets. Shape the
branches on the tree top (
3
), then step back and evaluate the
overall look of the tree. Shift branches as necessary.
7
3
2
6
3
2
5
8
1
2
3
6
Lowes.com


