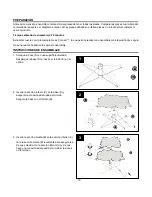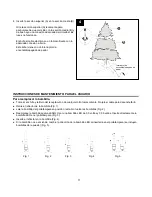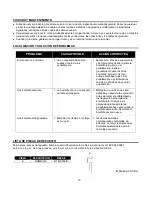
3
Please read and understand this entire manual before attempting to assemble, operate or install the product.
WARNING
To reduce the risk of electric shock or injury:
Do not plug in the unit before assembly.
Keep electric wires clear of being pinched or cut during assembly or installation. Discard sets with cut or damaged
insulation.
For indoor use.
RISK OF FIRE
Do not replace attachment plug. Discard product if the attachment plug is damaged.
CAUTION
To reduce the risk of overheating, replace burned-out bulbs promptly. Use 3 volt LED bulbs only.
These lightings are rated 10 watts (0.14 amps). Do not overload.
When using electrical products, basic precautions should always be followed including the following:
READ AND FOLLOW ALL SAFETY INSTRUCTIONS
Do not use seasonal products outdoors unless marked suitable for indoor and outdoor use. When products are
used in outdoor applications, connect the product to a Ground Fault Circuit Interrupting (GFCI) outlet. If one is not
provided, contact a qualified electrician for proper installation.
This seasonal-use product is not intended for permanent installation or use.
Do not mount or place near gas or electric heaters, fireplaces, candles or other similar sources of heat.
Do not secure the wiring of the product with staples or nails, or place on sharp hooks or nails.
Do not let lamps rest on the supply cord or on any wire.
Unplug the product when leaving the house, when retiring for the night, or if left unattended.
This is an electric product – not a toy! To avoid risk of fire, burns, personal injury and electric shock it should not
be played with or placed where small children can reach it.
Do not use this product for other than its intended use.
Do not hang ornaments or other objects from cord, wire or light string.
Do not close doors or windows on the product or extension cords as this may damage the wire insulation.
Do not cover the product with cloth, paper or any material not part of the product when in use.
This product is equipped with push-in type bulbs. Do not twist bulb.
For connection to a supply not in the U.S.A., use an attachment plug adapter of the power configuration for the
power outlet, if needed.
Do not abuse cord – Do not carry product by the cord or yank or pull
it to disconnect from the outlet.
Disconnect the product from the outlet when not in use.
CAUTION- If the connector of this lighting string does not properly fit into the connector of the driver, do not modify
the product and discard product if the connector is damaged.
Read and follow all instructions that are on the product or provided with the product.
SAVE THESE INSTRUCTIONS
PREPARATION
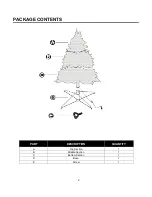
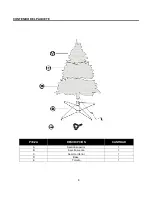
Before beginning assembly of product, make sure all parts are present. Compare parts with package contents list and
diagram above. If any part is missing or damaged, do not attempt to assemble, install or operate the product.
Estimated Assembly Time: 20 minutes
No tools required for assembly.
SAFETY INFORMATION


