4 of 8
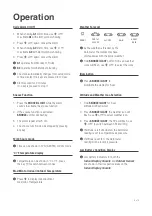
Operation
Before You Begin
1. Open the battery compartment located
at the rear side of each device
2. Place the batteries in the battery
compartment as per the polarity shown
3.
ALTITUDE
will flash. Use
+
/
Minus
to
set the altitude of your position
4. Press
SNOOZE/LIGHT
5. The weather symbol will flash. Use
+
/
Minus
to choose the weather
6. Press
SNOOZE/LIGHT
7.
hPa
and
inHg
will flash. Use
+
/
Minus
to select
8. The
Indoor Display Console
is now
connecting to the
Outdoor Sensor
. This
process takes about 3 minutes. The display
will then show the outdoor temperature
9. In case of reception failure, press
CHANNEL
for more than 3 seconds to receive again
Mounting the Outdoor Sensor
We suggest the outdoor sensor to be hung as shown
Do not place outside, and try to avoid direct
sunshine or rain as much as possible
Manual Time Setup
1. Press and hold
MODE
for 3 sec
2.
12/24 hr
format will flash; use
+
/
Minus
to select,
press
MODE
to confirm
3.
HOUR
will flash; use
+
/
Minus
to select,
press
MODE
to confirm
4.
MINUTES
will flash; use
+
/
Minus
to select,
press
MODE
to confirm
5.
YEAR
wil flash; use
+
/
Minus
to select,
press
MODE
to confirm
6.
MONTH
will flash; use
+
/
Minus
to select,
press
MODE
to confirm
7.
DATE
will flash; use
+
/
Minus
to select,
press
MODE
to confirm
The clock automatically changes from setup mode
to time display if no keys are pressed for 20 sec
Daily Alarm Setup
1. Press
ALARM
to switch from
time display to
A1
display
2. Press and hold
ALARM
for 3 sec, the
flashing alarm times will show
3. The
HOUR
display of the alarm time will flash;
use
+
/
Minus
to select, press
ALARM
to confirm
4. The
MINUTE
display of the alarm time will flash;
use
+
/
Minus
to select, press
ALARM
to confirm
5. Press
ALARM
again to switch from
A1
display to
A2
display
6. Repeat the above steps to set the time for
A2

