background image

7

www.holsteinhousewares.com

4. 

Push the lever further down to activate the drive wheel.

5. 

When the can and lid have been separated, hold the can with one hand and 
raise the lever with the other hand to remove the can.

6. 

NOTE:  To stop the product during the process, raise the lever.

7. 

Carefully remove the lid from the magnet.

1. 

This can opener should not be used to open cans designed to be opened by 
another method, such as a pull tab, peel-off foil seal, or rolling key. This can 
opener will not open rimless cans or cans with angled corners.

2. 

If there is a dent in the rim of a can, open the other end or start the cutting 
action just beyond the dent. Cans with heavy seams, uneven rims or odd 
shapes may cause the can opener to stall, If this occurs, turn the can slightly 
by hand to aid the cutting action.

3. 

 Frozen juices or foods in cardboard cans should be opened as soon as they 
are removed from the freezer. Aluminum lids will not stick to the magnet. 

CAN OPENING TIPS

CAUTION: Avoid contact with the edges of the can or lids as they are sharp. 

Carefully remove the lid from the magnet and discard.

NOTE: When opening cans continuously, do not exceed opening 5 cans in row, 
with rest periods of 15 seconds. 

Summary of Contents for HH-0910203

Page 1: ...H ALL ITEMS WITH THE MODEL NUMBER HH 0910203 ESTE MANUAL DE USUARIO APLICA PARA TODOS LOS PRODUCTOS CON EL N MERO DE MODELO HH 0910203 READ THIS MANUAL BEFORE USING THE PRODUCT AND SAVE FOR FUTURE REF...

Page 2: ...use the appliance if the power cord is broken damaged or if wires are exposed 5 DO NOT use the appliance if it malfunctions or has been dropped or damaged 6 This appliance has no parts that user serv...

Page 3: ...is necessary when used near children 13 DO NOT leave the appliance unattended while in use 14 Do not use attachments that are not recommended or sold and approved by the manufacturer of this applianc...

Page 4: ...liance 2 The longer cord should be arranged so that it will not drape over the countertop or tabletop where it can be tripped over snagged or pulled on unintentionally by children or the user POLARIZE...

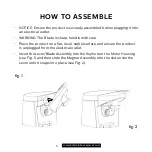
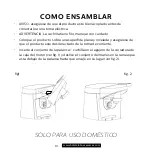
Page 5: ...NG The Blade is sharp handle with care Place the product on a flat level stable surface and ensure the product is unplugged from the electrical outlet Insert the Lever Blade Assembly into the Keyhole...

Page 6: ...he product and all it parts Remove all packaging materials including any stickers or labels 2 Read these instructions carefully 3 Clean the exterior surface of the product with a damp cloth Wipe dry w...

Page 7: ...less cans or cans with angled corners 2 If there is a dent in the rim of a can open the other end or start the cutting action just beyond the dent Cans with heavy seams uneven rims or odd shapes may c...

Page 8: ...ner at the front of the unit will only remove metal bottle caps Do not use it for screw off caps punch in tabs or on cans with pull ring TO OPEN BOTTLES HOW TO USE THE KNIFE SHARPENER Unplug the power...

Page 9: ...er Carefully brush the blade and the sharpener to remove residues Clean the outside of the product with a damp cloth CLEANING CAUTION DO NOT IMMERSE THE PRODUCT THE POWER CORD OR PLUG IN WATER OR ANY...

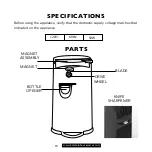
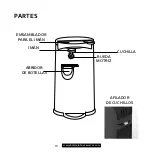
Page 10: ...ares com PARTS MAGNET BLADE BOTTLE OPENER DRIVE WHEEL MAGNET ASSEMBLY Before using the appliance verify that the domestic supply voltage matches that indicated on the appliance 120V 60Hz 50W SPECIFICA...

Page 11: ...roto da ado o si los cables est n expuestos 5 NO utilice el artefacto si funciona mal o si se ha ca do o da ado 6 Este artefacto no tiene piezas que el usario pueda reparar No trate de examinar or re...

Page 12: ...a supervisi n es necesaria cuando se utiliza cerca de ni os 13 NO deje el artefacto desatendido mientras est en uso 14 No utilice ning n accesorio que no est recomendado o vendido y aprobado por el fa...

Page 13: ...se o tirar del accidentalmente especialmente por ni os ENCHUFE POLARIZADO Este electrodom stico tiene un enchufe polarizado una pata del enchufe es m s ancha que la otra Para reducir el riesgo de desc...

Page 14: ...iene filo manejar con cuidado Coloque el producto sobre una superficie plana y nivelada y aseg rese de que el producto est desconectado de la toma de corriente Inserte el conjunto de la palanca cuchil...

Page 15: ...tros aparatos para evitar la sobrecarga del circuito INSTRUCCIONES DE USO ADVERTENCIA No utilice este producto para abrir latas de materiales inflamables o latas presurizadas 1 Conecte el producto a u...

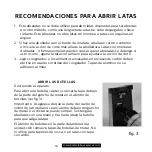
Page 16: ...Jugos congelados o los alimentos envasados en envases de cart n deben abrirse en cuanto se retiran del congelador Tapas de aluminio no se adhieren al im n RECOMENDACIONES PARA ABRIR LATAS ABRIR LAS BO...

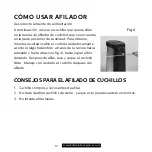
Page 17: ...fuente de alimentaci n A continuaci n colocar el cuchillo que quiere afilar en la ranura de afilador de cuchillos que se encuentra en la parte posterior de la unidad Para obtener mejores resultados af...

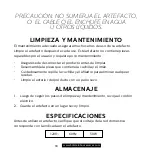
Page 18: ...e su artefacto Limpie el artefacto despu s de cada uso Este artefacto no contiene piezas reparables por el usuario y requiere poco mantenimiento Asegurese de desconectar el producto antes de limpiar D...

Page 19: ...19 www holsteinhousewares com PARTES IM N EMSAMBLADOR PARA EL IM N RUEDA MOTRIZ CUCHILLA ABRIDOR DE BOTELLAS AFILADOR DE CUCHILLOS...

Page 20: ...NSION A MENOS QUE SE PUEDA INSERTAR COMPLETAMENTE EL ENCHUFE DEL ARTEFACTO EN EL CABLE DE EXTENSION NO INTENTE ALTERAR ESTA MEDIDA DE SEGURIDAD DE NINGUNA MANERA WARNING ELECTRIC SHOCK WARNING TO REDU...

Reviews: