Major lamp parts manufactured in Germany by Holtkötter Leuchten GmbH.
Bulbs manufactured in Germany by Osram GmbH.
Final assembly by Holtkötter International, Inc. in South St. Paul, MN.
Holtkötter
®
and Holtkötter Leuchten
®
are registered trademarks
of Holtkötter International, Inc. All Rights Reserved.
© Holtkötter International, Inc.
HOLTKÖTTER
INTERNATIONAL, INC.
155 Hardman Avenue South, South St. Paul, MN 55075
fax: (888) 552-8661 • phone: (800) 899-5444
ASSEMBLY INSTRUCTIONS FOR
www.holtkoetter.com
e-mail: customerservice@holtkoetter.com
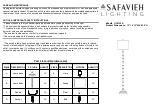
Glass Shield and Bulb Replacement Instructions
In order to replace the bulb, special care must be taken to remove the shade. The lamp must
1.
be turned off and unplugged for at least 15 minute prior to removing the shade.
Turn the shade clockwise until it stops. Using the allen wrench provided, loosen the set-screw
2.
located on the inner part of the vent. Do not remove this set-screw.
Take the shade assembly off the lamp.
3.
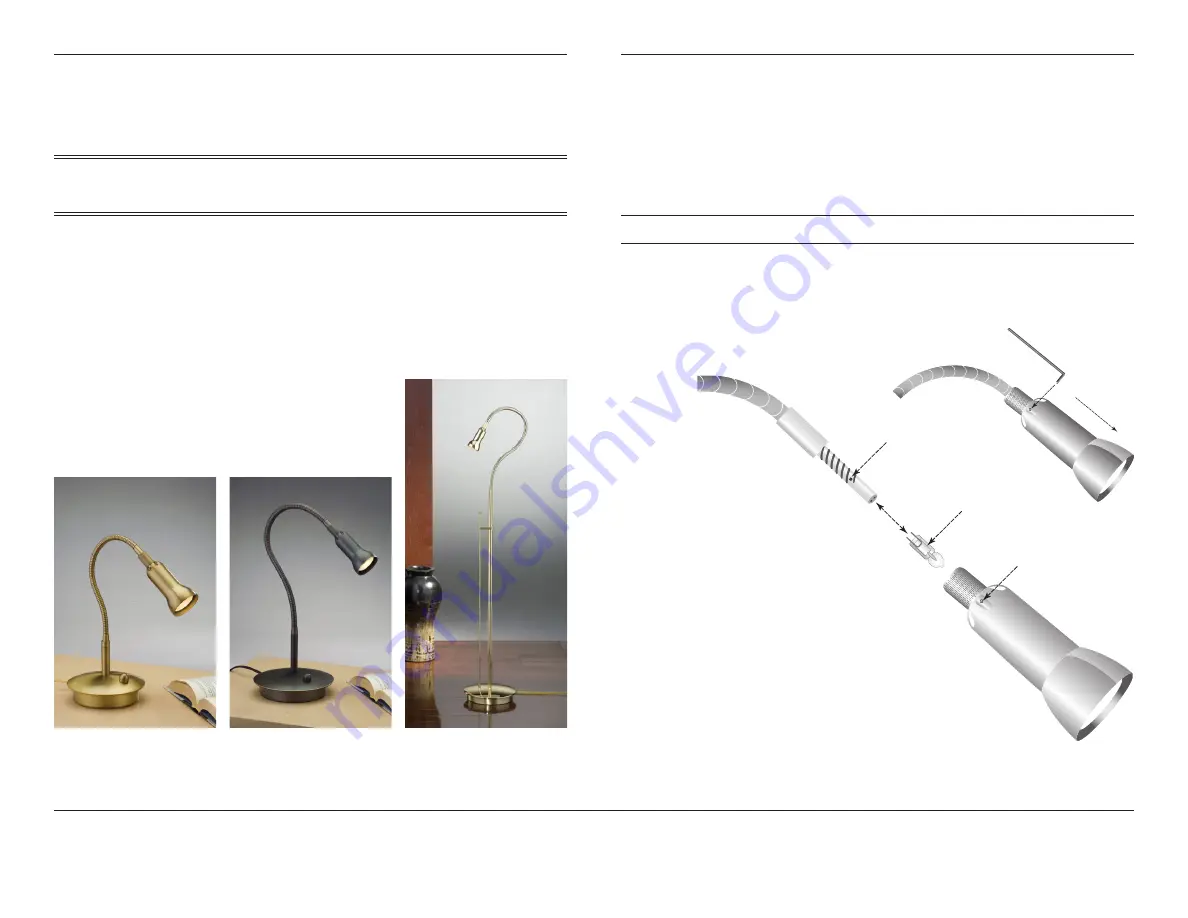
Congratulations, you have just purchased one of the finest reading lamps available on the market
today. This lamp has a telescoping shade that allows the user to focus the halogen light where
they want it and a full-range dimmer to control the light output. The reflector houses a secondary
aluminum reflector covered with a frosted glass shield that evens and focuses the light output of
the encased 20 Watt Halogen bulb. The table lamps come fully assembled, the floor lamp requires
the dimmer rod to be installed.
Replacement Bulb Order Code: 9250*020-HSTAR-G4
Care Instructions
Use only a soft, dry cloth to clean. If necessary, a slightly damp,
soft cloth can be used to spot clean. Do not use common
household cleaners on lamps or fixtures, as the lacquer on the
outside of the brass may be damaged as a result.
Enjoy your new Holtkötter lamp.
Chair and Bedside Reading Lighting
6260/1, 6261/1 & 6360/1
6260/1
6360/1
6261/1
Allen Wrench
H o l d i n g
4.
the
black
rubber
washer,
remove the old bulb.
Insert the new bulb being
5.
careful not to touch the bulb
with bare fingers. Hold the bulb
with a small cloth or tissue. This will
help prolong the life of the bulb.
To replace the shade, slide the reflector
6.
over the bulb up to the lamp arm. Screw the
shade onto the lamp until the set-screw lines up
with the grooves in the arm of the lamp.
Tighten the set-screw to hold the reflector onto the
7.
lamp. Check the lamp by turning the shade counter-
clockwise. If the shade can be turned past the set-screw,
the shade is not correctly placed. Slide the shade back up to
the arm of the lamp and line up the set-screw with the groove
again. Proper installation of the shade will not allow it to be twisted
past the set-screw.
Set-Screw
Bulb
Set-Screw


