background image


HOLUX


GR-231 Bluetooth GPS Receiver Manual 


8

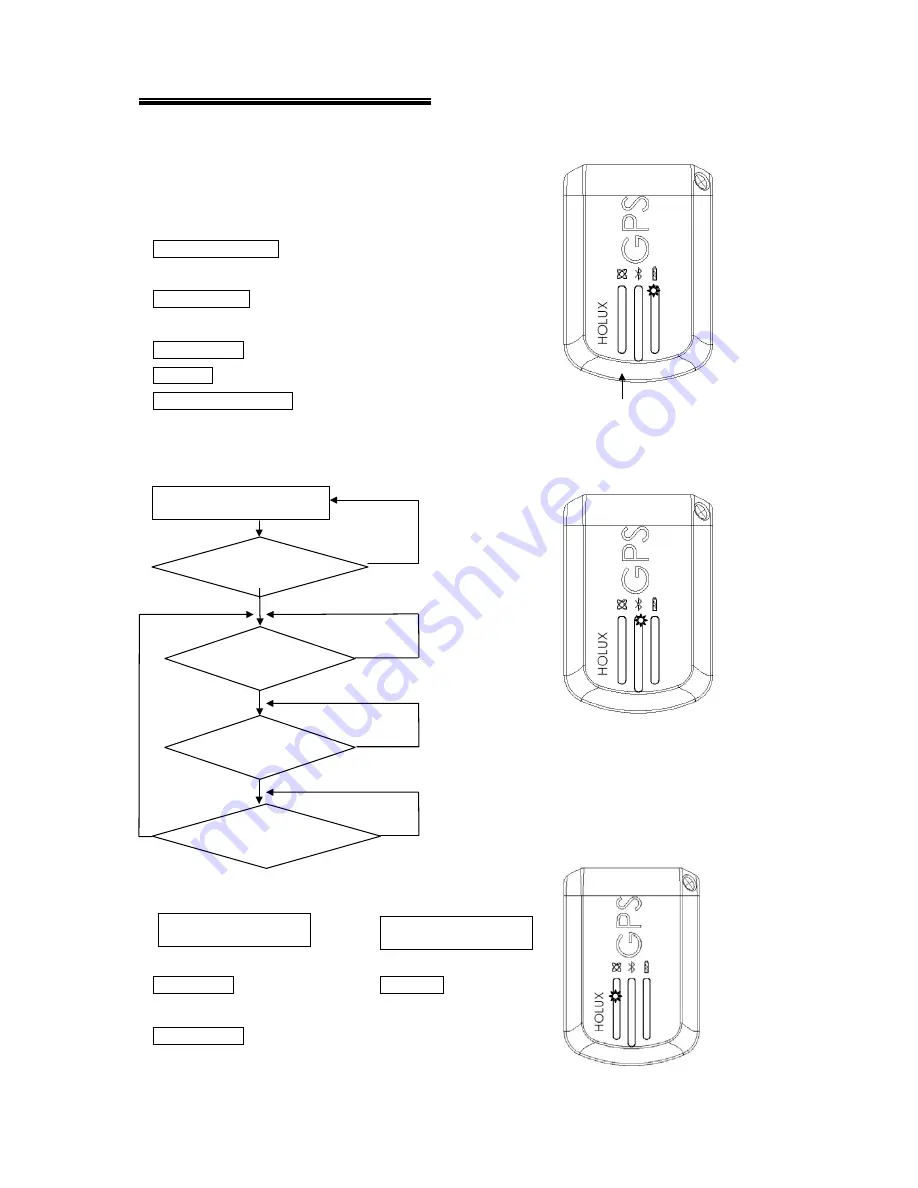
5. Getting Started 

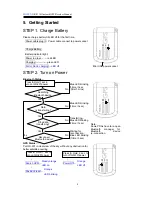
STEP 1. Charge Battery 

Please charge battery till LED off for the first time. 

Power cable plug in    Power cable connect to power socket 


Charge Battery 

Battery indicator light: 

Power too low 

--------

 red LED 


Charging -------------- green LED 

Full or Not in charging -- LED off


Mini USB power socket 

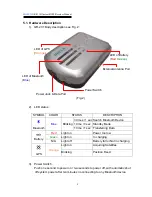
STEP 2. Turn on Power 

Bluetooth Status – 


Note: 

Some PDAs have to re-open 

Bluetooth manager for 

Bluetooth device 

re-connection.


GPS Status

 ---


Put GR-231 in clear view of the sky without any obstruction for 
better satellite acquiring. 


Search GPS --                                      Power Off --   


Position Fixed -- 


Press & Hold 1 sec to

turn on GR-231power

Blue LED blinking 

(1time / 3sec)


Transferring…

Blue LED blinking

(1time / 1sec)


Waiting for 

reconnection

… 

Blue LED blinking

(1time / 3sec)


No

Searching 

Bluetooth device


Stop data 

transferring?


Data 

is transferring?


Reconnect 

Bluetooth device?


Blue LED blinking

(1time / 3sec 

, After 5 mins)


No

No

No

Yes 

Yes 

Yes 

Yes 

Press & Hold 1 sec to

turn on GR-231power 

Press & Hold 2 sec to

turn off GR-231power 

Steady orange 
LED on


Orange  

LED blinking


Orange
LED off

Summary of Contents for GR-231

Page 1: ...ceiver Aug 10 2004 HOLUX Technology Inc 8F 11 No 26 Tai Yuen St Chu Pie City Hsin chu Taiwan TEL 03 5526268 FAX 03 5526108 E Mail info holux com tw Website www holux com tw All Right Reserved User s Guide GR 231 HOLUX ...

Page 2: ...ECEIVER ACCURACY 6 4 4 USE LIMITATION 6 4 5 POWER SUPPLY 6 4 6 OUTPUT AND INTERFACE 7 4 7 PHYSICAL 7 4 8 OTHER FUNCTIONS 7 5 GETTING STARTED 8 5 1 HARDWARE DESCRIPTION 9 5 2 SOFTWARE INSTALLATION 12 6 5 FINISH BLUETOOTH MANAGER SETUP 12 5 3 INSTALLATION OF TESTING PROGRAM 13 6 OPTIONALACCESSORIES 15 7 DRIVER INSTALLATION 16 7 1 SYSTEM REQUIREMENT 16 7 2 INSTALLATION 16 7 3 IMPORTANT 16 8 WARRANTY ...

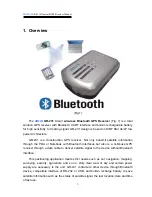
Page 3: ...rough the PDA or Notebook with Bluetooth interfaces but also is a G Mouse GPS receiver through a data cable to deliver satellite signal to the device without Bluetooth interface This positioning application meets strict needs such as car navigation mapping surveying security agriculture and so on Only clear view of sky and certain power supply are necessary to the unit GR 231 contacts to other dev...

Page 4: ...n though the receiver usually stays off 2 Packing List Congratulations on your purchase of the GR 231 GPS Receiver We hope it will be useful to you for a long time Before you begin make sure that your package includes the following items If any of these items are missing please contact your local HOLUX dealer or distributor HOLUX GR 231 Bluetooth GPS receiver 1 Set Travel power supply Cigarette ad...

Page 5: ...e Lithium ion battery without external power supply and the working time lasts at least 9 hours Provide Continue mode and Power saving mode for user s requirement Provide expand terminal contact to other system without Bluetooth device Built in rechargeable battery for memory and RTC backup and for fast Time To First Fix TTFF Support NMEA0183 v2 2 data protocol and SiRF binary code 4 colors LED to...

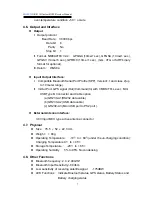
Page 6: ...r the standard software Position 2 2 meters horizontal 95 of time 5 meters Vertical 95 of time Velocity within 0 1 meters second Time 1 microsecond synchronized GPS time 4 4 Use Limitation Altitude 18 000 meters 60 000 feet Velocity 515 meters second 700Knots Acceleration 4 G Jerk 20 meters second max 4 5 Power Supply External Voltage 5VDC 10 Batteries Main Power Built in rechargeable Lithium ion ...

Page 7: ...Out Command In with CMOS TTL Level Mini USB Type B Connector and Cable option a GR230 A1 RS232 data cable b GR230 A2 USB data cable c GR230 A3 Mini USB port to PS2 port External Antenna interface 3 0V input MCX type active antenna connector 4 7 Physical Size 76 5 52 22 3 mm Weight 80 g Operating Temperature 10 to 60 under the un charging condition Charging Temperature 0 to 45 Storage Temperature 2...

Page 8: ...h device re connection GPS Status Put GR 231 in clear view of the sky without any obstruction for better satellite acquiring Search GPS Power Off Position Fixed Press Hold 1 sec to turn on GR 231power Blue LED blinking 1time 3sec Transferring Blue LED blinking 1time 1sec Waiting for reconnection Blue LED blinking 1time 3sec No Searching Bluetooth device Stop data transferring Data is transferring ...

Page 9: ... any Bluetooth device SYMBOL COLOR STATUS DESCRIPTION 3 times 1 sec Search Bluetooth Device 1 time 3 sec Standby Mode Bluetooth Blue Blinking 1 time 1 sec Transferring Data Red Light on Power too low Green Light on In charging Battery N A Light off Battery full or Not in charging Light on Acquiring Satellites GPS Orange Blinking Position Fixed External Antenna Port LED of Battery Red Green Power S...

Page 10: ... Fig 3 and Fig 4 Fig 3 USB Cable GR230 A2 Fig 4 USB Cable GR231 A2 RS232 Cable GR231 A1 Mini USB 1 Connect to Cigarette iPAQ 38xx Cable CA IPAQ38xx PDA 2 Connect to Cassio Cable PDA CA CASSIOPEIA 3 Other PDA cable contact to factory PC Notebook USB port PC Notebook RS232 port Convert cable GR231 A3 ...

Page 11: ...see table 1 Fig 6 Table 1 Pin Pin Name Signal and description 1 GND Signal ground Battery charging ground 2 VOUT Unregulated voltage out 3 6 V max 100mA 3 TXD Transmit Data From organizer to peripheral Voltage Level is 3 3V 5 0V 4 RXD Receive Data Form peripheral to organizer Voltage level is 3 3V 5 0V 5 VCHARG Positive terminal of DC adaptor that powers the internal charging circuit of Li Ion bat...

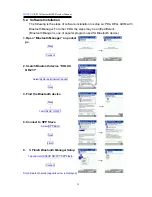
Page 12: ...uetooth Manger is one of popular program used for Bluetooth device 1 Open Bluetooth Manager on pocket pc New Connect 2 Search Bluetooth device HOLUX GR 231 Select Explore a Bluetooth device Next 3 Find the Bluetooth device Next Tap HOLUX GR 231 4 Connect to SPP Slave Select SPP slave Next Finish 6 5 Finish Bluetooth Manager Setup Tap and Hold HOLUX GR 231 SPP slave Connect Finish Bluetooth setup o...

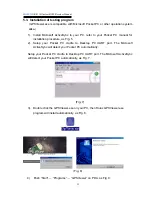
Page 13: ...tallation procedure as Fig 5 2 Setup your Pocket PC cradle to Desktop PC UART port The Microsoft ActiveSync will detect your Pocket PC automatically Setup your Pocket PC cradle to Desktop PC UART port The Microsoft ActiveSync will detect your Pocket PC automatically as Fig 7 Fig 7 3 Double click the GPSViewer exe on your PC then Holux GPSViewer exe program will install automatically as Fig 8 Fig 8...

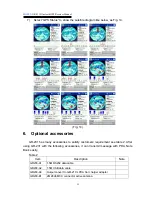
Page 14: ...ow is show after executing GPSViewer as Fig 10 Fig 10 6 Setup Baud rate 38400 then push Scan bottom to scan your COM Port Example theIPAQ 3970 is the output port COM8 Select your COM Port COM1 COM10 then push Open GPN bottom as Fig 11 Fig 12 and Fig 13 Fig 11 Fig 12 Fig 13 ...

Page 15: ... many accessories to satisfy customers requirement see table 2 After using GR 231 with the following accessories it can transmit message with PDA Note Book easily Table 2 Item Description Note GR230 A1 1 5M RS232 data cable GR230 A2 1 5M USB data cable GR230 A3 Output convert to GM 210 s PDA Car charger adaptor GR230 B1 2M 28db MCX connector active antenna ...

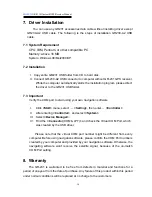
Page 16: ...ing your own navigation software I Click Start menu select Setting then enter Controller II After entering Controller and select System III Select Device Manager IV Find the Connector COM LPT and check the Virtual COM Port which was created by the USB driver Please note that the virtual COM port number might be different from every computer Before using navigation software please confirm the COM P...

Page 17: ...d run GPSViewer Cold start function to try again or connect an external antenna to improve the poor GPS signal Execute fail Bluetooth function unstable Power On Off GR 231 Re Start PDA or PC and reference sec 5 2 re install software Can not turn on the COM port Install GR 231 incompletely or operate the device is being used with same COM port Install GR 231 completely or stop other device that is ...

Page 18: ... guarantee that interference will not occur in a particular installation If this equipment does cause harmful interference to radio or television reception which can be determined by turning the equipment off and on the user is encouraged to try to correct the interference by one or more of the following measures Reorient or relocate the receiving antenna Increase the separation between the equipm...

Reviews: