Instruction Manual: Hot Tub
26
The following procedure is recommended by the manufacturer:
1.
After removing the foil in the upper area, turn the hot tub with the help of 3 to 5
physically strong people.
2.
The stepped edge (approx. 2 cm high) makes it easier to set down the hot tub. You must
hold the hot tub by this edge when setting it down.
CAUTION
Danger of crushing when setting down the hot tub!
Take care when moving
and placing the hot tub on the bearing surface. Only hold the stepped edge.
Select a level and appropriate bearing area as per the description in Chapter
5.2
.
Wear protective gloves.
3.
After the first side of the hot tub has been placed on the bearing surface (make sure
that the hot tub does not sink into the surface), lift the other side of the using the
stepped edge, cut the tension band, remove the remaining foil and remove the Euro
pallet.
WARNING
Risk of injury from manual handling when removing transport packaging!
Take care when handling sharp tools such as carpet cutters and scissors. Make
sure that the tensioning strap is kept under tension. Hold this in place when
cutting. Wear protective gloves.
NOTE
Take care not to damage the hot tub when using a carpet knife.
4.
Carefully put down the second side of the hot tub.
CAUTION
Danger of crushing when setting down the hot tub!
Take care when moving
and placing the hot tub on the bearing surface. Only hold the stepped edge.
Select a level and appropriate bearing area as per the description in Chapter
5.2
.
Wear protective gloves.
5.
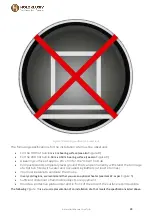
Please check that the hot tub is resting on all the designated bearing surfaces (see
Figure 12
) and repeat
the above steps if necessary.
5.4
Assembly
The following chapters describe the installation steps you need to perform to get the hot tub
ready for operation.
5.4.1
Assembling the flue pipe
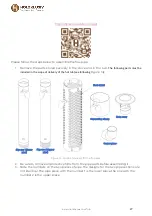
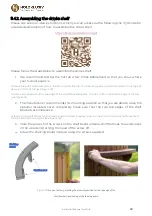
Please also see our video instructions, which you can access via the following link / QR code, for
a detailed explanation of how to assemble the flue pipe.


