9
HBS Series | Version 1.06
Setting up and connection
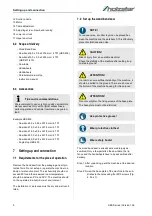
12 Suction nozzle
13 Motor
14 Table adjustment
15 Adjusting screw - Saw band running
16 Lower door lock
17 Upper door lock
6.2 Scope of delivery
- Wood Band Saw
- Saw band16,0 x 0,5 x 3378 mm / 4 TPI (HBS 400)
- Saw band16,0 x 0,5 x 3455 mm / 4 TPI
(HBS 471/473)
- Saw table
- Handwheels
- Handwheels
- Parallel aluminium stop
- Instruction manual
6.3 Accessories
Example HBS 400:
- Saw band 6,0 x 0,65 x 3378 mm / 6 TPI
- Saw band 10,0 x 0,5 x 3378 mm / 4 TPI
- Saw band 16,0 x 0,5 x 3378 mm / 4 TPI
- Saw band 20,0 x 0,5 x 3378 mm / 4 TPI
- Saw band 25,0 x 0,5 x 3378 mm / 4 TPI
- Angle stop HBS 400
7
Setting up and connection
7.1 Requirements for the place of operation
Remove the band saw from the packaging and all pro
-
tective films. Do not set up or operate the machine in a
damp or wet environment. The air humidity should not
exceed 80% and the measured room temperature
should be between 5°C and 35°C. The machine should
not be operated in a humid or wet environment.
The installation or work area must be dry and well venti
-
lated.
7.2 Set up the wood band saw
The wood band saw is already delivered largely as
-
sembled. Only a few parts like the saw table, the rip
fence and the handwheels have to be assembled after
delivery.
Step 1: After unpacking, park the machine at the desired
location.
Step 2: Screw the base plate of the machine to the sub
-
strate via the holes using four M10 screws (Fig.
4, Pos. 1).
Tips and recommendations
We recommend to use only high quality original Holz
-
star accessories. Only with original accessories a
perfect operation and optimal results can be guaran
-
teed.
NOTE!
To reduce noise, a rubber layer can be placed bet
-
ween the machine and the workbench. This effectively
prevents vibrations and noise.
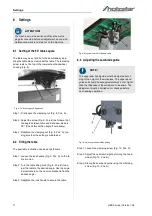
CAUTION!
Risk of injury from an unstable machine!
Check the stability of the machine after setting it up
on stable ground.
ATTENTION!
In order to ensure sufficient stability of the machine, it
should be bolted to the ground. There are 4 holes at
the bottom of the machine housing for this purpose.
ATTENTION!
Do not overtighten the fixing screws of the base plate.
The base plate must not be distorted
Use protective gloves!
Wear protective clothes!
Wear safety boots!


