12
KGZ 305 E | Version 1.09 | EN
Care, maintenance and repair
9 Care, maintenance and repair
9.1 Care after finish work
Step 1: Unplug the mains connector from the safety soc-
ket.
Step 2: Empty and clean the dust collection bag.
Step 3: Clean the saw from sawdust and chips.
Step 4: Check the saw for damage to the safety devices
and the saw blade. If necessary, repair or have
repaired the saw in accordance with the safety
instructions.
To ensure safe and proper operation, keep the power
tool and ventilation slots clean at all times.
9.2 Maintenance and repair
Maintenance and repairs must be carried out by specia-
list staff only.
If the chop- and mitre saw is not operating correctly, con-
tact a specialist retailer or our customer service. The
contact details can be found in chapter 1.2 Customer
Service.
All protective and safety equipment must be immediately
reinstalled after having completed repair and main-
tenance work.
9.2.1 Replacement the saw blade
Step 1: Disconnect the mains plug from the socket
outlet.
Step 2: Press the release knob on the handle of the saw
head and move the saw head to the upper end
position.
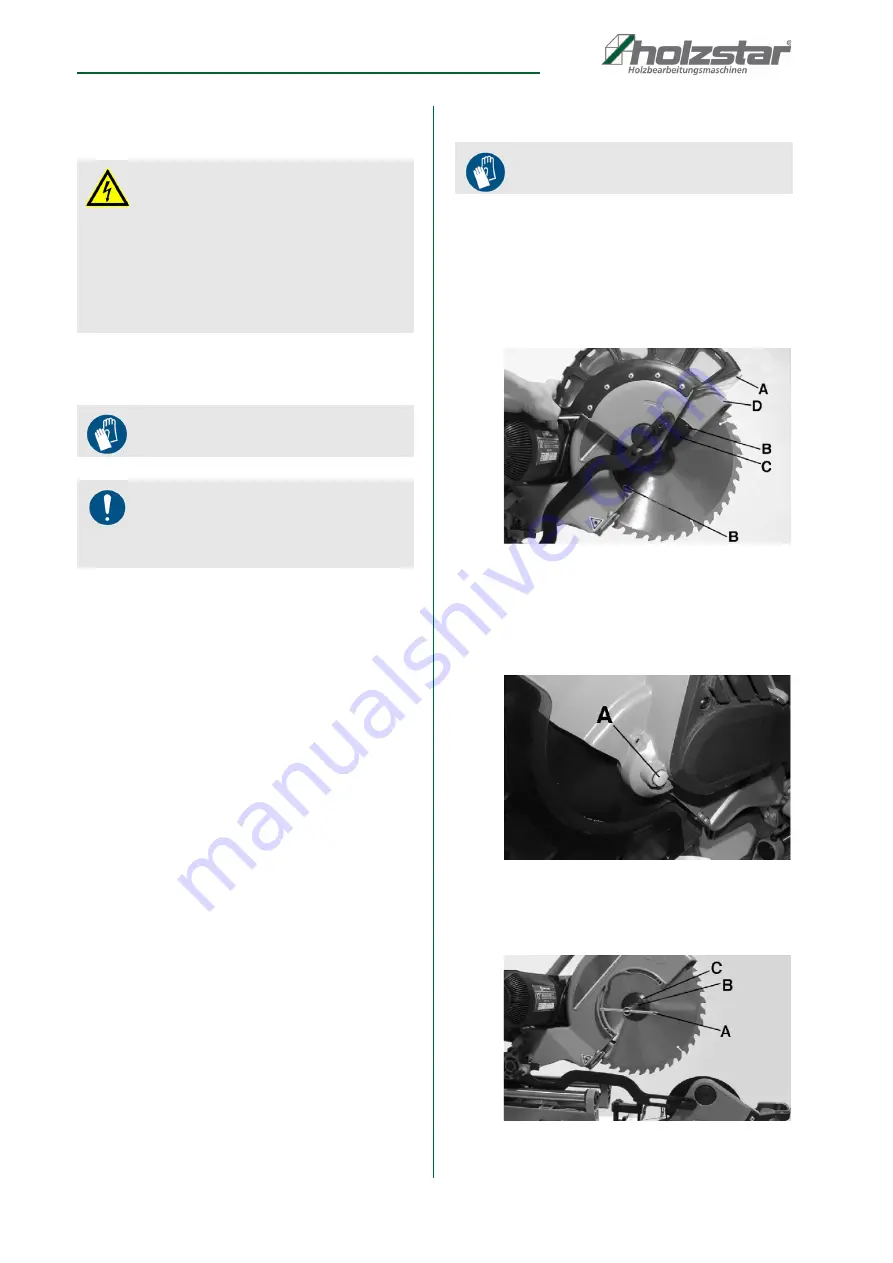
Fig. 14: Remove the protective cover
Step 3: Lift the pendulum protection cover (Pos. A,
Fig. 14) and loosen the two screws (Pos. B,
Fig. 14). Remove the protection cover (Pos. D,
Fig. 14) and safety plate (Pos. C, Fig. 14).
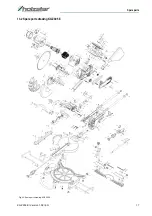
Fig. 15: Fix the saw blade
Step 4: Press locking knob (Pos. A, Fig. 15) and turn the
saw blade by hand until it clicks into place.
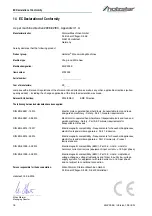
Fig. 16: Unscrew the saw blade
DANGER!
Risk of fatal injury through electric
shock!
There is a risk of fatal injury on touching live compo-
nents. Electrical components that are switched on
can perform uncontrolled movements and cause inju-
ries.
- Before starting cleaning and maintenance work, un-
plug the mains connector.
Use protective gloves!
NOTE!
Never use strong cleaning agents for any cleaning
work. This can damage or destroy the device.
Use protective gloves!


