Care, maintenance and repair
KGZ 305 E | Version 1.09 | EN
13
Step 5: Using the socket screwdriver (A, Fig. 16), uns-
crew the fixing screw B for the saw blade clock-
wise and remove the clamping flange C.
Step 6: Carefully lift out the saw blade.
Step 7: Insert the new saw blade.
Note: Ensure that the saw blade is installed in the correct
direction. The tooth position must correspond to
the illustration in Fig. 14. Observe the marking
on the saw.
Step 8: Rub a drop of oil onto the clamping flange, then
fit the clamping flange.
Step 9: Press the locking button and fix the saw blade
and clamping flange by screwing in the fixing
screw counterclockwise.
Step 10: Fasten the protective hood with the two screws.
Step 11: Switch on the saw briefly in accordance with the
safety regulations and visually check that the
saw blade is correctly aligned.
Step 12: If you notice an unsteady run, switch off the saw
immediately, unplug the power plug from the
socket and correct the saw blade attachment.
Repeat the steps several times if necessary. If
the saw does not run smoothly, replace the saw
blade.
Step 13: You will notice that the saw blade is running
smoothly. The saw is now ready for use.
9.2.2 V-belt inspection
Step 1: Disconnect the mains plug from the socket outlet
Step 2: Secure the saw head in the lower position.
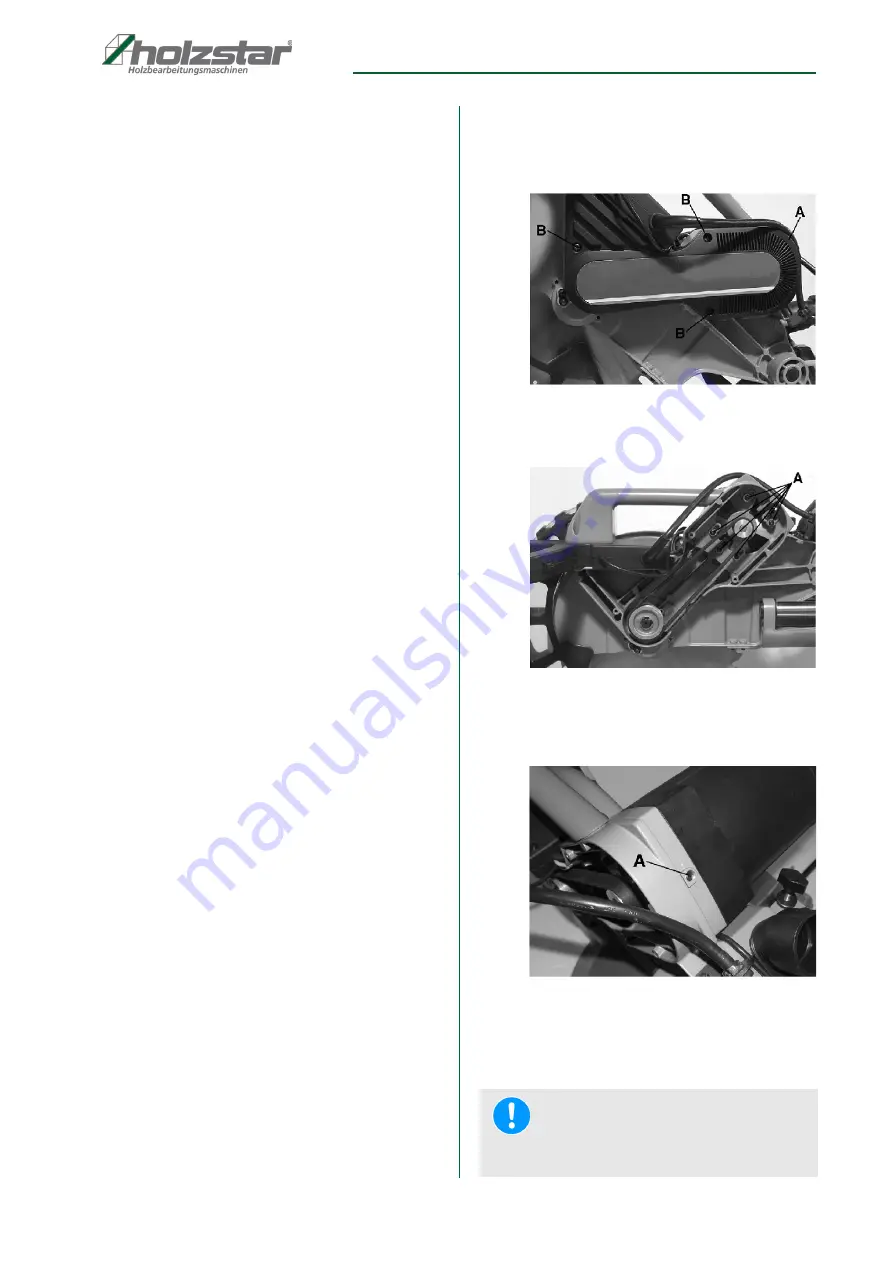
Fig. 17: Remove the cover.
Step 3: Loosen the 3 V-belt cover screws on the right
side of the saw using the hex key.
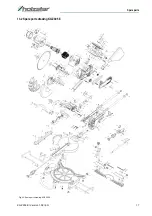
Fig. 18: Remove motor screws
Step 4: Check the V-belt visually for damage. To retigh-
ten or replace the V-belt, first loosen the 6
screws (Pos. A, Fig. 18).
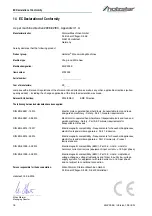
Fig. 19: Tension screw for V-belt
Step 5: Tension or loosen the V-belt tensioning screw
(Pos. A, Fig. 19). The correct tension is when the
belt can be pressed in approx. 1/2". Check the
functioning of the spring tension pulley.
NOTE!
Replace damaged V-belts or belts that can no longer
be tensioned by the spring tension pulley.


