background image


_______________________________________________________User manual Homburg Drain Cleaner type Senior  

© Copyright HOMBURG HOLLAND  


42 

TRANSPORT (NOT BEHIND THE TRACTOR)


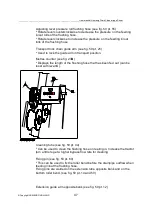
The machine always comes completely assembled. That means the machine does not 
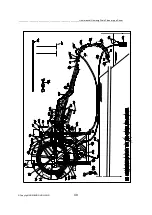
have to be put together after receipt. The machine is fitted with 2 hoisting eyes (see fig. 
50 pt. 16 and fig. 51 pt. 13). Make sure the reel is not pressed in by slings or hoisting 
cables when hoisting it! That can be achieved by using an equator. 


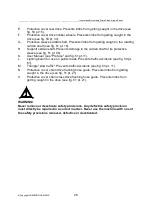
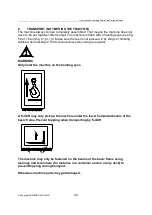
WARNING!


Only hoist the machine on the hoisting eyes.


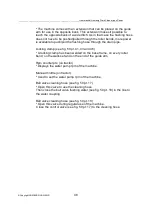
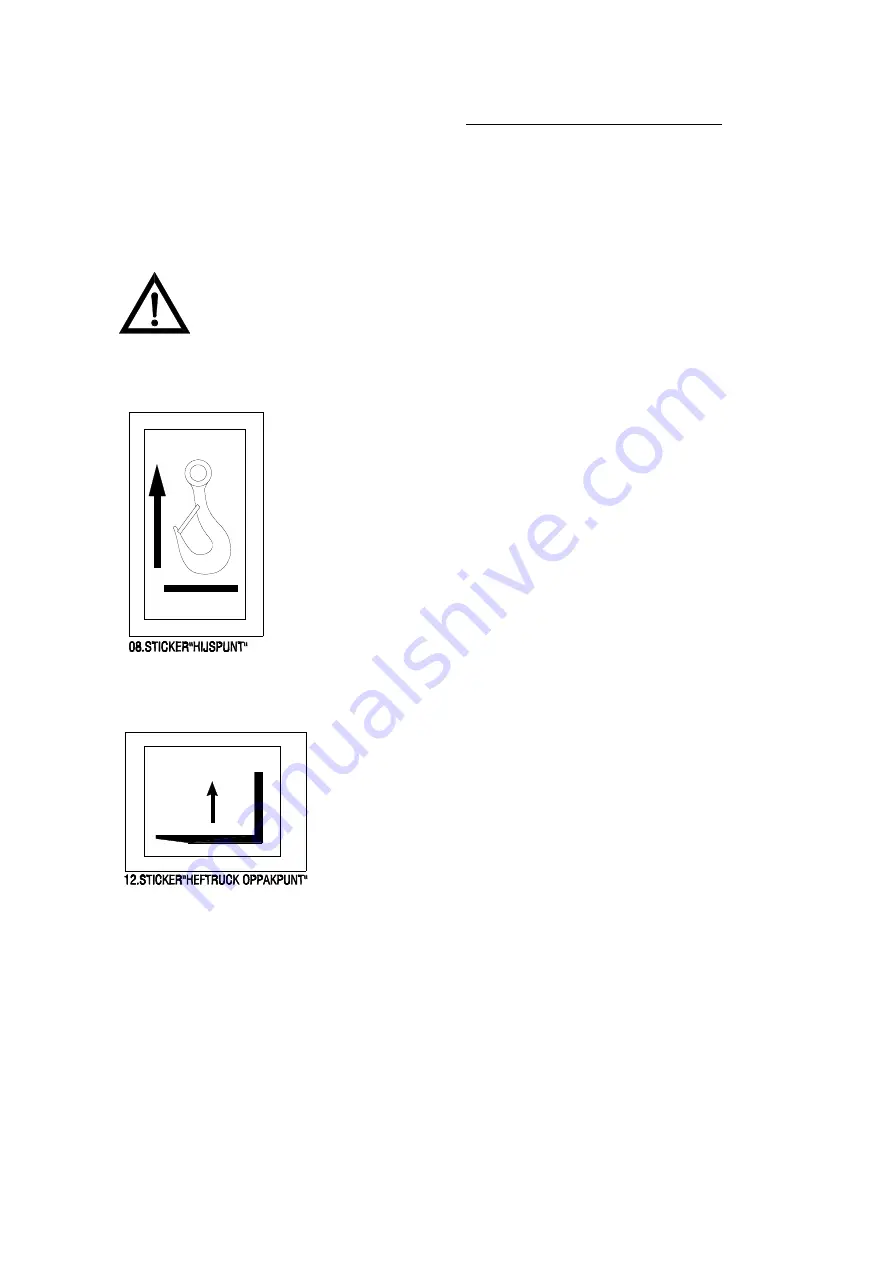
A forklift may only pick up the machine under the lower horizontal beams of the 
basic frame. Prevent toppling when transporting by forklift


The machine may only be fastened on the beams of the basic frame using 
lashings and tensioners (for instance in a container and on a lorry deck) to 
prevent toppling during transport. 


Otherwise machine parts may get damaged.


Summary of Contents for SE-M135

Page 1: ...pe Senior SE M135 Serial number Date 01 October 2011 Issue no SE 3 Englisch Version D It Noarderfjild 21 9051 BM STIENS NL Postbus 5 9050 AA STIENS NL Tel 31 0 58 257 15 55 Fax 31 0 58 257 35 35 info homburg holland com www homburg holland com ...

Page 2: ......

Page 3: ...hafts 5 5 Working with the machine 5 6 Transport behind the tractor 5 7 Transport not behind the tractor 5 8 Service Maintenance and Repair 5 9 Hydraulic system 5 10 Safety warnings stickers 5 11 Safety provisions 6 GENERAL DESCRIPTION OF THE MACHINE 6 1 Main components 6 2 Operation 7 TECHNICAL SPECIFICATIONS 7 1 Machine 7 2 Cardan shaft 7 3 Flushing water pump 7 4 Technical requirements tractor ...

Page 4: ...chine 10 4 2 Coupling the hydraulic quick connect couplings to the tractor 10 4 3 Connecting electrically and mounting the rear lighting beam 10 4 4 At the working location 10 4 5 Feeding the flushing hose into the drainpipe 10 4 6 Feeding out the flushing hose from the drainpipe reeling in 10 4 7 Preparing the machine for transport on public roads 10 4 8 Unhitching the machine from the tractor 10...

Page 5: ...or users and maintenance technicians of the Homburg Drain Cleaner type Senior Therefore we expressly recommend to completely read and understand this user manual before taking the machine into use Do you have questions about the machine In that case contact your superior the importer or the manufacturer as soon as possible You will find the icons below throughout this user manual They refer to inc...

Page 6: ...r manual are SI units All non SI units are placed in brackets The numbered operating instructions must be carried out in that numerical sequence Use and maintenance instructions as supplied by manufacturers of components such as water pump and cardan shaft have been supplied with this user manual Ask for them if you have not received them HOMBURG HOLLAND does not accept any liability for damage re...

Page 7: ...ne that is not described in this user manual If you contact us please make sure you have the following information at hand machine type serial number year of manufacture water pump type Always keep this user manual on the machine in its special storage compartment see fig 46A If the user manual is missing or damaged or if pages are missing a new copy must be ordered from the manufacturer at once ...

Page 8: ...manual Walterscheid cardan shafts supplied User manual Imovilli Pompe water pumps supplied Parts Book Imovilli Pompe water pumps supplied On the last page you will find a form that you can use to list your suggestions questions and remarks regarding this user manual If you think that this user manual needs modifications please let us now Copyright Homburg Machinehandel b v Nothing in this publicat...

Page 9: ...he machine is permitted The manufacturer is not liable for damage caused by use that is not described in this user manual If the machine does have to be used for a different purpose this requires the prior written permission from the manufacturer The guide arm must never be used as a hoist The machine must not be operated by people younger than 18 The Homburg Drain Cleaner type Senior or some cons...

Page 10: ...__________________________________________________________________ Johannes de Boer Managing Director _______________________________________________________User manual Homburg Drain Cleaner type Senior Copyright HOMBURG HOLLAND 9 CE Declaration of conformity visiting address mailing address HOMBURG HOLLAND HOMBURG HOLLAND It Noarderfjild 21 Postbus 5 9051 BM Stiens 9050 AA Stiens The Netherlands ...

Page 11: ...manufacturer Visiting address of the manufacturer Telephone number of the manufacturer Fax number of the manufacturer e mail address of the manufacturer Company logo Machine type reference Serial number of the machine Year of construction of the machine CE mark indicating that the machine satisfies the Machine Directive Patent number The machine serial number is also stamped on top of the machine ...

Page 12: ...OMBURG HOLLAND 11 On receipt of the machine fig 13 and the information below must completely be entered Pump Make Immovilli Type D135 Serial no ___________________ Cardan shaft Make Walterscheid Type W2100 SD05 660 10100 10100 Serial no ___________________ Delivery date Machine _____________________ Factory stamp ...

Page 13: ...sed by operating staff or maintenance staff older than 18 who have fully read and understood this user manual and who are familiar with the use of the machine In addition we recommend to follow a short course in operating and maintaining the machine which can be arranged by the manufacturer or a different company or importer recognised for that purpose by the manufacturer of the machine You as mac...

Page 14: ...people must keep out of the machine s operating range Always inspect the area where the machine is going to be used height width bearing capacity embankments shoulders floors bridges risk of explosion etc Wear adequate eye protection goggles The flushing water leaving the drainpipe under pressure may carry off small hard objects at high speed Always check the machine for loose bolts and nuts damag...

Page 15: ...st care must be taken when hitching or unhitching the machine When hitching or unhitching the machine the tractor operating lever must be placed in such a position that it cannot inadvertently be moved Make sure the machine link pin diameters match the hole diameters of the tractor three point WARNING In the area of the tractor three point the risk of getting caught and sustaining injury exists Lo...

Page 16: ...id of lock chains Select the correct rpm for the cardan shaft before switching it on Check that there are no people or animals near the machine before switching on the cardan shaft Switch off the cardan shaft when the angle with the machine or the tractor exceeds the value prescribed by the manufacturer WARNING When the cardan shaft has been switched of the driven pump may coast down a while Never...

Page 17: ...e tractor from the position intended for it Always ensure a good view of the work Always switch off the machine when you leave it and take the tractor ignition key with you WARNING In the area of the machine guide arm the risk of getting caught and sustaining injury exists When working from public roads always keep other road users in mind Switch on the flashing light or rotating light The maximum...

Page 18: ...intenance of the air filter or the crankcase ventilation system the machine and the tractor engine may get severely damaged due to a very high rpm If this happens the air intake of the tractor engine must be shut off as quickly as possible to stop the engine Emergency If the tractor with the machine has toppled the tractor engine must be shut off directly to prevent damage to the tractor engine an...

Page 19: ...ordance with the traffic regulations when using public roads Make sure the machine has been brought into transport position as prescribed by the manufacturer when using public roads with the tractor and machine It is not permitted to carry people animals or goods with the machine Be aware that the tractor handles differently with a hitched machine Check that the tractor front axle pressure is suff...

Page 20: ...behind the tractor Be aware of the total transport height flyovers etc Be aware of the total transport weight Never stand under a lifted machine Only use the special hoisting eyes when the machine has to be hoisted The location of the hoisting eyes is shown in fig 50 and fig 51 Only lift the machine at those places indicated with the sticker below ...

Page 21: ... The settings and accesses sealed by the manufacturer must not be broken A broken seal automatically voids the manufacturer s product liability Always use the tools spare parts materials lubricants and operating procedures prescribed by the manufacturer Never use defective tools Use tools only for their intended purpose Don t leave any tools in the machine after maintenance Make sure during mainte...

Page 22: ...nts cooling fluid and hydraulic oil Deposit used oil used grease and oil filters at the intended places in accordance with environmental regulations None of the substances on or in the machine are suitable for internal use Uncouple the battery or the electric connection to the tractor when working on the electric system of the machine Never remove lines hoses or valves of hot and or pressurised fl...

Page 23: ...l Homburg Drain Cleaner type Senior Copyright HOMBURG HOLLAND 22 The machine has a water pump equipped with a pressurised air filled accumulator Be very careful when working on this accumulator Work must only be carried out by specialised personnel with special tools ...

Page 24: ...achine to prevent incorrect connection of the quick connect couplings If the quick connect couplings have been connected incorrectly all hydraulic operating functions are reversed e g up becomes down Work on the hydraulic system must only be carried out by personnel with special training Regularly check the hoses Damaged and or defective hoses must be replaced at once When mounting new hoses these...

Page 25: ...kers fig 48 49 Warnings on the machine must be durable indelible and permanently present on the machine throughout the machine s service life If the warnings have been removed or have become illegible they must be replaced at once The meaning of all stickers has been described in the above text Below it is shown were all warnings should be on the machine ...

Page 26: ..._______________________________________________________User manual Homburg Drain Cleaner type Senior Copyright HOMBURG HOLLAND 25 ...

Page 27: ...umber Read the operating manual first art no 978443 Hydraulic operating symbols art no 13461 Hoisting point art no 978439 Three point suspension point art no 978446 Forklift pick up point art no 13410 Air accumulator present in machine art no 13411 Danger of getting caught art no 978434 No welding on the machine art no 13412 Remove tractor ignition key before carrying out maintenance art no 978436...

Page 28: ...rovisions A Stickers see fig 48 and 49 B Pressure gauge Indicates the flushing water pump pressure in bar see fig 18 and fig 50 pt 22 C Safety mesh in reel Prevents limbs from getting caught in the rotating reel see fig 50 pt 10 D Flushing water pressure controller Prevents the pressure from exceeding 3 5 MPa 35 bar see fig 05 and fig 50 pt 19 ...

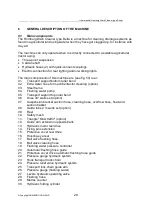
Page 29: ...haft or its protective sleeve see fig 51 pt 06 K User Manual see Preface and fig 51 pt 11 L Lighting beam for use on public roads Prevents traffic accidents see fig 50 pt 61 M Triangle slow traffic Prevents traffic accidents see fig 50 pt 11 N Protective cover chain drive flushing hose guide Prevents limbs from getting caught in the drive see fig 51 pt 21 0 Protective cover chain cross drive flush...

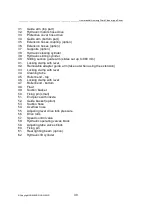
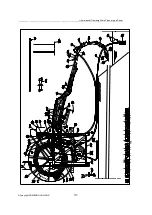
Page 30: ...hose for machine tractor cleaning option 03 Steel frame 04 Flushing water pump 05 Transport support top roller bend 06 Knee 30 wells set option 07 Suspension bracket suction hose cleaning hose overflow hose float and suction basket 08 Guide tube 2 m wells set option 09 Reel 10 Safety mesh 11 Triangle Slow traffic option 12 Guide arm extension opposite bank 13 Hydraulic motor reel drive 14 Fixing p...

Page 31: ...section guide arm slides out up to 880 mm 41 Locking clamp with lever 42 Removable adapter guide arm take out when using the extension 43 Locking clamp with lever 44 Cleaning tube 45 Roller bend top 46 Locking clamp with lever 47 Roller bend bottom 48 Float 49 Suction basket 50 Fixing pin small 51 End piece with nozzle 52 Guide basket option 53 Suction hose 54 Overflow hose 55 Adjusting lever driv...

Page 32: ..._______________________________________________________User manual Homburg Drain Cleaner type Senior Copyright HOMBURG HOLLAND 31 ...

Page 33: ...ree point suspension 05 Oil gauge glass filler cap flushing water pump 06 Cardan shaft support 07 Suspension point top link three point suspension 08 Protective cover drive automatic flushing hose guide 09 Protective cover drive automatic flushing hose guide 10 Chain tensioner 11 Storage compartment user manual 12 Water coupling 13 Hoisting eye front 14 Reel bearing 15 Safety mesh reel 16 Hydrauli...

Page 34: ..._______________________________________________________User manual Homburg Drain Cleaner type Senior Copyright HOMBURG HOLLAND 33 ...

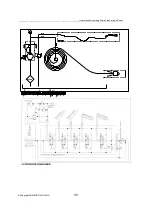
Page 35: ...manner that both during feeding in and feeding out the reel wants to roll up under slight pressure so the flushing hose always winds tightly around the reel See hydraulic diagram fig 53 The flushing hose guide of this machine is driven mechanically and it ensures that the flushing hose winds evenly on the reel The bottom roller bend can be turned to enable cleaning drainpipes in the own bank as we...

Page 36: ..._______________________________________________________User manual Homburg Drain Cleaner type Senior Copyright HOMBURG HOLLAND 35 ...

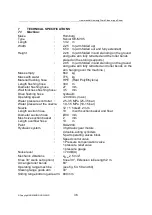
Page 37: ...ing hose 300 m Diameter flushing hose 27 mm Wall thickness flushing hose 3 5 mm Drive flushing hose hydraulic Operating speed 20m min max Water pressure controller 2 5 3 5 MPa 25 35 bar Water pressure at the nozzle 1 0 1 5 MPa 10 15 bar Nozzle 12 1 hole Ø 2 mm Length suction hose 10 m with suction basket and float Diameter suction hose Ø30 mm Mesh size suction basket 2 mm Length overflow hose 10 m...

Page 38: ..._______________________________________________________User manual Homburg Drain Cleaner type Senior Copyright HOMBURG HOLLAND 37 ...

Page 39: ..._______________________________________________________User manual Homburg Drain Cleaner type Senior Copyright HOMBURG HOLLAND 38 ...

Page 40: ..._______________________________________________________User manual Homburg Drain Cleaner type Senior Copyright HOMBURG HOLLAND 39 ...

Page 41: ...0 bar nominal Pressure accumulator 0 7 MPa 7 bar Speed 350 550 rpm Input power 13 3 kW 18hp Mass 27 5 kg Lubricating oil 1 85 litres SAE20 30 Maximum head 3 m 7 4 Technical requirements tractor Tractor must be fitted with three point suspension Category 2 in accordance with DIN9674 and ISO730 sufficient counterweight pto connection 350 550 rpm 1 3 8 6 splines according to DIN9611 and ISO500 hydrau...

Page 42: ...o 90 Indoors as well as outdoors environment without dust and or gas explosion risk 7 6 Conversion table SI units ANSI units ANSI units SI units 1 kg 2 2046 lbs 1 lb 0 453592 kg 1 m 3 28 ft 1 ft 0 3048 m 1 mm 0 03937 in 1 in 25 4 mm 1 km 0 62 mile 1 mile 1 609 km 1 litre 0 264 gallon US 1 gallon US 3 785 litres 1 MPa 10 bar 145 psi 145 lbs 1 psi 1 lbs 0 068966 MPa 0 0689 bar 1 kW 1 36 hp 1 hp 0 73...

Page 43: ...fig 51 pt 13 Make sure the reel is not pressed in by slings or hoisting cables when hoisting it That can be achieved by using an equator WARNING Only hoist the machine on the hoisting eyes A forklift may only pick up the machine under the lower horizontal beams of the basic frame Prevent toppling when transporting by forklift The machine may only be fastened on the beams of the basic frame using l...

Page 44: ..._______________________________________________________User manual Homburg Drain Cleaner type Senior Copyright HOMBURG HOLLAND 43 9 CONTROLS ...

Page 45: ... arm up Pull the lever forward move the arm down C Hydraulic operating lever folding in out bottom section guide arm goes to central position under spring pressure Push the lever back to fold out the arm Pull the lever forward to fold in the arm D Hydraulic operating lever slewing left right guide arm goes to central position under spring pressure Pull the lever back to slew the arm clockwise Push...

Page 46: ...ng hose some 50 m into the drainpipe 3 Close speed control valve F 4 Feed the flushing hose out of the drainpipe at 30 m min using the pressure compensation valve G Read from the metres counter how many metres a minute are being fed out 5 Now the pressure compensation valve has been adjusted for the tractor that is currently driving the machine This must be done once for every tractor so don t tou...

Page 47: ..._User manual Homburg Drain Cleaner type Senior Copyright HOMBURG HOLLAND 46 J Pressure gauge flushing water Used to read out the water pump pressure K Pressure gauge hydraulic system Used to read out the operating pressure in the machine s hydraulic system ...

Page 48: ... pt 25 Used to lock the guide arm in transport position Metres counter see fig 23B Displays the length of the flushing hose that has been fed out can be reset with lever C Cleaning tube see fig 50 pt 44 Can be used to clean the flushing hose on reeling in Increase the tractor rpm a little to get a higher bypass flow rate for cleaning Fixing pin see fig 50 pt 60 This can be used to fix the roller b...

Page 49: ... through the drain pipe Locking clamp see fig 50 pt 41 43 and 46 A locking clamp has been welded on the base frame on every roller bend on the wells set and on the end of the guide arm Rpm counter pto on tractor Displays the water pump rpm of the machine Manual throttle on tractor Used to set the water pump rpm of the machine Ball valve cleaning hose see fig 50 pt 17 Open this valve to use the cle...

Page 50: ..._______________________________________________________User manual Homburg Drain Cleaner type Senior Copyright HOMBURG HOLLAND 49 ...

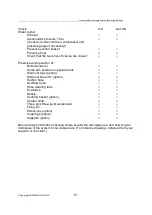
Page 51: ..._______________________ Time start check ___________________________ _____________________________________________________________________ Check OK Not OK General damage and leakage machine Presence and operations safety provisions Stickers Pressure gauge Pressure gauge hydraulic system Casing drive flushing hose guide Safety mesh in reel Water pressure controller Protective cover reel drive Prote...

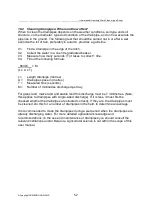
Page 52: ...ff valves are closed Presence and operation of Roller bends 2 Guide arm extension opposite bank Wells set pipe option Wells set knee 30 option Suction hose Overflow hose Hose cleaning tube End piece Nozzle Centring basket option Cardan shaft Three pins three point suspension Fixing pin Extensions option Couplings option Supports option Be sure to get information showing where exactly the drainpipe...

Page 53: ...04 Fill out the following formula _86400__ M L x A x T L Length drainpipe metres A Drainpipe space in metres T Measured time seconds M Number of millimetres discharged per day For grass land maize land and arable land this discharge must be 7 millimetres Note this applies to drainpipes with single sided discharge If it is less it must first be checked whether the drainpipes are situated correctly ...

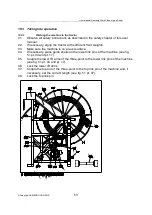
Page 54: ...essary equip the tractor with sufficient front weights 03 Make sure the machine is on a level surface 04 If necessary place guide shells on the lower link pins of the machine see fig 51 pt 04 and pt 17 05 Couple the lower lift arms of the three point to the lower link pins of the machine see fig 51 pt 04 and pt 17 06 Lock the lower lift arms 07 Couple the top rod of the three point to the top link...

Page 55: ...ing the cardan shaft also refer to the instructions that came with the cardan shaft WARNING Apply the tractor parking break switch off the tractor engine and take the tractor ignition key from the lock 01 Slide the cardan shaft over the water pump shaft holding the thinnest side of the protective sleeve down 02 Check that the spring tensioned catch of the cardan shaft sits in the recess of the pum...

Page 56: ...move the synthetic and steel sawdust and filings 11 Coat the sliding splines with lubricating grease 12 Slide the two cardan shaft sections and the protective sleeve back together Be sure to slide the sections together in their original orientation 13 Other modifications to the cardan shaft are not permitted WARNING Make sure that the two cardan shaft sections are at least half the total sliding l...

Page 57: ...m the lock 01 Slide the cardan shaft over the water pump shaft holding the thinnest side of the protective sleeve down 02 Check that the spring tensioned catch of the cardan shaft sits in the recess of the pump shaft 03 Slide the cardan shaft fully in 04 Slide the cardan shaft over the pto while holding the thickest side of the protective sleeve upward 05 Check that the spring tensioned catch of t...

Page 58: ...ff the hydraulic control valve of the tractor then move the three control levers of the machine back and forth a number of times before connecting or disconnecting the hydraulic quick connect couplings of the machine to from the tractor CAREFUL Take measures to prevent environmental pollution due to spilling hydraulic oil 01 Check that all hydraulic levers of the machine are in central position se...

Page 59: ...r manual Homburg Drain Cleaner type Senior Copyright HOMBURG HOLLAND 58 02 Connect the hydraulic quick connect coupling for the return blue to return see fig 51 pt 6 03 Connect the hydraulic quick connect coupling for the supply red to supply see fig 51 pt 16 ...

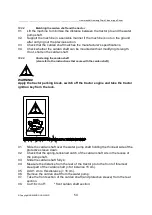
Page 60: ...e lighting beam from the tractor outlet if mounted 04 Lift the machine some 10 cm off the ground 05 Place the machine at a suitable distance from the drainpipe to be cleaned 06 Apply the tractor parking brake 07 Connect the transparent suction hose to the pump suction side and fix it NOTE Know the maximum pump head If it is too high the pump will not suck in any water 08 Put the suction basket on ...

Page 61: ..._______________________________________________________User manual Homburg Drain Cleaner type Senior Copyright HOMBURG HOLLAND 60 13 Remove the transport lock pin fig 50 pt 25 from the guide arm ...

Page 62: ..._______________________________________________________User manual Homburg Drain Cleaner type Senior Copyright HOMBURG HOLLAND 61 ...

Page 63: ...simultaneously with the other operating levers 14 Switch on the hydraulic control valve of the tractor 15 Fold out the bottom guide arm section by pulling the hydraulic operating lever fig 56 pt C back 16 Fold out the top guide arm section by pulling the hydraulic operating lever fig 56 pt B back 17 Repeat items 15 and 16 until the entire guide arm is fully stretched out horizontally ...

Page 64: ...g extension tubes couplings and supports see fig 50 pt 35 36 and 37 19 Put the overflow hose fig 50 pt 54 on the cleaning tube only if the top roller bend is placed 20 Attach the bottom roller bend to the top roller bend and fasten it only if the top roller bend is placed 21 Extend the guide arm using the hydraulic operating lever fig 56 E The guide arm can hydraulically be extended by a maximum o...

Page 65: ...re using the adjusting lever fig 50 pt 55 Do not set the clamping pressure too high 28 Mount the end piece with guide basket and nozzle if necessary Note Do not mount these until the hose or the extension has been fed through both roller bends 29 Fix the roller bend using the supplied fixing pin fig 50 when the roller bend has been positioned in front of the drainpipe That will prevent the roller ...

Page 66: ...ontrol valve fig 56F fully open 33 Push the lever on the left fig 56A forward 34 Turn the speed control valve fig 56F slowly clockwise never shut it Feed the flushing hose up to 2 metres into the drainpipe 35 Put the lever on the left fig 56A in its central position 36 Set the metres counter fig 58C to zero 37 Slowly take all tension off the water pressure controller fig 50 pt 19 by taking loose t...

Page 67: ...rdan shaft speed About 400 rpm tractor 40 Wait until all air has disappeared from the transparent suction hose If the air does not disappear the pump does not suck properly or the suction hose leaks or the head is too high Note The pump must not run dry for longer than 5 min to prevent damage to the pump 41 Close the hook clamp fig 05A of the water pressure controller at the highest position 42 Ch...

Page 68: ...ig 56A forward 03 Slowly turn the top speed control valve fig 56F clockwise never shut it That controls the feeding in speed of the flushing hose into the drainpipe 04 Make sure the drive wheels do not slip on the hose That could damage the hose If the drive wheels are slipping the resistance is too high or the pressure of the rolls on the flushing hose is too low 05 Set a feeding in speed of abou...

Page 69: ...ls For that reason a pressure relief valve see fig 50 pt 24 has been included in the hydraulic system which has been factory set at the correct pressure and must not be adjusted 08 Turn the speed control valve fig 56F fully open counterclockwise when the nozzle approaches the end of the drainpipe That stops feeding in the flushing hose 09 Directly put the water pressure controller open at the mome...

Page 70: ..._______________________________________________________User manual Homburg Drain Cleaner type Senior Copyright HOMBURG HOLLAND 69 ...

Page 71: ...er pressure must never exceed 5MPa 50 bar 01 Slide the end of the overflow hose over the upturned end of the cleaning tube fig 50 pt 54 and 44 02 Set the cardan shaft speed to keep a pressure on the pressure gauge of no more than 3 5 MPa 35 bar while water flows out of the cleaning tube fig 50 pt 44 03 Turn the speed control valve fig 56F fully open counterclockwise 04 Pull the lever on the left f...

Page 72: ...r on the left fig 56A backward 13 Slowly turn the top speed control valve fig 56F clockwise That way the flushing hose can completely be removed from the drainpipe 14 Slowly open the top speed control valve fig 56F counterclockwise when the flushing hose has been retracted far enough between the rubber wheels 15 Put the lever on the left fig 56A in its central position 16 Pull the roller bend fixi...

Page 73: ... fig 56E 05 Remove the lower roller bend put it on the roller bend transport support and lock it 06 Remove the top roller bend put it on the roller bend transport support and lock it 07 Remove the guide arm extension fig 50 pt 12 from the guide arm and put it on the extension transport support only if the roller bends have not been used WARNING When folding in the guide arm there is a risk that li...

Page 74: ...ide in and lock it with the wing bolt WARNING First switch off the hydraulic control valve of the tractor then move the five control levers of the machine back and forth a number of times before connecting or disconnecting the hydraulic quick connect couplings of the machine to from the tractor CAREFUL Take measures to prevent environmental pollution due to spilling hydraulic oil 14 Check that all...

Page 75: ...overflow hose and hang it on the machine 19 Mount the lighting beam on the machine 20 Insert the machine plug into the tractor outlet 21 Check the correct operation of the lighting beam 22 Lift the machine into transport position lifted some 25 cm off the ground 23 Switch off the working lights of the machine or tractor if they are on 24 Check that the rotating light or flashing light if mounted f...

Page 76: ... the machine back and forth a number of times before connecting or disconnecting the hydraulic quick connect couplings of the machine to from the tractor CAREFUL Take measures to prevent environmental pollution due to spilling hydraulic oil 03 Check that all hydraulic levers of the machine are in central position 04 Disconnect the hydraulic quick connect coupling for the supply red 05 Disconnect t...

Page 77: ..._____________________User manual Homburg Drain Cleaner type Senior Copyright HOMBURG HOLLAND 76 09 Uncouple the lower lift arms of the three point suspension fig 51 pt 04 and 17 10 If applicable remove the front weights from the tractor ...

Page 78: ...itre bucket with a mixture of water and anti freeze with protection up to 25 C 05 Close both valves of the flushing water pump 06 Put the end of the suction hose the end of the overflow hose and the water supply hose of the reel fig 58A in the bucket 07 Switch on the cardan shaft and let the flushing water pump take up the anti freeze mixture to prevent frost damage and internal corrosion of the p...

Page 79: ...m the tractor 11 Always protect the black flushing hose from intense sunlight particularly in summer or in tropical areas That will increase the service life of the flushing hose 12 Fill the two reel bearing grease nipples fig 58C with grease and grease the central reel coupling fig 58A 13 Carry out the activities as prescribed in the maintenance schedule ...

Page 80: ...tenance must only be carried out by trained and appointed personnel that does not use alcohol medicines or drugs None of the substances on or in the machine are suitable for internal use Make sure during maintenance that no oil or grease is spilled on the flushing hose or the drive wheels and the pressure rolls That will cause slip when feeding in or out The settings and accesses sealed by the man...

Page 81: ...e a protective casing of a running machine If the machine is used under special operating conditions for instance 24 hours a day 7 days a week with very dirty flushing water a modified maintenance schedule must be observed Consult your supplier in that case 11 2 Paint damage Paint damage through mechanical causes or corrosion must be repaired as follows 01 Sand the location in question to the plai...

Page 82: ... used the water temperature must not exceed 40 C Do not use detergent for that will cause the flushing hose drive wheels to slip 11 4 Changing oil flushing water pump This must be done annually Be sure there is no air left in the cylinder head after changing the oil of the flushing water pump The air can be removed by tilting the pump forward and simultaneously rotating the shaft That way the air ...

Page 83: ...uide arm F H and L Lubricate 4 Grease Mollub Alloy 777 1 Cardan shaft Grease Check protective sleeve 3 Grease Mollub Alloy 777 1 Tractor pto Lubricate 1 Grease Mollub Alloy 777 1 Water pump shaft Lubricate 1 Grease Mollub Alloy 777 1 Water pump N Check top up 1 85 litres Engine oil SAE30 40 Change after 1000 hours Suction basket Clean Check 1 Using a brush Nylon rollers Lubricate 20 Engine oil 5W3...

Page 84: ...____________________________User manual Homburg Drain Cleaner type Senior Copyright HOMBURG HOLLAND 83 Water system Check 1 Check for leakage Accumulator Check 1 0 7MPa 7 bar Pressure roll tightener M Lubricate 1 Engine oil 5W30 ...

Page 85: ..._______________________________________________________User manual Homburg Drain Cleaner type Senior Copyright HOMBURG HOLLAND 84 ...

Page 86: ...now what your nearest address is for minor and major maintenance and repairs ordering parts and getting technical advice you can ask the manufacturer for the telephone number of the current importer in your country Then this importer can refer you to the dealer or service provider nearest to you You can also get information from the dealer where you bought the machine ...

Page 87: ... Suction basket is fouled Suction basket connection defective Pump valves do not close properly Pressure in accumulator incorrect Submerge suction basket Clean suction basket Repair connection Repair pump Change accumulator pressure Maximum flushing pressure is not reached Pump valves do not close properly Suction basket is fouled Leakage water pressure controller Nozzle worn Repair pump Clean suc...

Page 88: ..._______________________________________________________User manual Homburg Drain Cleaner type Senior Copyright HOMBURG HOLLAND 87 ...

Page 89: ...he lever on the left fig 56A in its central position 02 Carefully take the tension open off the hook clamp fig 05A of the water pressure controller 03 Switch off the cardan shaft tractor 04 Switch off the hydraulic control valve of the tractor 05 Switch off the tractor engine 06 Uncouple the cardan shaft from the tractor and from the pump ...

Page 90: ...ith diesel or petrol to prevent corrosion of the pump 08 Check the diaphragms 09 Replace the defective diaphragm Important Be sure there is no air left in the cylinder head after changing the diaphragms The air can be removed by tilting the pump forward and simultaneously rotating the shaft That way the air between the piston and the diaphragms will disappear ...

Page 91: ...spose of these in an environmentally sound manner as prescribed by the local authorities Accumulator in the water pump The gas pressure in the accumulator is high Only specialised personnel with specialised equipment are allowed to be depressurise the accumulator Flushing hose The flushing hose is made of HPE Hard PolyEthylene synthetic Send the flushing hose float guide rolls suction hose cleanin...

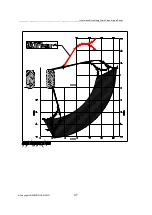
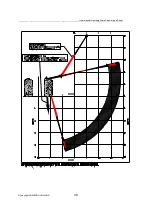
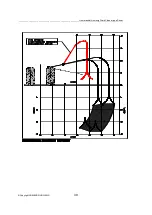
Page 92: ...t three point suspension 17 Sticker Trademark and company logo 18 Flushing water pressure gauge 23 Metres counter 45 Rear side general Senior 46 Storage space User Manual 47 Location identification plate and serial number 48 Location stickers rear 49 Location stickers front 50 Main components rear Senior 51 Main components front Senior 52 Water diagram 53 Hydraulic diagram 54 Operating range machi...

Page 93: ..._______________________________________________________User manual Homburg Drain Cleaner type Senior Copyright HOMBURG HOLLAND 92 15 SUBJECT INDEX ...

Page 94: ...e tube 30 handling characteristics 19 heat development 35 height 20 37 high pressure cleaner 82 hoisting eye 20 33 hoisting point 27 80 hook clamp 67 hose guide 30 hoses 24 HPE 37 hydraulic control valve 89 hydraulic system 24 35 icons 4 identification plate 10 Imovilli Pompe 7 41 importer 86 information 86 intense sunlight 79 internal use 80 knee 30 30 leakage 51 length modification 55 length 37 ...

Page 95: ...63 65 73 sticker 25 28 51 storage compartment 6 suction basket 31 37 72 75 78 suction basket 60 suction hose 31 67 72 75 78 suspension bracket 30 swivel lock pin 31 49 73 synthetic 91 technical advice 86 technical service life 91 three point suspension 14 three point suspension 14 three point suspension 41 54 77 thunderstorm threat 18 tools 21 top rod 54 77 tractor 12 72 74 77 89 traffic regulatio...

Page 96: ...low Is this publication complete yes no set up correctly yes no clear yes no well illustrated yes no Please circle where applicable Does this user manual satisfy your wishes How can this user manual be improved in your opinion Please describe clearly what you mean and give examples Fill in your particulars below Name Position Company name Address Please fill in this form completely and send it by ...

Page 97: ......

Page 98: ...L O PE R ATO R S M AN U AL 1 3451 G B O PE R ATO R S M AN U AL 1 3453 F O PE R ATO R S M AN U AL 1 3452 D 1 3492 42021 45045 40841 1 3231 40062 1 4230 1 3491 42021 1 3006 40064 4091 0 40841 4091 0 1 3001 4501 1 1 4232 1 4231 40981 4091 6 401 67 4091 6 40846 4091 2 40842 ...

Page 99: ......

Page 100: ......

Page 101: ......

Page 102: ......

Page 103: ......

Page 104: ......

Page 105: ......

Page 106: ......

Page 107: ......

Page 108: ......

Page 109: ...BLAD 1 0A Senior m aart 2002 46041 46006 65000 1 431 7 1 431 6 1 3276 65000 65001 62522 65001 62522 40041 40909 40841 65000 1 431 5 65000 1 431 6 1 31 06 65000 65000 1 3938 0 6 691 04 691 04 0 6 ...

Page 110: ...62522 65000 1 431 9 1 431 8 1 3631 1 4341 631 1 3 63053 6321 0 631 1 3 6321 0 1 4320 1 4321 1 4325 1 4322 1 4324 1 4323 1 31 08 631 1 3 1 3752 6321 0 6321 0 63053 1 3752 631 1 3 63053 6321 0 6321 0 1 4304 65001 1 4342 631 76 63566 1 5 ...

Page 111: ...2 1 1 021 37 B1 0241 05 B1 01 3004 B0400952 B1 028004 1 2302 B1 024508 B1 009205 B1 028005 B1 01 3005 B1 028005 B0400953 62505 H ASPE L PO M P 62505 B1 009205 62505 1 4329 1 3709 B1 009205 1 3542 1 3707 62505 N 2025051 B1 028004 1 2301 ...

Page 112: ......

Page 113: ......

Page 114: ......

Page 115: ......

Page 116: ......

Page 117: ......

Page 118: ......

Page 119: ......

Page 120: ......

Reviews: