background image

~ 12 ~ 

EXERCISING INSTRUCTIONS 

Before starting..  

Exercise has been proven essential for good health and general wellbeing. Regular exercise will:  

  Relieve tension and stress  

  Provide enjoyment and fun  

  Stimulate the mind  

  Help maintain stable weight 

  Control appetite  

  Boost self-image  

  Improve muscle tone and strength  

  Improve flexibility 

  Lower blood pressure  

  Relieve insomnia 


A good exercise program consists of a warm-up, aerobic exercise, and a cool down.  Do the entire 
program at least two to three times a week, resting for a day between workouts.  


1.  WARM UP PHASE 

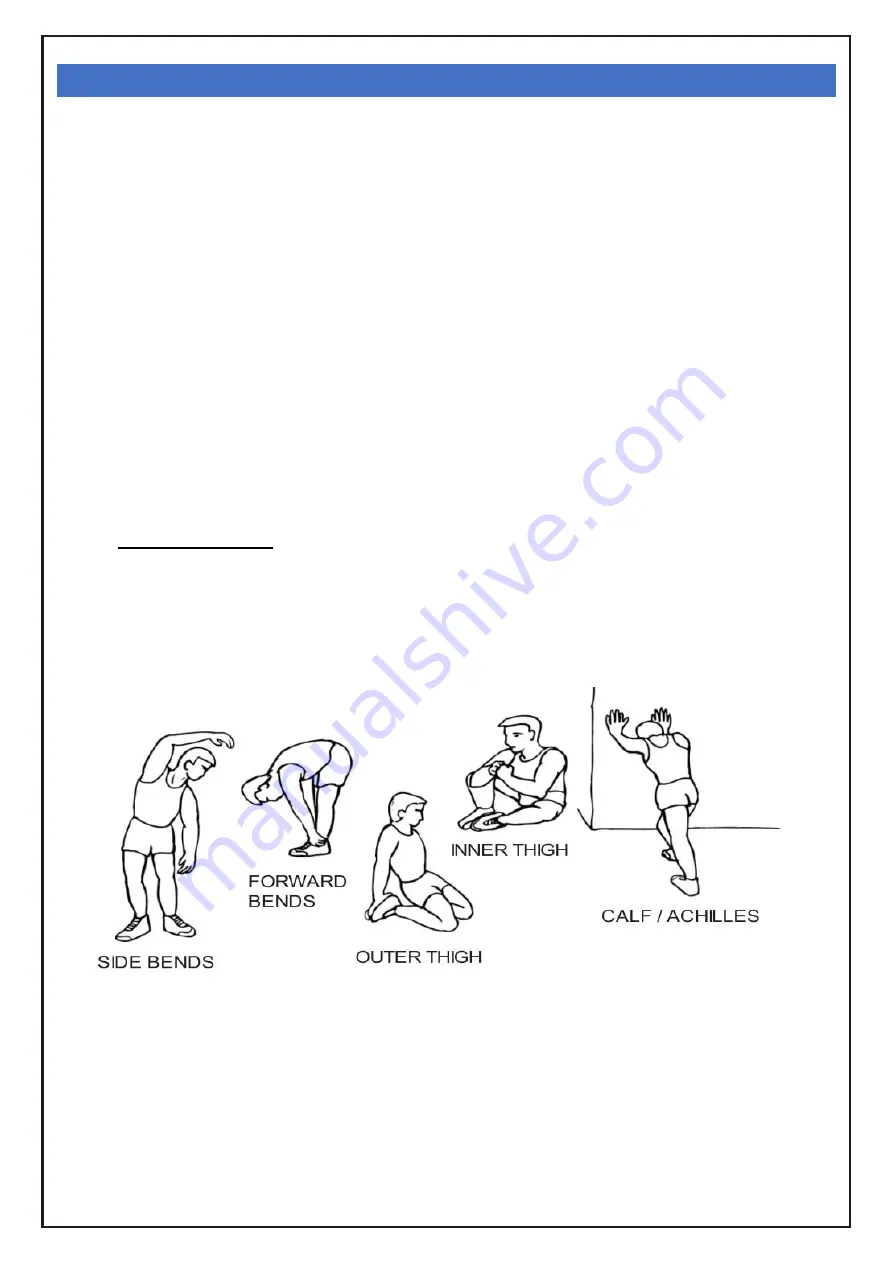
The WARM-UP is an important part of any workout. It should begin every session to prepare your 
body for more strenuous exercise by heating up and stretching your muscles, increasing your 
circulation and pulse rate, and delivering more oxygen to your muscles.  Each stretch should be 
held for approximately 30 seconds, do not force, or jerk your muscles into a stretch - - if it hurts, 
STOP!   See below. 


Summary of Contents for A90-196

Page 1: ...EXERCISE BIKE ASSEMBLY INSTRUCTION INada084V01_UK A90 196 READ AND SAVAE THIS INSTRUCTION FOR FUTURE USE...

Page 2: ...0 EXERCISING INSTRUCTIONS 12 CARE AND MAINTENANCE 14 EXPLODED PARTS DIAGRAM 15 PARTS LIST 16 Important Please read and understand these instructions before assembly or using These instructions contain...

Page 3: ...responsibility of the owner to ensure that all users of this product are appropriately advised to the safe operation of this product This product is intended for domestic use only Do not use in any c...

Page 4: ...dispose of batteries in a fire Do not dispose of batteries with normal household waste take to a local recycling centre Warning Before beginning any exercise program consult your Doctor This is especi...

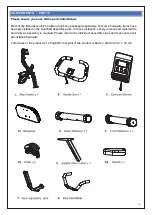
Page 5: ...hardware items have been preinstalled in the identified assembly parts In these instances simply remove and reinstall the hardware as assembly is required Please refer to the individual assembly step...

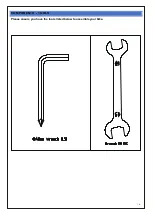
Page 6: ...4 COMPONENTS TOOLS Please ensure you have the tools listed below to assemble your bike...

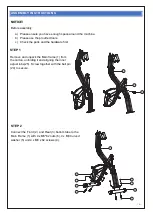
Page 7: ...c Check the parts and the hardware first STEP 1 Remove and unpack the Main frame 1 from the carton unfolding it and aligning the inner adjust tube 25 Screw together with the ball pin 24 to secure STE...

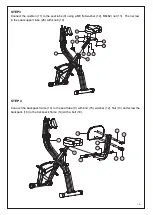
Page 8: ...ing a M8 flat washer 12 M8x62 nut 13 Then screw in the seat support tube 26 with knob 10 STEP 4 Connect the backpack frame 14 to the seat tube 9 with bolt 15 washer 12 Nut 13 and screw the backpack 18...

Page 9: ...ote The left pedal 8 should be locked clockwise and he right pedal 7 should be locked counter clockwise Always keep the pedals in a locked state during exercise Failure to do so will cause the threads...

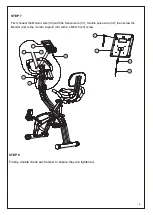
Page 10: ...connect the Monitor wire 30 with the Sensor wire 31 Handle pulse wire 32 then screw the Monitor 22 to the monitor support 33 with 2 x M5x10 23 screw STEP 8 Finally double check each screw to ensure th...

Page 11: ...utward At the same time adjust the Front frame to your preferred position Release and fix the Bike Angle Adjustment Knob 28 There are 3 positions for workouts and 1 position for storage SEAT HEIGHT AD...

Page 12: ...lay and press SET button to set time duration When the SET button is zero the computer will sound an alarm for 10 seconds CALORIES Counts the total calories burnt during the exercise Press the MODE bu...

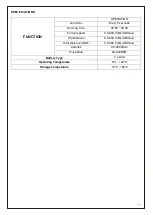
Page 13: ...Running Time 00 00 99 59 Current speed 0 0 999 9 ML KM hour Trip Distance 0 0 999 9 ML KM hour Total Distance ODO 0 0 999 9 ML KM hour Calories 0 0 9999Kcal Pulse Rate 40 240BPM Battery Type 2 x AAA O...

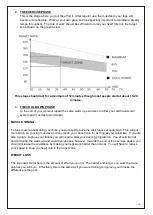
Page 14: ...d exercise program consists of a warm up aerobic exercise and a cool down Do the entire program at least two to three times a week resting for a day between workouts 1 WARM UP PHASE The WARM UP is an...

Page 15: ...To tone muscle whilst using your bike you will need to have the resistance set quite high This will put more strain on your leg muscles and may mean you cannot train for as long as you would like If y...

Page 16: ...usceptible to wear 5 The equipment can be cleaned using a soft damp cloth and mild non abrasive detergent DO NOT use solvents 6 DO NOT attempt to repair this equipment yourself Should you have any dif...

Page 17: ...15 EXPLODED PARTS DIAGRAM...

Page 18: ...16 PARTS LIST...

Page 19: ......

Reviews: