Christmas Tree
Model# TP40P4598C00
Sku #1004 327 527
Safety Information
IMPORTANT SAFETY
INSTRUCTIONS
a.
READ AND FOLLOW ALL
SAFETY INSTRUCTIONS.
b. This product is for indoor and outdoor use. The electrical rating
is
0.51 A, 120 V, 60 Hz.
c. This seasonal product is not intended for permanent installation or use.
d. Do not mount or place the product near gas or electric heaters,
fireplaces, candles, or other similar sources of heat.
e. Do not secure the wiring of the product with staples or nails, or place
on sharp hooks or nails.
f. Do not let lamps rest on any wire.
g. Unplug the product when leaving the house, when retiring for the
night, or if left unattended.
h. This is an electric product and not a toy! To avoid risk of fire, burns,
personal injury and electric shock it should not be played with or
placed where small children can reach it.
i. Do not use this product for other than its intended use.
j. Do not hang ornaments or other objects from wire, or light string.
k. Do not close doors or windows on the product as this may damage the
wire insulation.
l. Do not cover the product with cloth, paper, or any material that is not a
part of the product when in use.
m. Read and follow all instructions that are on the product or provided
with the product.
n.
SAVE THESE INSTRUCTIONS
Assembly
When using electrical products, basic precautions should always
be followed, including the following:
Step 1. Choose a location near a wall outlet.
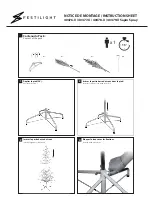
Step 2. Insert tree bottom (C) into the weighted pot (D).
Step 3. Insert tree center (B) into the trunk of the tree bottom (C).
Step 4. Insert the tree top(A) into the trunk of the tree center (B).
Step 5. Shape the branches. Shift branches to fill any gaps, lightly
all branch tips for a uniform look. Your tree is now
ready to decorate.
Step 6. Shape the tree from the bottom to the top. Start with the
branches farthest from the pole – fan out in a star shape,
and continue until the entire tree is shaped.
Step 7. Insert green label plug into the wall outlet.
Assembling the tree
Tree top
Section 2
Section 1
Insert
Green Label
Plug Into Wall
Outlet
Assemble
Red Labels
Together
Assemble
Yellow Labels
Together
Package Contents
Pre-Assembly
Part Description
C
Tree center, Sticker 1
A Tree top
B
Tree center, Sticker 2
D Tree pot
Quantity
1
1
1
1
Top view
Side view
TM
Operation
Turning on the tree
NOTE: If some bulbs do not light or flicker, search for any
loose plugs and/or broken, loose, or missing bulbs. Replace
bulbs promptly with the replacement bulbs provided in
order to maintain the performance and life expectancy of
your tree.
Connect the light strings of the tree together and plug the
power cord into a wall outlet.
NEED HELP?
DO NOT RETURN TO STORE. Call: 1-877-527-0313
Form 8am to 5pm EST, Monday through Friday.


