background image

13

HOMEDEPOT.COM/HOMEDECORATORS

Please contact 1-800-986-3460 for further assistance.

Assembly - Attaching the Light (continued)

Attaching the light kit fitter assembly

2


Remove one screw (LL) from the light kit pan (H), and loosen, 
but do not remove the other two screws.


Connect the wires from the light kit fitter assembly (I) to the 
wires from the fan motor assembly (E) by connecting the 
molded adaptor plugs together. Carefully tuck all wires and 
splices into the switch cup.


Push the light kit fitter assembly (I) up to the light kit pan (H) so 
that the two loosened screw heads fit into the keyholes slots. 
Turn the light kit fitter assembly (I) clockwise to secure. 


Re-install the screw (LL) that was removed in step 1.


Make sure all the screws are firmly tightened.

CAUTION:

  To reduce the risk of electric shock, disconnect 

the electrical supply circuit to the fan before installing the 

light fixture.

Installing the LED bulbs and 
glass shade

3        


With power off, install the two light bulbs, (included) (L) by 
screwing them into the light bulb sockets.


Remove the washer (EE), the nut (UU), the bottom cover (XX)  
and the finial (YY) from the threaded nipple of the light kit 
fitter assembly (I).


Position the glass shade (J), re-install the washer (EE), the 
nut (UU), the bottom cover (XX) and the finial (YY) over the 
threaded nipple, and tighten the finial securely.

CAUTION:

  Make sure the power is off before attaching or 

removing the glass shade.

WARNING:

 Allow the glass shade to cool completely before 

removing.

I

LL

H

CAUTION:

  Do not over tighten the hex nut. Overtightening 

the hex nut may cause the glass shade to break.

XX

EE

YY

L

UU

I

Summary of Contents for 52117

Page 1: ...nk in the Product Overview section Questions problems missing parts Before returning to the store call Home Decorators Collection Customer Service 8 a m 7 p m EST Monday Friday 9 a m 6 p m EST Saturday 1 800 986 3460 HOMEDEPOT COM HOMEDECORATORS THANK YOU We appreciate the trust and confidence you have placed in Home Decorators Collection through the purchase of this ceiling fan We strive to conti...

Page 2: ...l wiring knowledge or experience contact a licensed electrician WARNING Electrical diagrams are for reference only Optional use of any light kit shall be UL listed and marked suitable for use with this fan WARNING To reduce the risk of fire or electric shock this fan should only be used with fan speed control part no AP 3RDL manufactured by DAWNSUN ELECTRONIC TECHNOLOGY CO LTD ZHONGSHAN Safety Inf...

Page 3: ...your responsibility Damage to any part such as by accident misuse improper installation or by affixing any accessories is not covered by this warranty Because of varying climatic conditions this warranty does not cover any changes in brass finish including rusting pitting corroding tarnishing or peeling Brass finishes of this type give their longest useful life when protected from varying weather ...

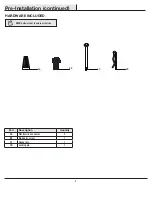
Page 4: ...Part Description Quantity AA Plastic wire connector 3 BB Blade arm screw 1 CC Hanger pin 1 DD Locking pin 1 Pre Installation continued HARDWARE INCLUDED NOTE Hardware not shown to actual size AA BB CC DD ...

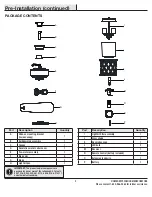
Page 5: ... H Light kit pan 1 Part Description Quantity I Light kit fitter assembly 1 J Glass shade 1 K Decorative cage 1 L LED bulb 2 M Receiver 1 N Remote control battery included 1 O Extension lead wire 1 P Battery 1 IMPORTANT This product and or components are governed by one or more of the following U S Patents 5 947 436 5 988 580 6 010 110 6 046 416 6 210 117 and other patents pending Pre Installation ...

Page 6: ...Use the appropriate fasteners and materials The outlet box and its bracing must be able to fully support the weight of the moving fan at least 35 lbs Do not use a plastic outlet box The illustrations below show three different ways to mount the outlet box If the canopy C touches the ball downrod assembly B then remove the decorative canopy bottom cover and turn the canopy C 180 before attaching th...

Page 7: ...move the setscrews OO on the collar on top of the fan motor assembly E Align the holes at the bottom of the ball downrod assembly B with the holes in the collar on top of the fan motor assembly E Carefully insert the hanger pin CC through the holes in the collar and ball downrod assembly B Be careful not to jam the hanger pin CC against the wiring inside the ball downrod assembly B Insert the lock...

Page 8: ... outlet box Securely tighten the two mounting screws JJ Carefully lift the fan motor assembly E up to the slide on mounting bracket A Seat the hanger ball portion of the ball downrod assembly B in the mounting bracket socket Ensure that the tab on the slide on mounting bracket A socket is properly seated in the groove in the hanger ball 1 2 WARNING To reduce the risk of fire electric shock or othe...

Page 9: ... included Replace the battery cover on the remote control N Insert the silicone rubber stopper PP into the hole on the receiver M to cover the dip switches NOTE The battery will weaken with age and should be replaced before leaking takes place as this will damage the hand unit Dispose of used battery properly and keep the battery out of the reach of children 4 Installing the receiver Position the ...

Page 10: ...e connecting nut AA Connect the receiver M white wire to the household white wire neutral using a wire connecting nut AA Secure each wire connecting nut using electrical tape WARNING To avoid possible electrical shock turn the electricity off at the main fuse box before wiring If you feel you do not have enough electrical wiring knowledge or experience contact a licensed electrician Wiring the fan...

Page 11: ...GG engage to the key slots Firmly tighten the two mounting screws GG Align the oval shape on the canopy C with canopy bottom cover II Push up the canopy bottom cover II until the screw GG heads engage to the slots on the canopy bottom cover II so that the magnetic canopy bottom cover II can be attached to the bottom of the canopy C properly 7 WARNING When using the standard ball downrod mounting t...

Page 12: ...echanism SS Make sure steel locking mechanism SS at the rear of the blade arm springs upward and butts against the edge of the blade G indicating a secure connection Visually inspect the top of the blade arms F to ensure the locking mechanism SS is securely in place Repeat for the remaining blades F G SS RR Assembly Attaching the Light Attaching the light kit pan 1 Remove one screw FF from the bla...

Page 13: ...d in step 1 Make sure all the screws are firmly tightened CAUTION To reduce the risk of electric shock disconnect the electrical supply circuit to the fan before installing the light fixture Installing the LED bulbs and glass shade 3 With power off install the two light bulbs included L by screwing them into the light bulb sockets Remove the washer EE the nut UU the bottom cover XX and the finial ...

Page 14: ...embly Attaching the Accessories Mounting the remote control holder Slide the screw cover plate up to remove it from the wall cradle Position the wall cradle in the desired position and attach it to the wall using the included wall cradle screws Slide the screw cover plate back onto the wall cradle to conceal the screws Screw cover plate NOTE Screw wall anchors are included for extra support The in...

Page 15: ... Forward A downward airflow creates a cooling effect This allows you to set your air conditioner on a higher setting without affecting your comfort Cool weather Reverse An upward airflow moves warm air off of the ceiling This allows you to set your heating unit on a lower setting without affecting your comfort A Warm weather B Cool weather 1 Power ON OFF Press and release the button to turn the fa...

Page 16: ...d blade arm screws are secure Most fan wobble problems are caused when blade levels are unequal Check this level by selecting a point on the ceiling above the tip of one of the blades Measure from a point on the center of each blade to the point on the ceiling Rotate the fan until the next blade is positioned for measurement Repeat for each blade Any measurement deviation should be within 1 8 Run ...

Page 17: ...3460 for further assistance Questions problems missing parts Before returning to the store call Home Depot Customer Service 8 a m 7 p m EST Monday Friday 9 a m 6 p m EST Saturday 1 800 986 3460 HOMEDEPOT COM HOMEDECORATORS Retain this manual for future use ...

Reviews: