5
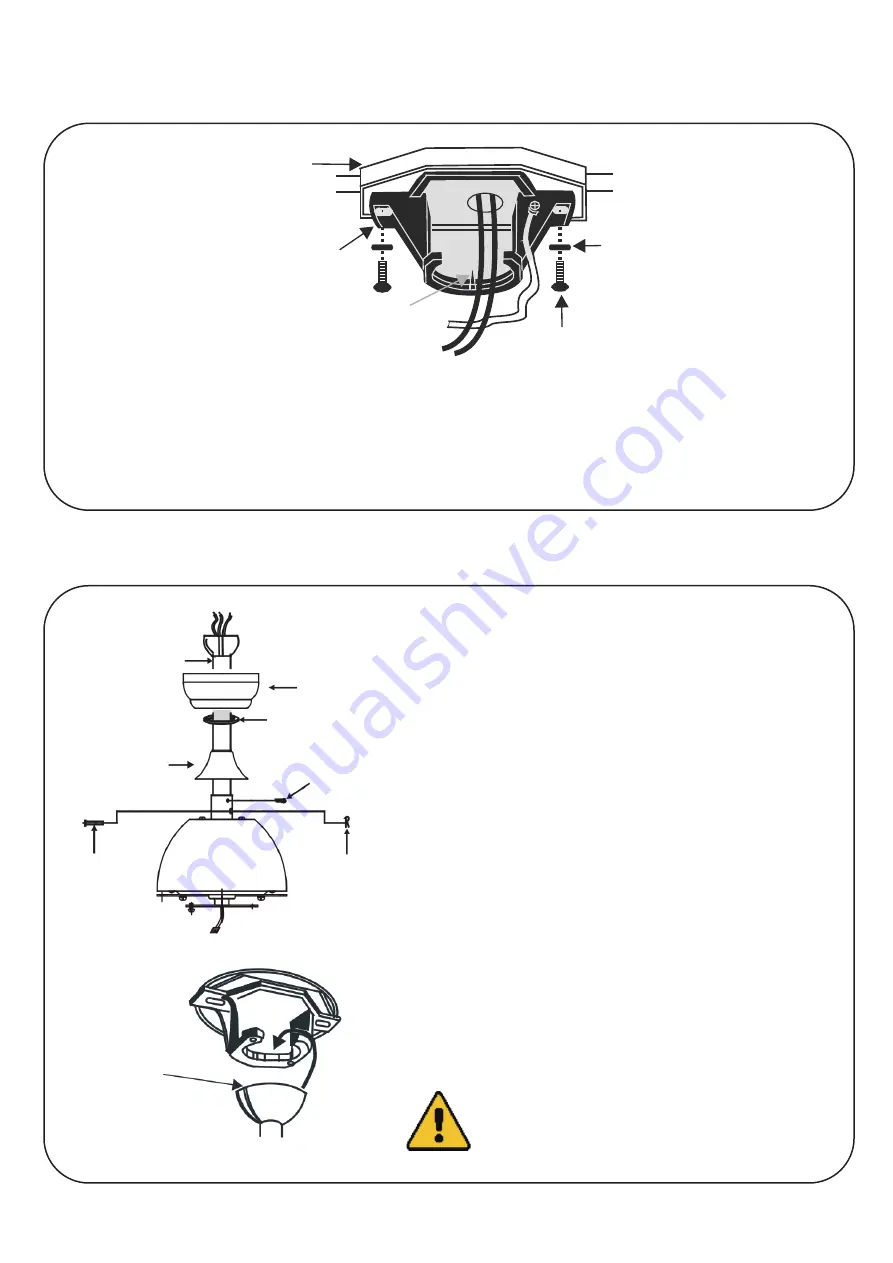
Step 1.
Pass the 120V supply wires through the center hole in the ceiling mounting
bracket.
Step 2.
Secure the ceiling mounting bracket to the outlet box with the provided mounting
screws or bolts and spring or star washers.
INITIAL INSTALLATION
Outlet Box
Ceiling Mounting Bracket
Hook
120V Wires
Mounting Screws/Bolts
Washers
Step 1.
Remove the hitch and lock pins. Loosen
the pre-installed bolts on the top of the
motor assembly.
Step 2.
Slip the canopy, canopy cover, and
coupling cover onto the downrod. Feed
the lead wires from the fan motor through
the downrod. Install the downrod onto the
coupling.
Step 3.
Insert the hitch pin through the downrod
and then re-install the retaining clip.
Retighten the bolts.
Step 4.
Place the downrod ball into the ceiling
mounting bracket socket. Rotate the
entire assembly until the tab has dropped
into its slot and sits firmly. The entire
motor assembly should not rotate (left or
right) when seated properly.
Failure to reattach the hitch pin and/or properly
seat the downrod can cause the fan to fall from
the ceiling during operation.
DO NOT
use the fan before ensuring it is
properly secured and the motor can no
longer rotate.
Bolt
Hitch Pin
Retaining Clip
Downrod
Canopy
Canopy Cover
Canopy Cover
Downrod
DOWNROD MOUNTING


